We have rescheduled this meeting/tour to the Saturday, Nov. 2nd meeting date. Cedric Broussard, who was hosting and presenting the skill topic for the Nov. meeting has graciously agreed to move his skill topic to early next year.
Those folks that paid to ride the bus are now re-booked for the Nov 2nd ride. If you can’t make it, let me know and we will refund your money. For those that were not riding the bus this time but would like to ride on the Nov 2nd date, let me know and we can add you as long as we still have room.
If you have any questions, let me know.
Stay safe!
Jim Landry
]]>Download & Installation
The website to download the program is http://www.delphiforfun.org/Programs/CutList.htm This is what you should see when you go to this website (as of 3/6/2019):
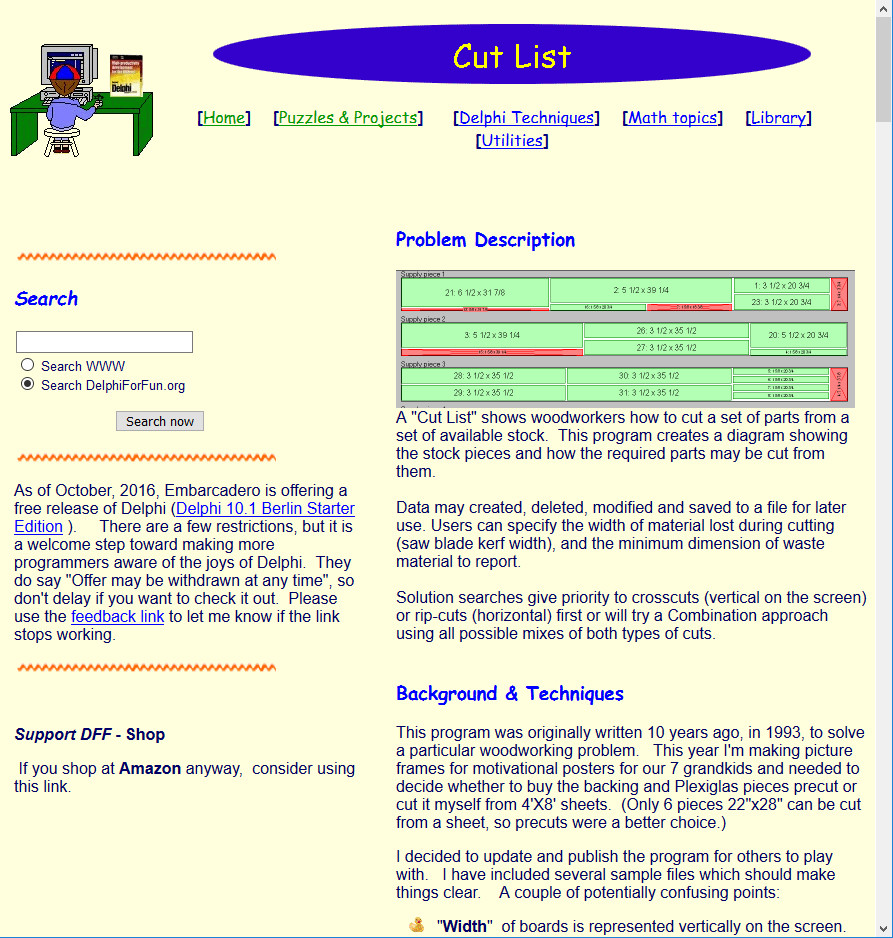
Scroll down the page to almost the bottom and you will see a section called “Running/Exploring the Program.”
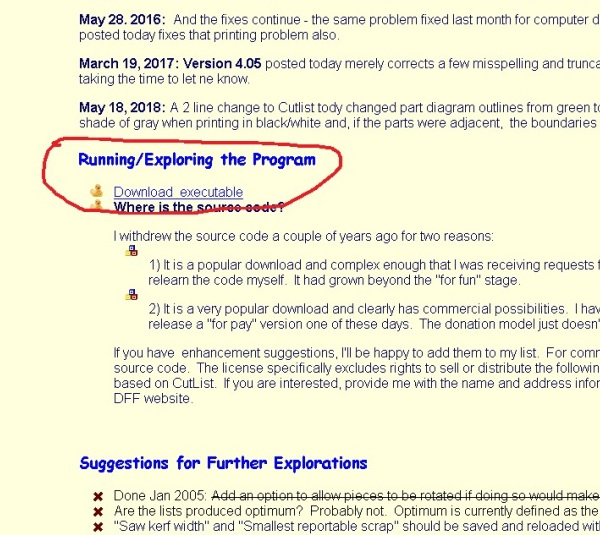
In this section, there will be a link labelled “Download Executable.” Click on this link and select Save File. It will download a zipped file to your computer called Cutlist.zip. You will then need to unzip this file and save it to whatever folder on your computer you would like to keep it.
Using the Program
After you unzip the file, go to the folder on your computer where you saved the files and you should see a file called CUTLIST400.exe. Double click on that file name to start the program.
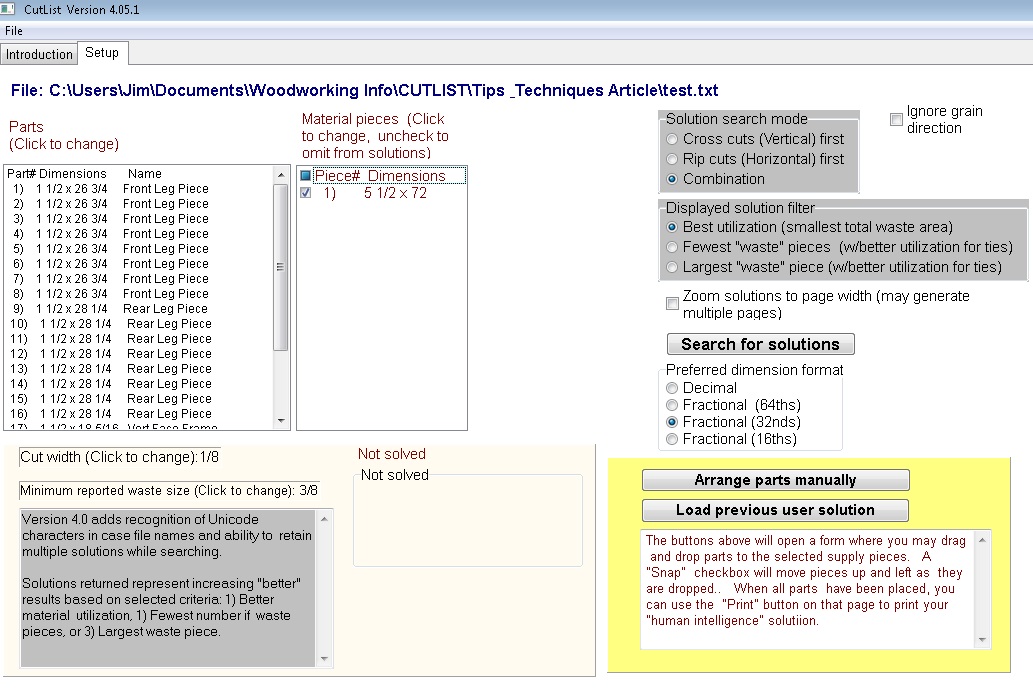
When the program starts you should see a screen like this on the “Setup” tab:
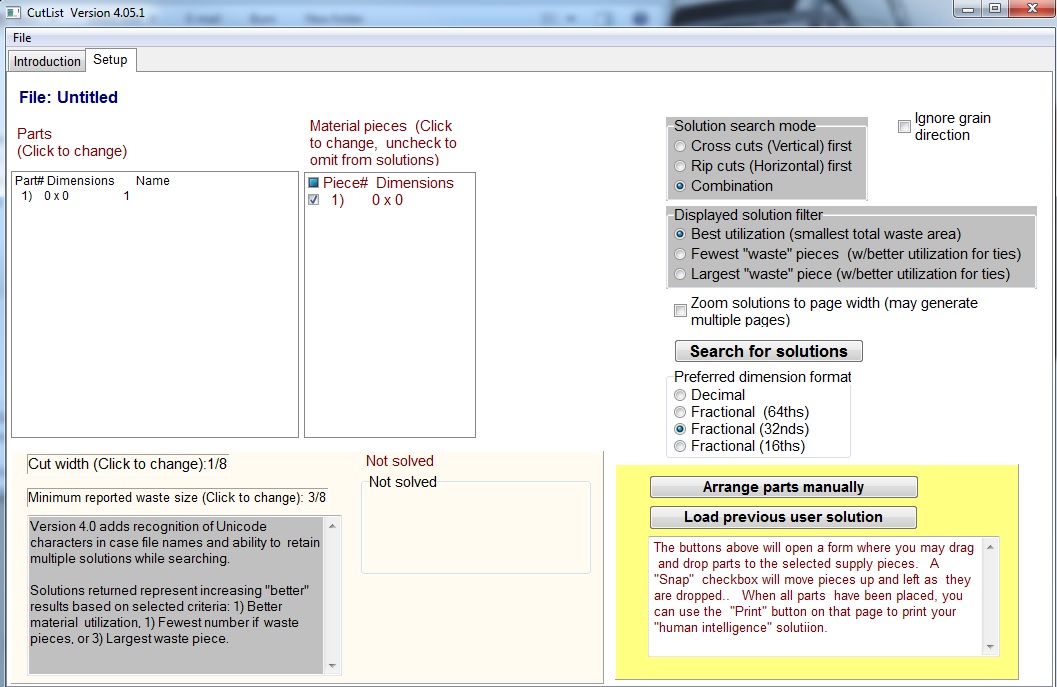
The box on the left is labelled “Parts.” This is where you add the dimensions for all the pieces that you want to cut out. The box on the right of it labelled “Material pieces.” This is where you add the size of the pieces of wood you will be cutting from.
Step 1: Populating Parts & Material Pieces
I will go thru an example of what I did to generate a cut list for the 3/4” hardwood pieces for the 2 HAART desks that we were going to build. To start adding the pieces that you want to cut out, you will first click on Part# 1 to select it and it will be highlighted in blue.
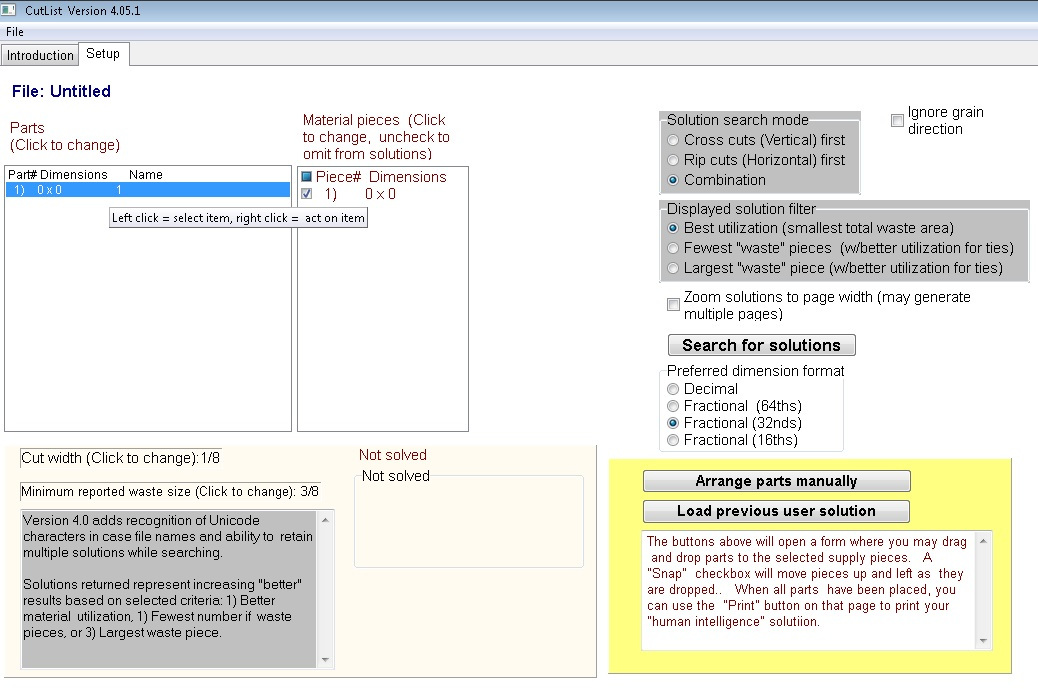
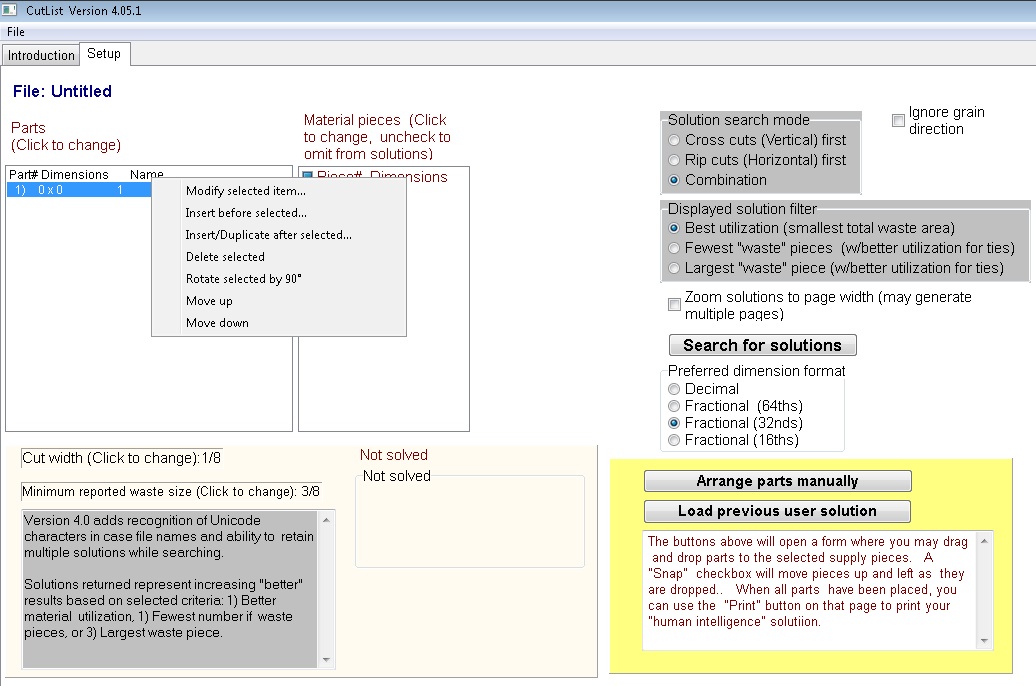
You then right click on that highlighted Part#, and you will get a dialog box of options to choose from:
If you click on “Modify selected item…,” you will then get a dialog box that pops up asking you for the dimensions of that part:
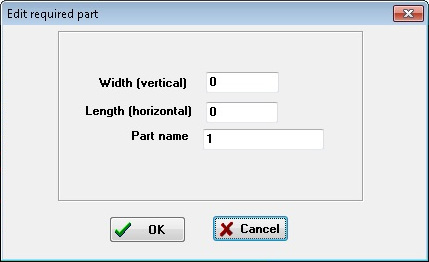
Enter in the Width and Length of the first piece you want to cut out. You can enter the dimensions as either decimal or fractional (e.g., 4.125 or 4 1/8). You can then enter the Part Name. So I added the Horizontal Face Frame piece which is 1-½” wide and 9-½” long.
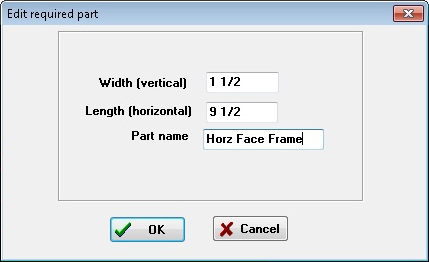
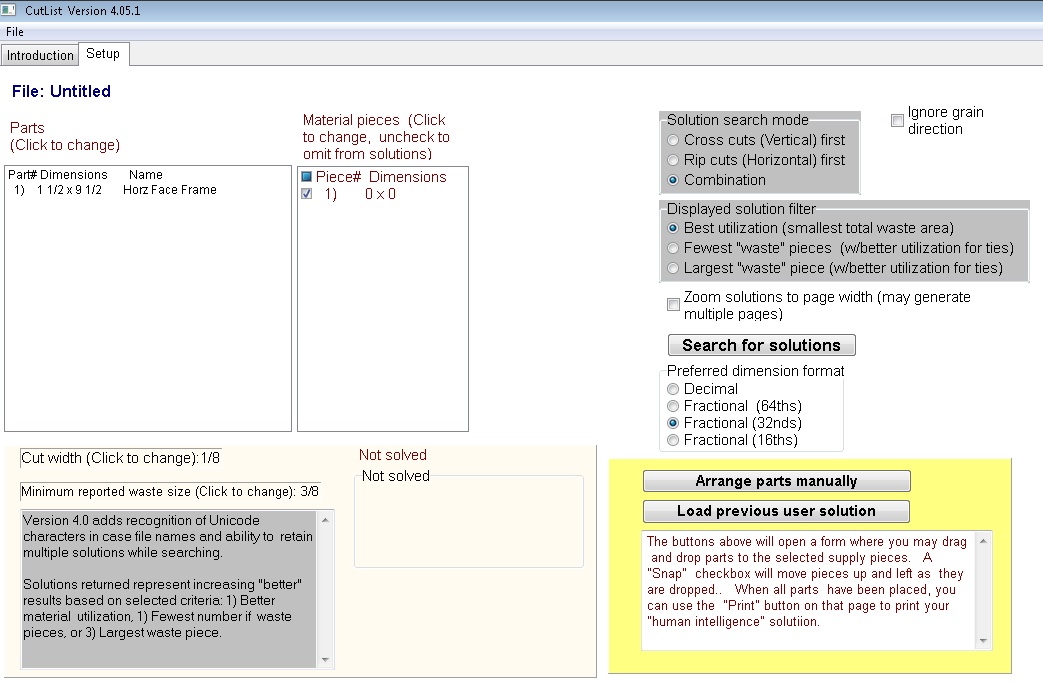
After you click on “OK”, you will see the piece added to the Parts list box.
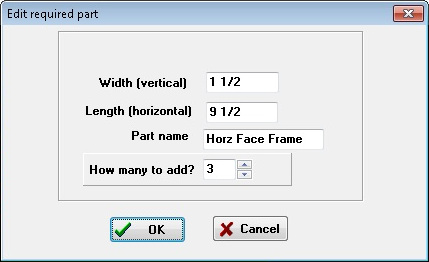
Since we were building 2 desks and there are 2 identical sized Horizontal Face Frame pieces per desk, I needed a total of 4 Horizontal Face Frame pieces. So I selected the Horizontal Face Frame piece by clicking on it and then right clicking on it to bring up the dialog box of options. I then selected the option to “Insert Duplicate after selected”. Since I needed 3 more pieces to make a total of 4 pieces, I entered 3 into the “How many to add?” field.
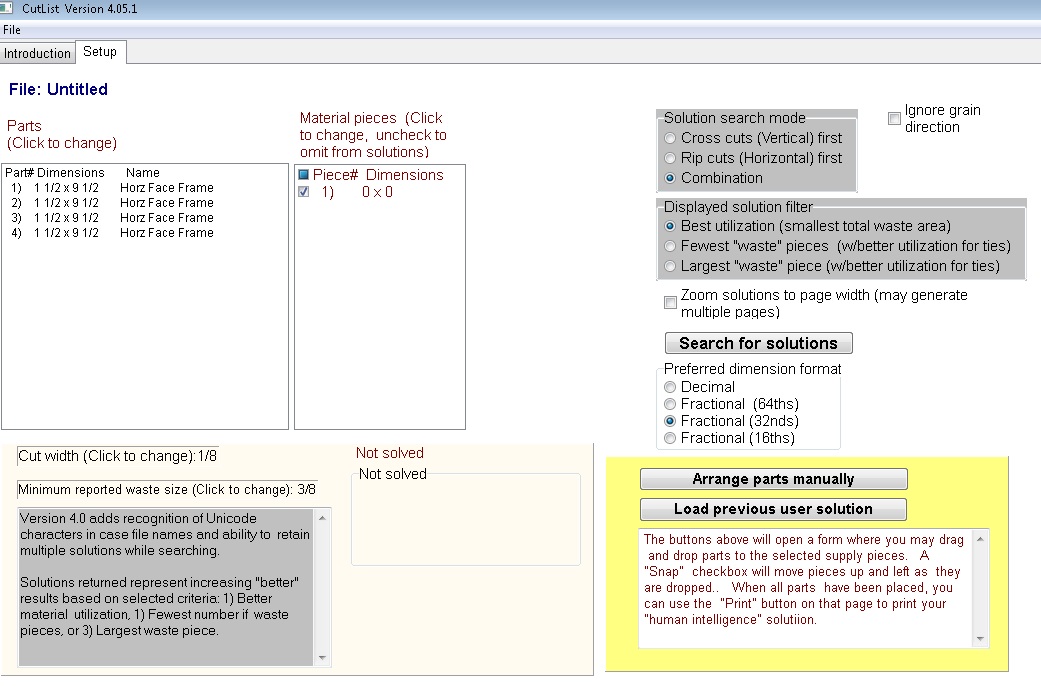
After you click on “OK,” you will see 3 more identical pieces added to the Parts list:
I then continued adding the other pieces. I clicked on Part# 1 to select it, right clicked on it to bring up the option dialog box and then selected “Insert before selected…..” I then added the Vertical Face Frame pieces which are 1-1/2” x 18-5/16” and I need 2 of these pieces since we are making 2 desks.
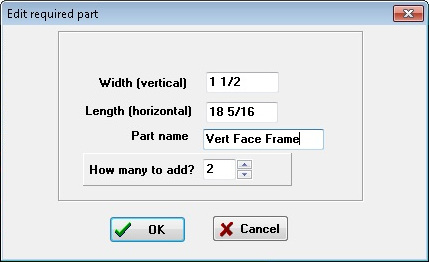
After clicking “OK”, the 2 Vertical Face Frame pieces are added above the Horizontal Face Frame pieces.
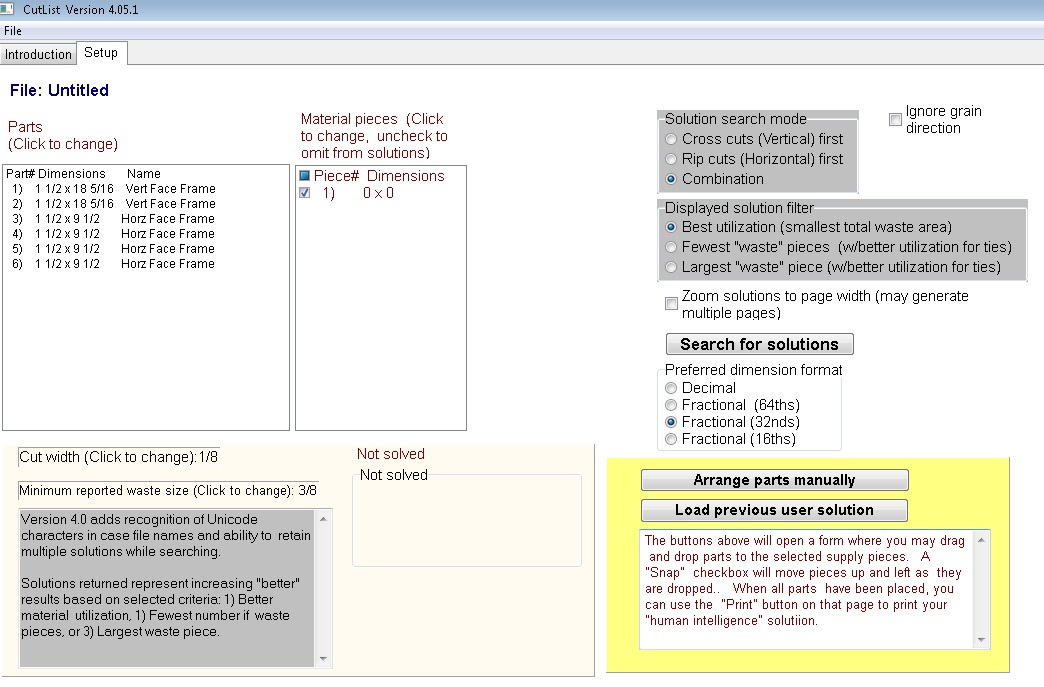
I then continued adding all the different pieces needed like the Rear and Front Leg pieces and ended up with this Parts list:
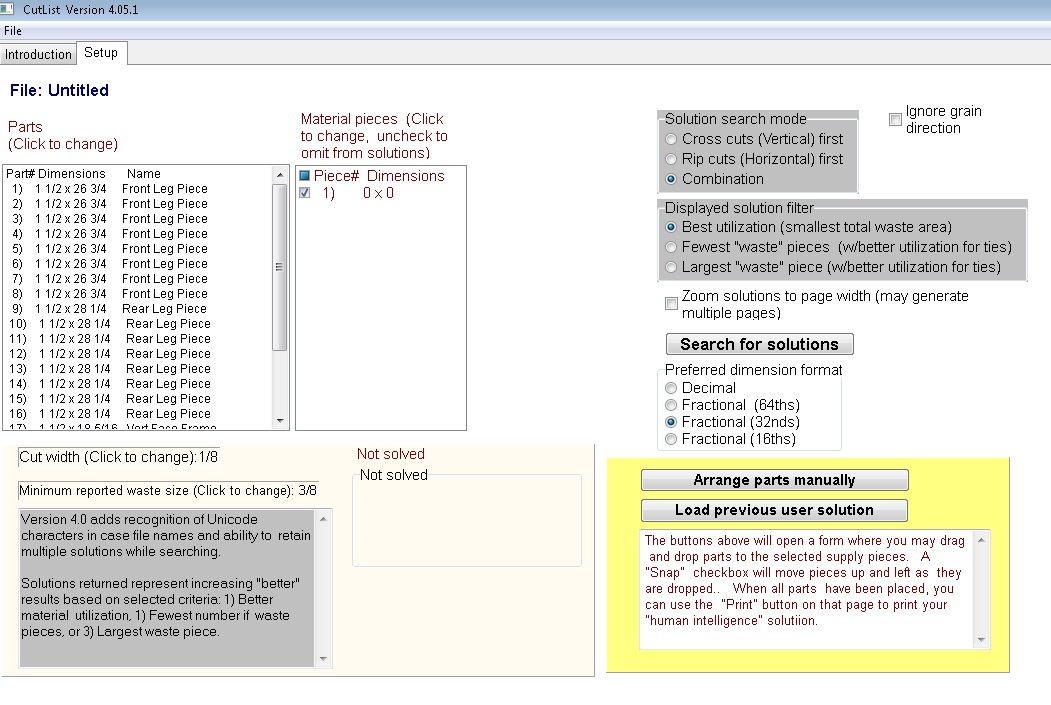
Now you need to enter in the size of the wood pieces you have to cut from. I have 6-foot long 1×6’s that are ¾” thick so following the same process as used on the Parts, I click on the Piece# 1 in the Material pieces box and then right click on it the bring up the option dialog box and select “Modify selected item …”. I then enter the dimensions of the 1×6 to cut from which is 5-½” wide by 72” long.
After clicking on “OK”, the piece shows up in the Material pieces box.
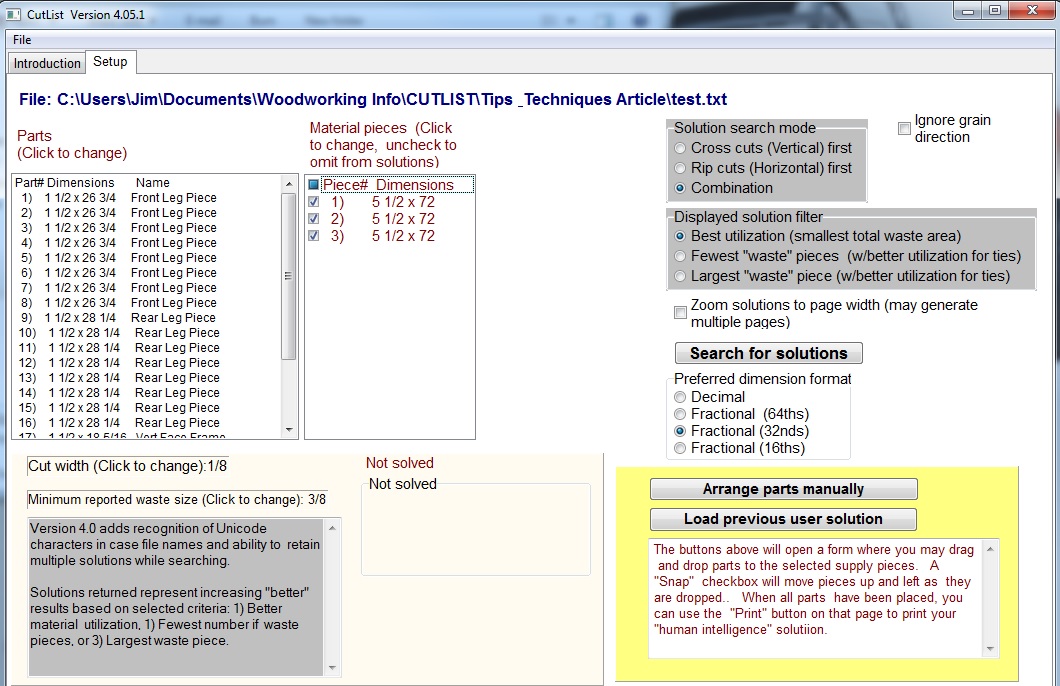
Since I think I need 3 pieces of the 1×6, I then click on the Piece# 1 and right click on it to bring up the option dialog box and select “Insert/Duplicate after selected…” and add 2 other identical pieces. After doing this, the Material piece list should look like this:
Now, the last thing I need to do is tell the program the thickness (kerf size) of the blade that I’m using to cut the wood so it can take that into account. Just below the Parts list box is a box that says “Cut width (click to change).” When you click on it, a dialog box pops up, asking you to enter is the blade thickness. I entered 1/8” as the thickness of my blade:

Generating the Cut Lists
OK, now I’m ready to run the program to generate a cut list. I click on the “Search for solutions” button
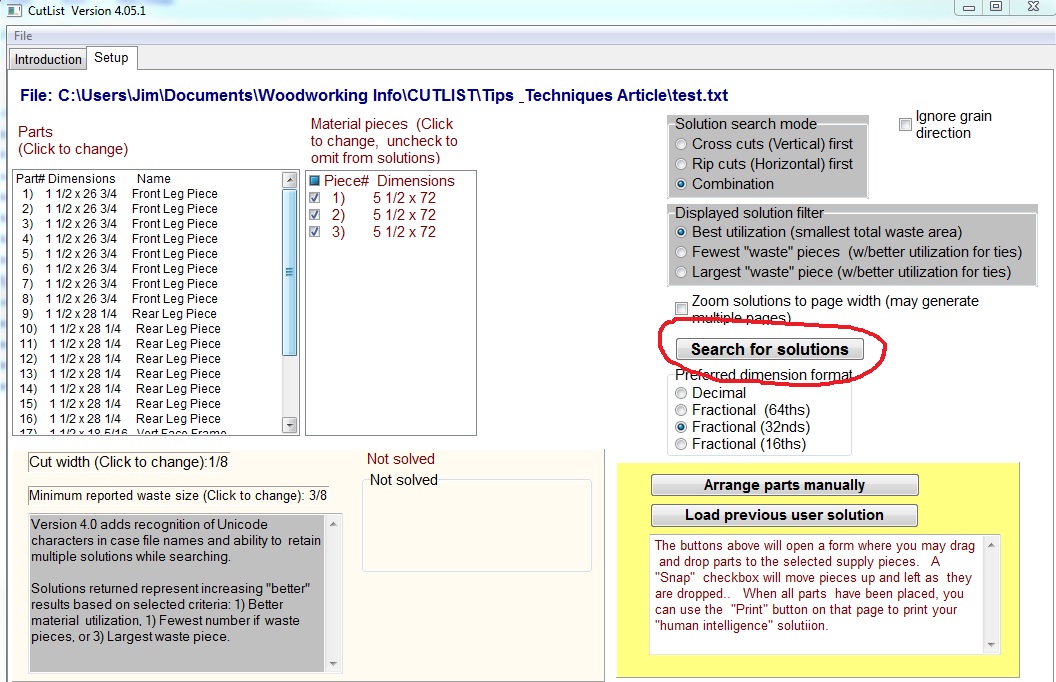
After clicking the button, it will tell you there a many possible ways to cut the parts and you will click the “OK.” You will see a progress box showing the percent progress and below that box you will start seeing the number of Solutions found.
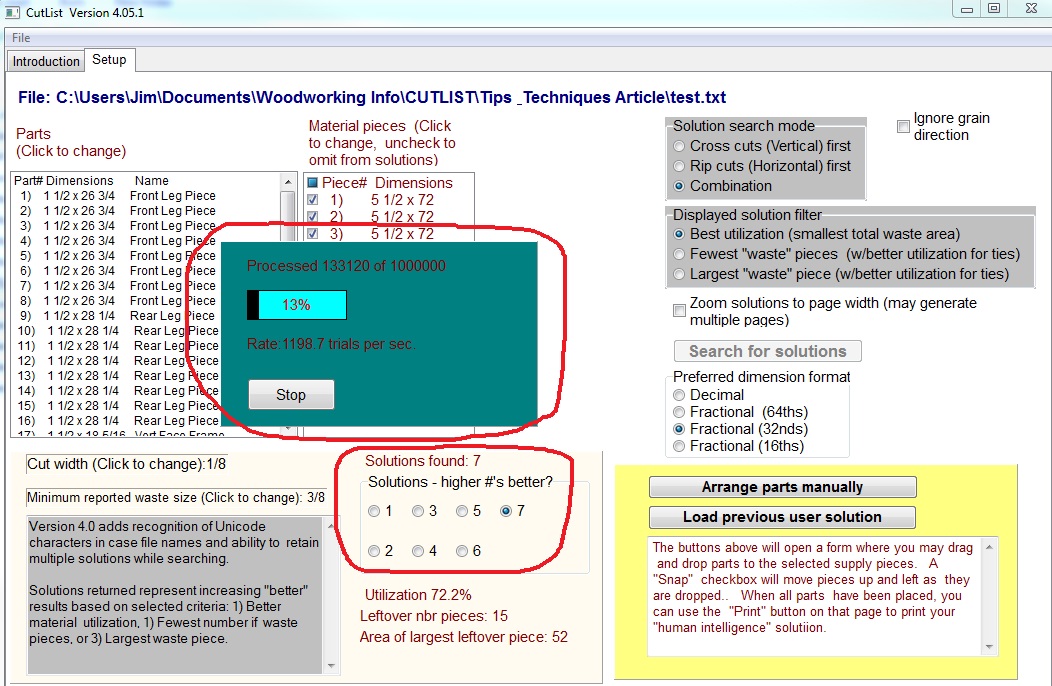
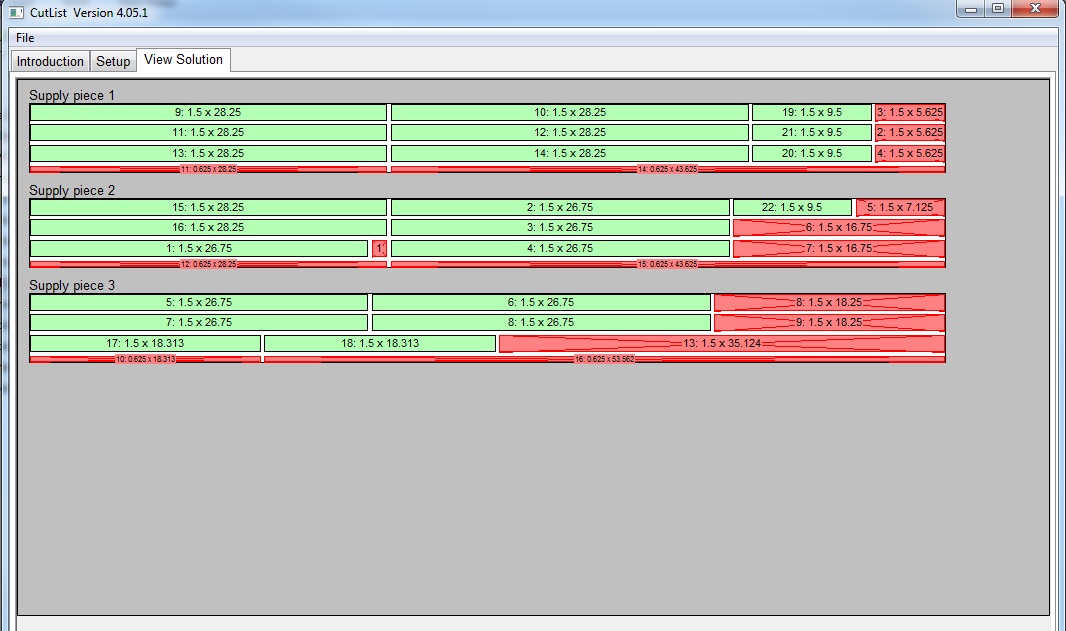
You can wait until it goes thru all the different combinations or you can click on Stop once you see several solutions. Typically the higher numbered solution is the optimum one. If you click on Stop or you click on the “View Solution” Tab, you will see the selected solution.
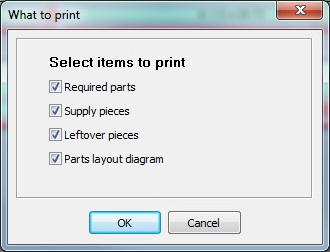
If you click on “File” on the Toolbar at the top, you can select “Print” and it will popup a dialog window with several options. I checked all of them to show you what you will get.
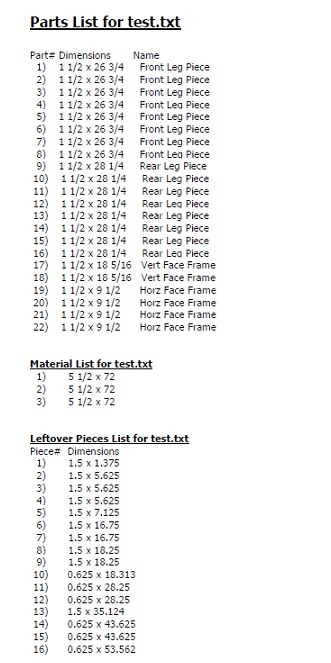
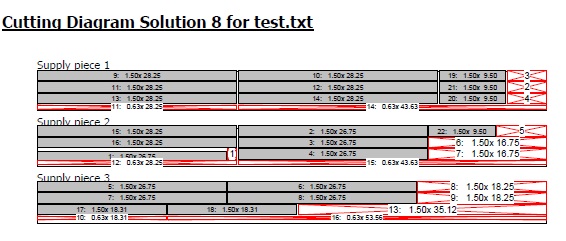
Here is what the printout will look like:
Tips
I guessed that I needed 3 1×6’s and it worked out. If I happened to select only 2 1×6’s, it would not have found a solution. If I would have selected more than I needed, like 4 1×6’x, the solutions would show only 3 pieces of wood being used.
Also, if grain direction is important, you will need to make sure you enter the dimensions of the parts correctly to get the grain running in the right direction. For example, when I enter in the hardwood as my Material pieces, I inputted it as 5-1/2 ” wide (vertical) and 72” length (horizontal). Therefore, the grain of the board is running in the length or horizontal direction. Therefore, when you add parts, the grain will always be running in whatever dimension you enter into the length/horizontal input box.
You can save the cut list by clicking on “File” on the Toolbar at the top and selecting “Save” or “Save As” and then the next time you start the program you can bring up the saved cut list by using the “Open” command. I tried to show the basic method to use this program. There are several other options in this program I haven’t used but you can experiment with them to see if they are helpful. Good luck!
]]>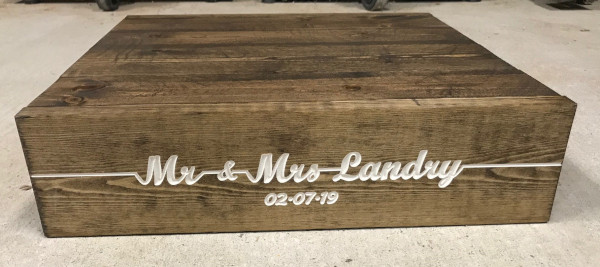
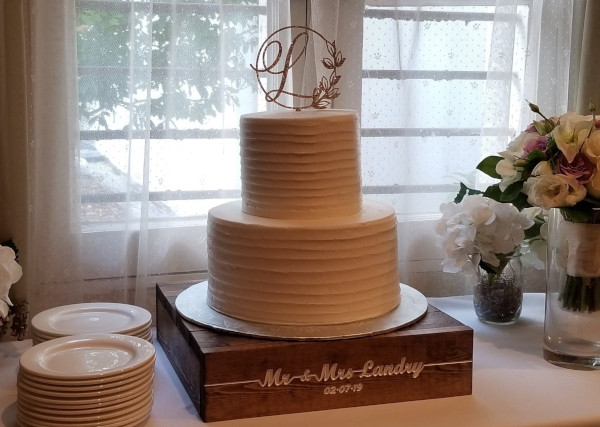
This cake stand was for my son’s wedding, made from 1×4 pine. I used the CNC to engrave the name and date and stained it dark walnut. The design was taken from Pinterest.

Baton Rouge Woodworkers Club is organizing a bus ride to St. Joseph Abbey, St. Benedict, LA, where we are holding our July 2019 Monthly Meeting (7/13). The meeting will feature the tour of St. Joseph Abbey’s woodworking facility, where they manufacture caskets. See down below for more information about the abbey.
During February Monthly Meeting, I passed around the sign-up sheet for the bus ride to the abbey. Twenty-seven (27) of us signed up to ride. Of those, 6 members signed up their spouses to ride along. This put us over 30 riders to go forth with the plan.
Bus Ride Information

- Cost: $20 per person
- Maximum Passengers: 50
- Pick-up/Drop-off Point: Juban Crossing shopping mall in Denham Spring
- Departure Time: 7:30 AM
- Return Time: 1:00 PM
How to Reserve Your Seat
Your seat is reserved when you place your payments. Our Treasurer, [brwc_user id=”105″], will collect the payments (cash or check) during the monthly meetings. The deadline for payment no later than the June 1st Monthly Meeting.
The seats are reserved for those members (and their spouses) who signed up for the bus ride during the Feb. Meeting only until all the seats are is filled.
Cancellation
If you cannot ride the bus for any reason, you may cancel your reservation at any time before the June 1st Monthly Meeting to receive full refund. The club owns the right to cancel the bus ride altogether if there aren’t enough paid riders by June 2, 2019.
Additional Notes:
- While we initially collect $20 per person, the price may come down if we have enough riders. If this happens, we will reimburse you the difference.
- Members’ family and friends are welcome to join as long as there is room in the bus. Please understand that the members get the first preference, and we may have to ask non-members to be off once the bus is full.
- Bus will depart St. Joseph Abbey by 11:30, giving us about 30 minutes after the meeting to walk the grounds/gift shop
- You are welcome to drive yourself to the meeting; the abbey is located just north of Covington, LA.
- (Optional) Regardless of riding the bus or not, we will have a lunch social at Walk-On’s Restaurant at Juban Crossing upon return from the trip if there are enough interests.
About St. Joseph Abbey & Their Casket Making
Main Website: https://www.saintjosephabbey.com
Woodworks Website: https://www.saintjosephabbey.com/about-woodworks
Saint Joseph Abbey was founded in 1889, and it is run by Benedictine monks. Their main focus is the education and formation of future priests.
Monks revived the ancient practice of casket making in 2007 to support their educational and healthcare expenses. However, Louisiana State Board of Embalmers and Funeral Directors moved to shut them down because it was a crime in Louisiana for anyone but a government licensed funeral director to sell caskets to the public. In 2013, the 5th U.S. Circuit Court of Appeals ruled unanimously to strike down the legislation, which makes it a crime. The case was taken to the U.S. Supreme Court, and eventually The Supreme Court rejected the board’s petition for review. Henceforth, we can purchase the caskets from St. Joseph Abbey under the name Saint Joseph Woodworks.
]]>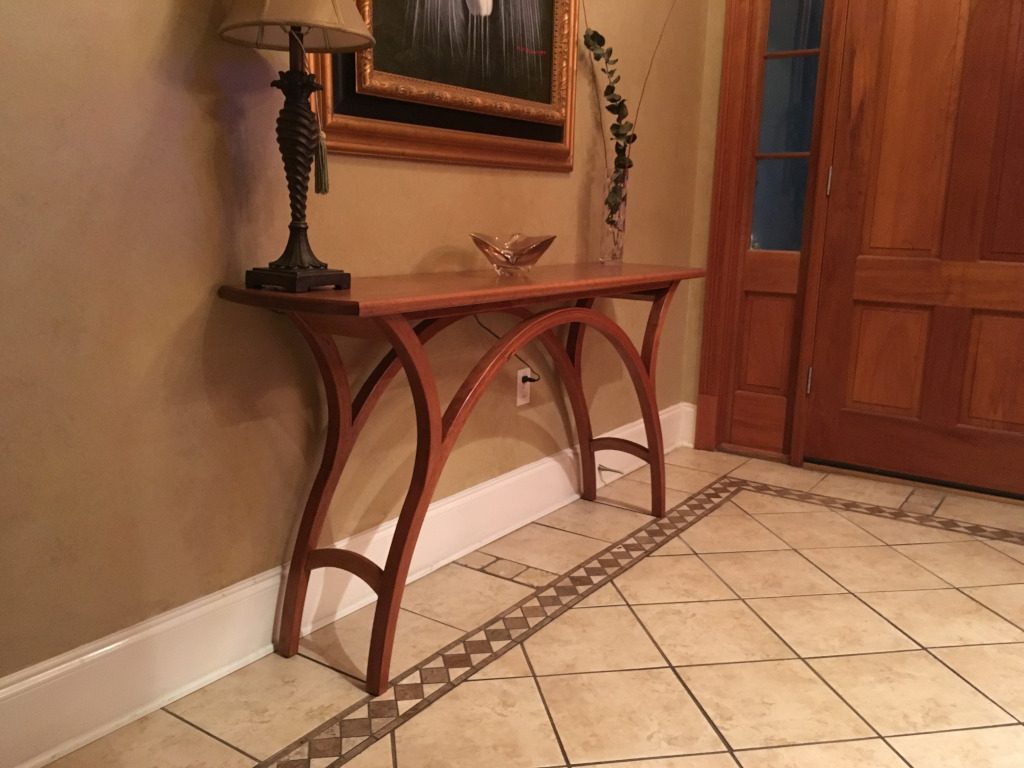
I completed the bent lamination table that I presented in December 2018 meeting. It now sits in the main hallway of my house.
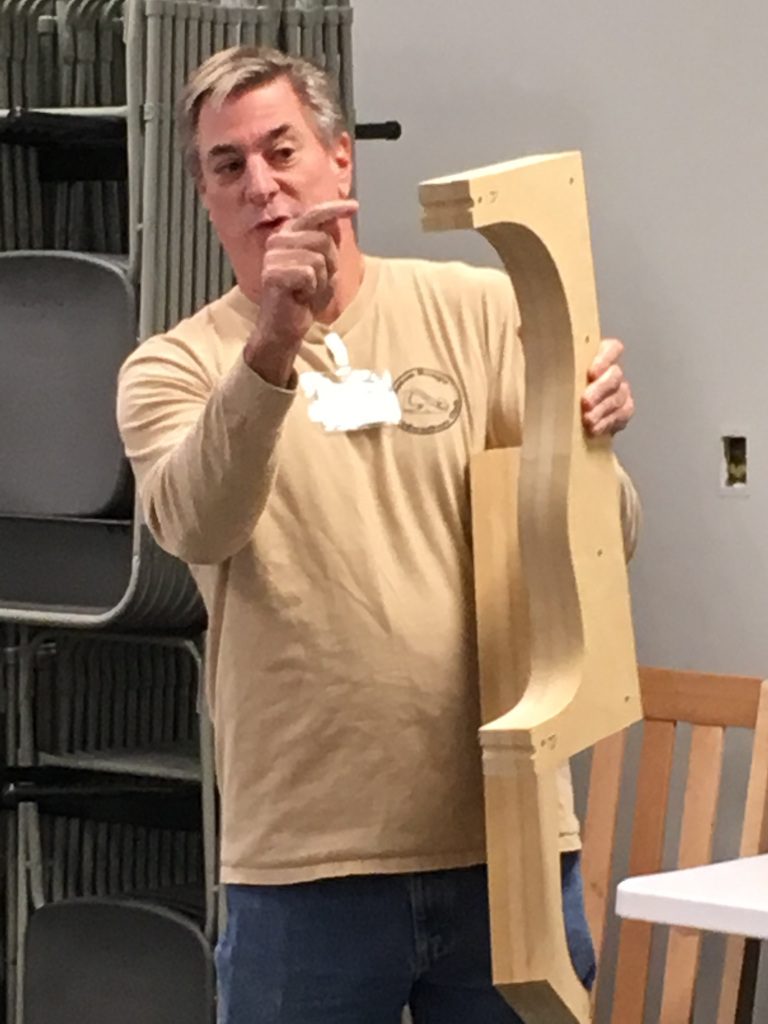
My next build is a guitar with my son. We have completed the first step: Making of the MDF fixture.
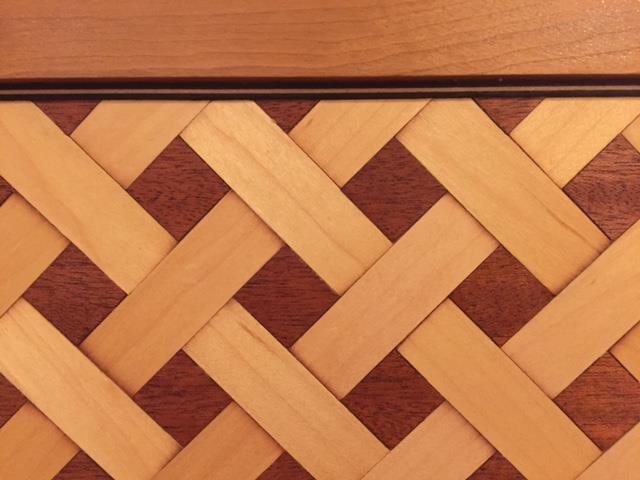
I recently built a blanket chest and wanted to create a unique veneer inlay on the inside of the lid. My wife and I used the Google Image search on the internet to look at photos of various inlay patterns. The one we found that we really liked was a lattice pattern as shown below on a serving tray.
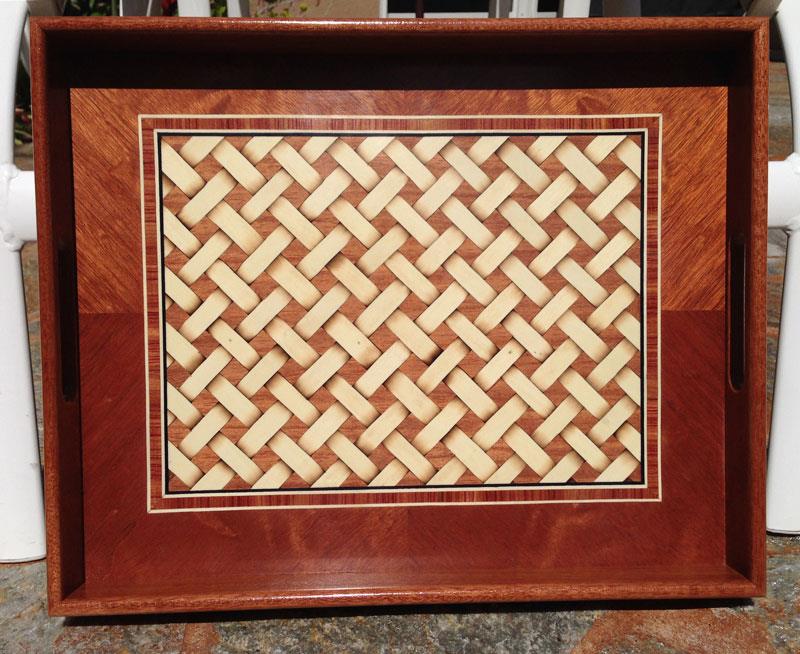
I decided to use maple and mahogany veneers to make this pattern. I purchased these veneers online from Rockler Woodworking and Hardware. I bought 2 of the 3 sq. ft. Plain Maple Veneer packs (Item # 44504) and 1 of the 3 sq. ft. Mahogany packs (Item #44848). I also bought a 3/16” wide Black Maple Striped Inlay banding (Item # 44968) from Rockler to use around the perimeter of the inlay pattern to offset it from the cherry lid.
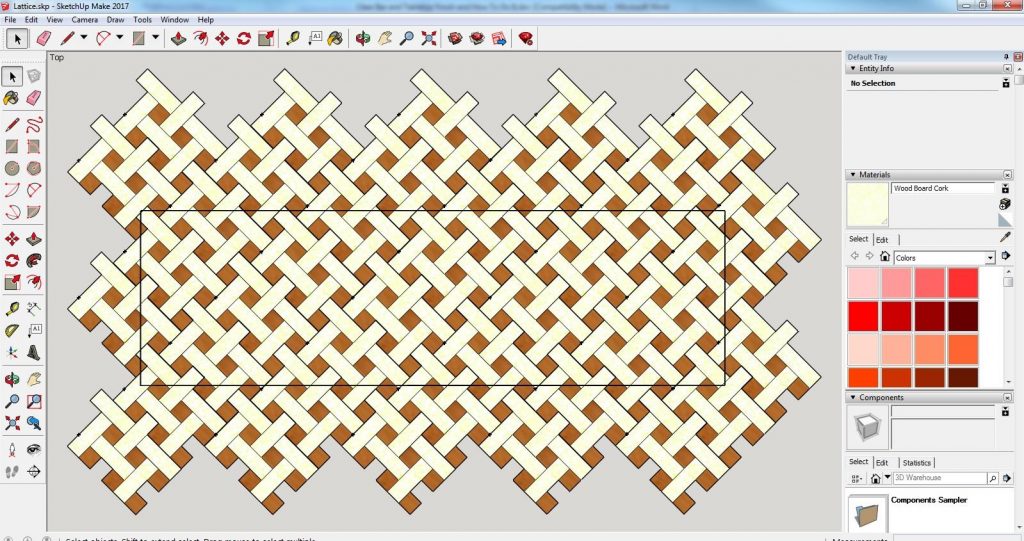
The first step was for me to figure the sizes of the pieces that would look good within the dimensions of the lid. The recessed section of the lid where I wanted to put the inlay was 35″ wide by 9-3/4″ tall. I used the free drawing program SketchUp to try different sizes to see which one would look best. I decided to go with the rectangular maple pieces being 1” wide by 3” long and the square mahogany pieces being 1” wide by 1” long. Here is what it looked like on SketchUp:
I used an X-acto knife, ruler and straight edge to start cutting out all the pieces. I decided to cut the maple pieces with the grain parallel with the long edge and cut the mahogany pieces at 45° to the grain. It ended up being 88 full size pieces of maple and 87 full size pieces of mahogany. Later, I would cut all the partial size pieces to fit around the perimeter. It took quite a while to cut all these pieces, but at least the NFL playoff games were on that weekend so it made time go by pretty quick.
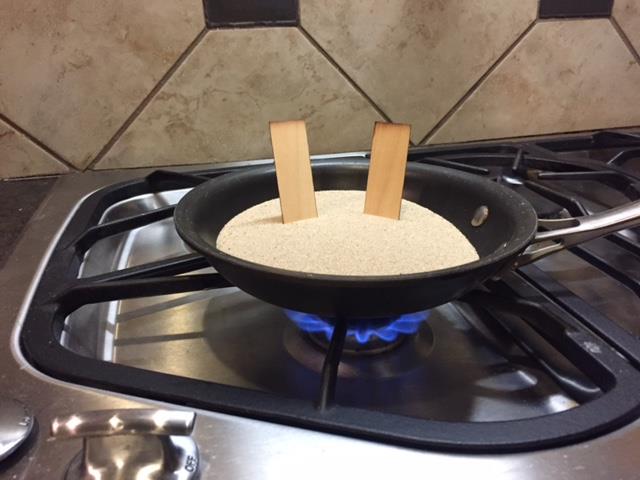
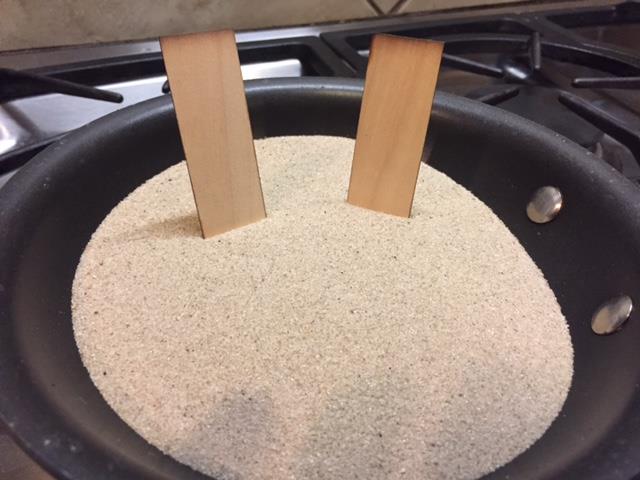
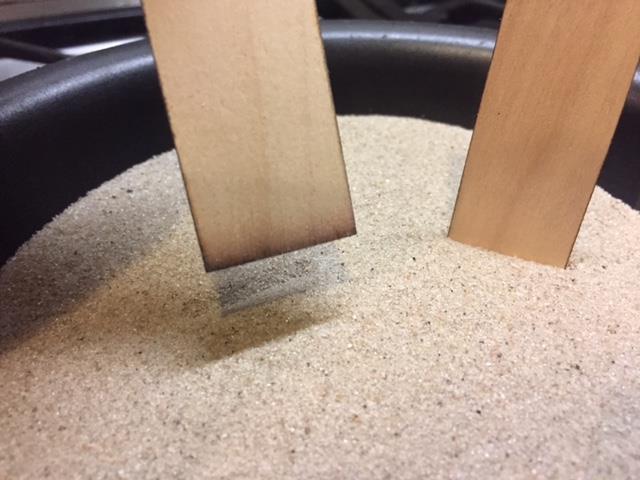
If you notice on the internet photo of the lattice pattern that the light colored pieces have a shading effect on the ends to give the appearance that it is woven. This is done thru a process called Sand Shading. Sand Shading is the art of applying heat to veneer in order to achieve shadow and depth. This process slightly scorches the edges of the veneer pieces to give a shading effect. To do this, I used a frying pan and put about 1 to 1-1/2 inches of sand into it. I heated it on medium for about 10 – 15 minutes stirring it periodically. Once the sand got hot, I stood the maple pieces into the sand, short ends down. I left it in the sand for about 10 seconds to slightly burn the ends. I then flipped the piece over to shade the opposite ends. Here are some pictures of the process:
To glue the banding and veneer pieces to the lid, I used Titebond Molding and Trim Wood Glue. I chose it because the glue has a strong initial tack, a fast set and it dries clear.
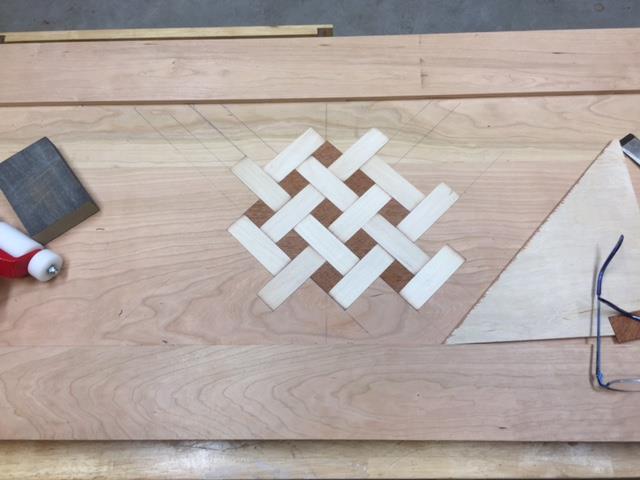
I decided the best way to do this was to start in the middle and work my way out piece by piece to the edges. I located the center of the area I was veneering and drew 45 degree lines as a guide. I started with gluing a square mahogany piece in the center and then worked out from there piece by piece. Here’s a picture after setting a few of the first pieces:
I would apply a thin layer of the glue evenly across the entire back of each piece. When I laid the piece down on the lid, I would use a J roller to press it down flat. Most the time it would stay down but sometimes a corner might start curling up and I would use the J roller again to press it down. I kept gluing piece by piece until I got close to the edges. I then glued in the black maple striped inlay banding around the perimeter of the lid opening. Finally, I finished it by cutting all the maple and mahogany partial pieces to fit on the perimeter.
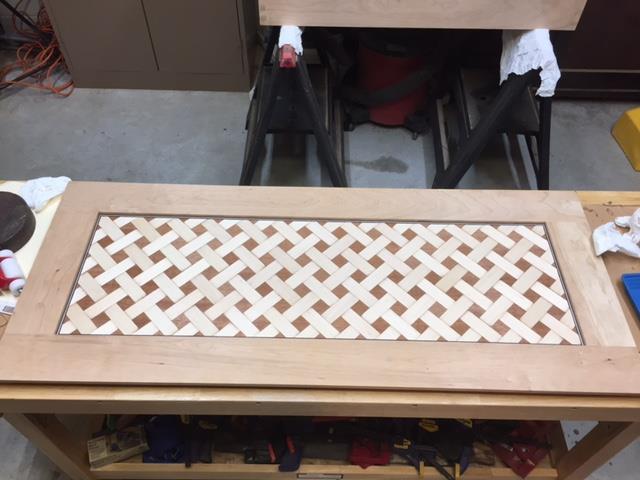
Here’s a picture of the completed lid:
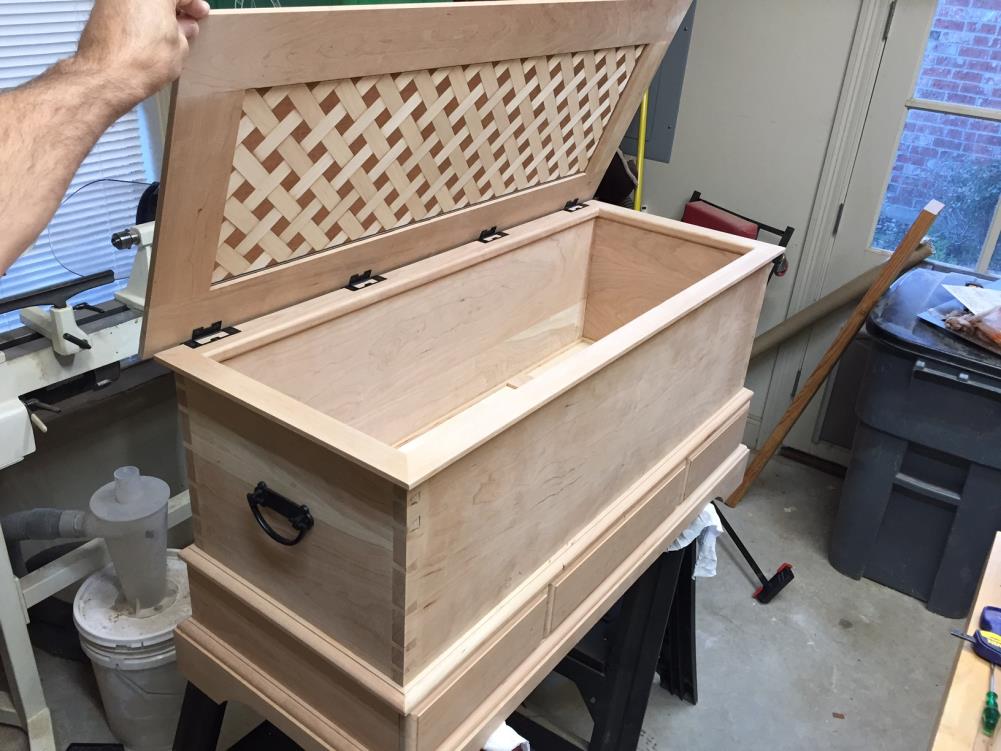
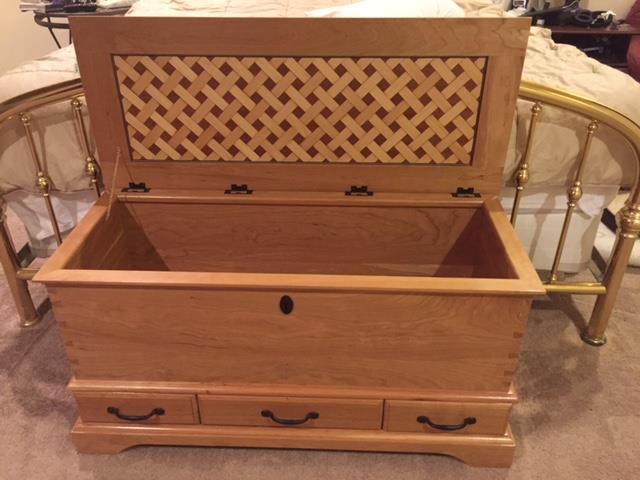
I finished the blanket chest by applying 9 wipe-on coats of Waterlox Original Sealer and Finish to the entire chest and over the veneered inlay. Here’s is what the completed blanket chest looked like before and after finishing:
Before Finishing:
After Finishing:
Close Up of the Veneered Inlay with black maple striped banding:
