Free Cut List Computer Program
When I was reviewing the project to build the desks for HAART, I wanted to make sure we had enough wood, and we also optimized our cutting to minimize the waste wood. I found a free Cut List program that I saw recommended on a few woodworking forums and decided to give it a try. It seems to work pretty good and thought I would share with you on where you can download it and how to use it. Please note that this software is only for Windows only.
Download & Installation
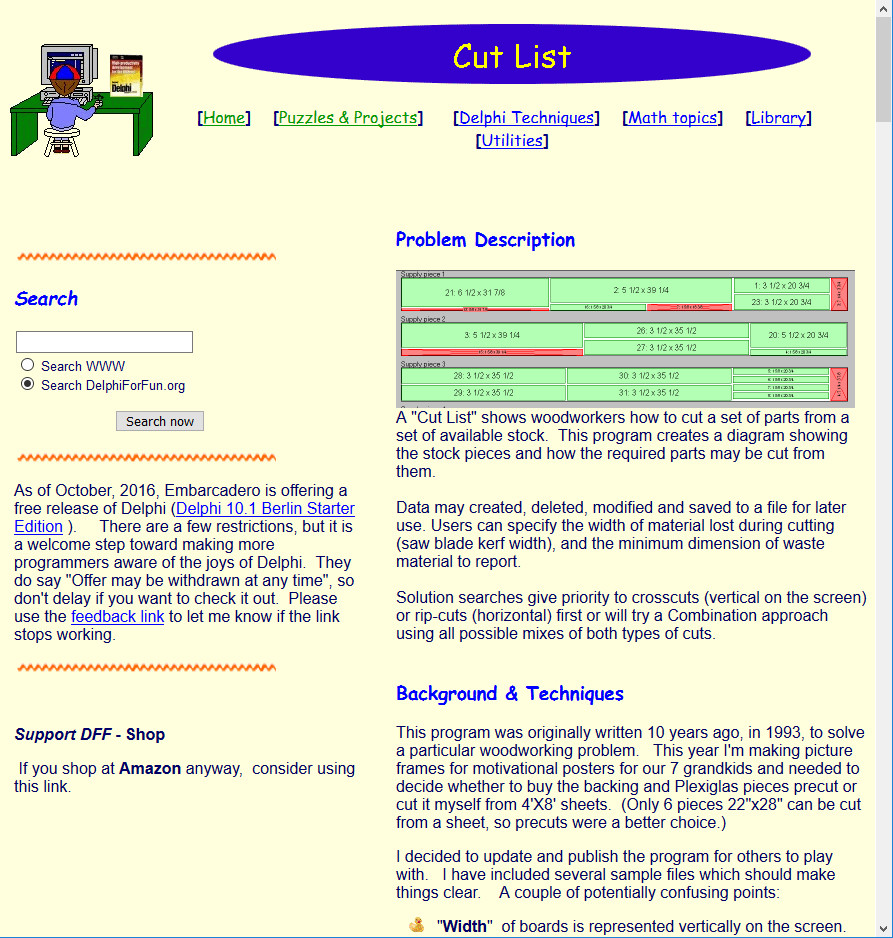
The website to download the program is http://www.delphiforfun.org.ws034.alentus.com/programs/cutlist.htm This is what you should see when you go to this website (as of 3/6/2019):
Scroll down the page to almost the bottom and you will see a section called “Running/Exploring the Program.”
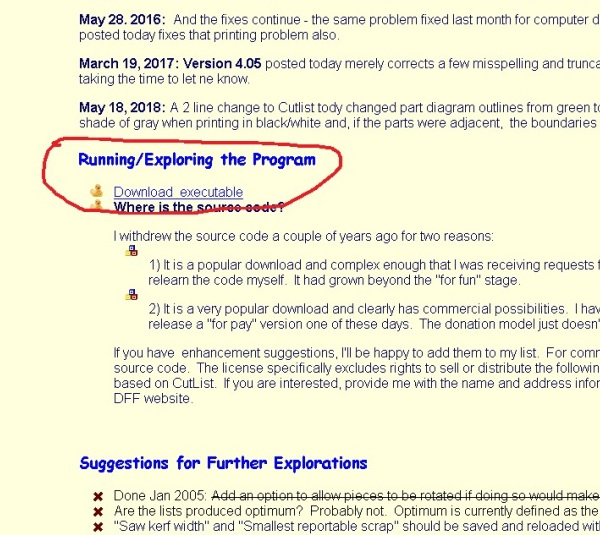
In this section, there will be a link labelled “Download Executable.” Click on this link and select Save File. It will download a zipped file to your computer called Cutlist.zip. You will then need to unzip this file and save it to whatever folder on your computer you would like to keep it.
Using the Program
After you unzip the file, go to the folder on your computer where you saved the files and you should see a file called CUTLIST400.exe. Double click on that file name to start the program.
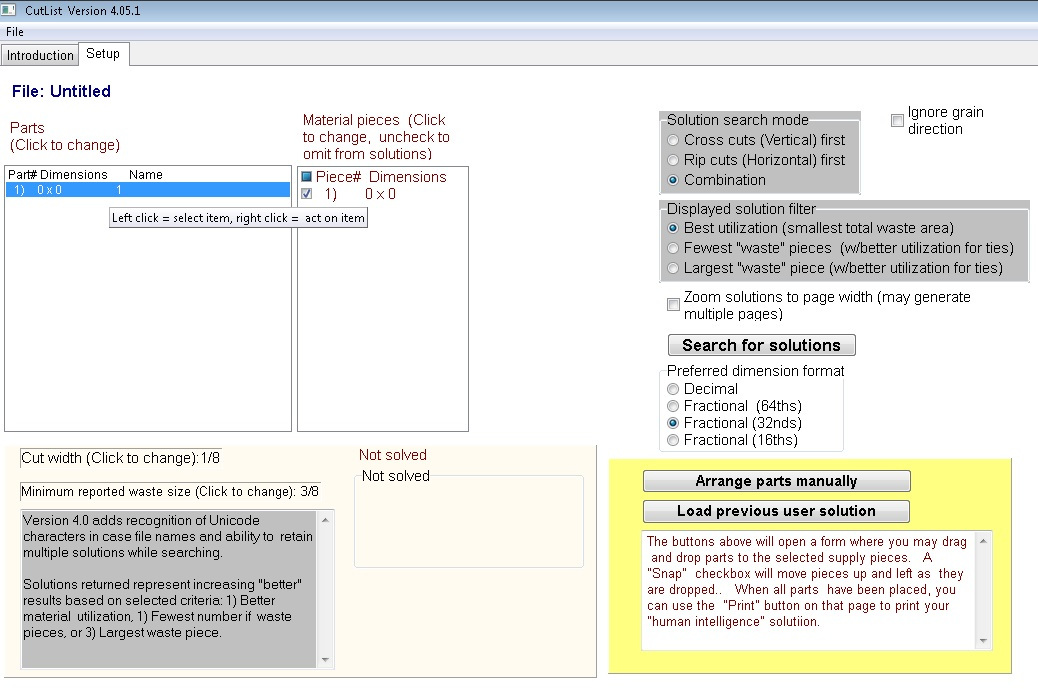
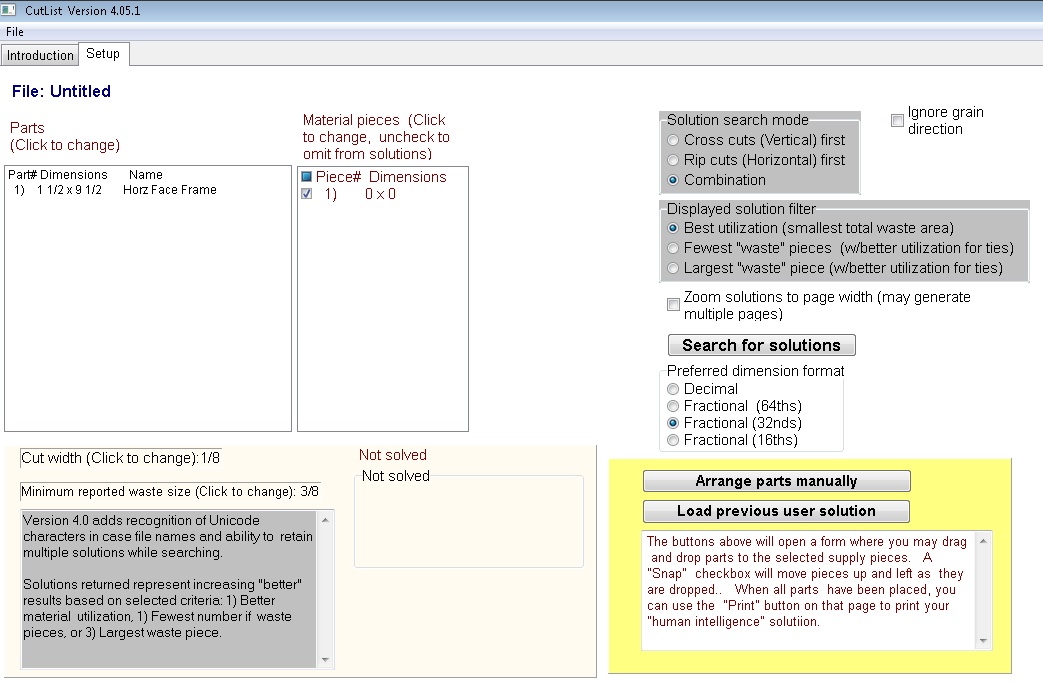
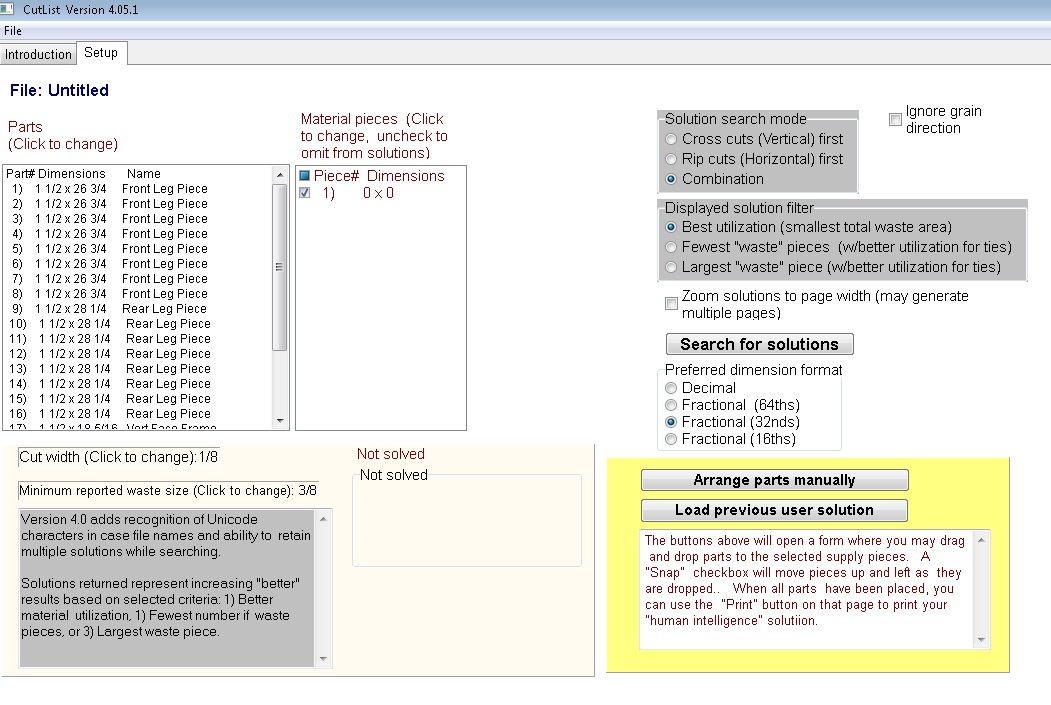
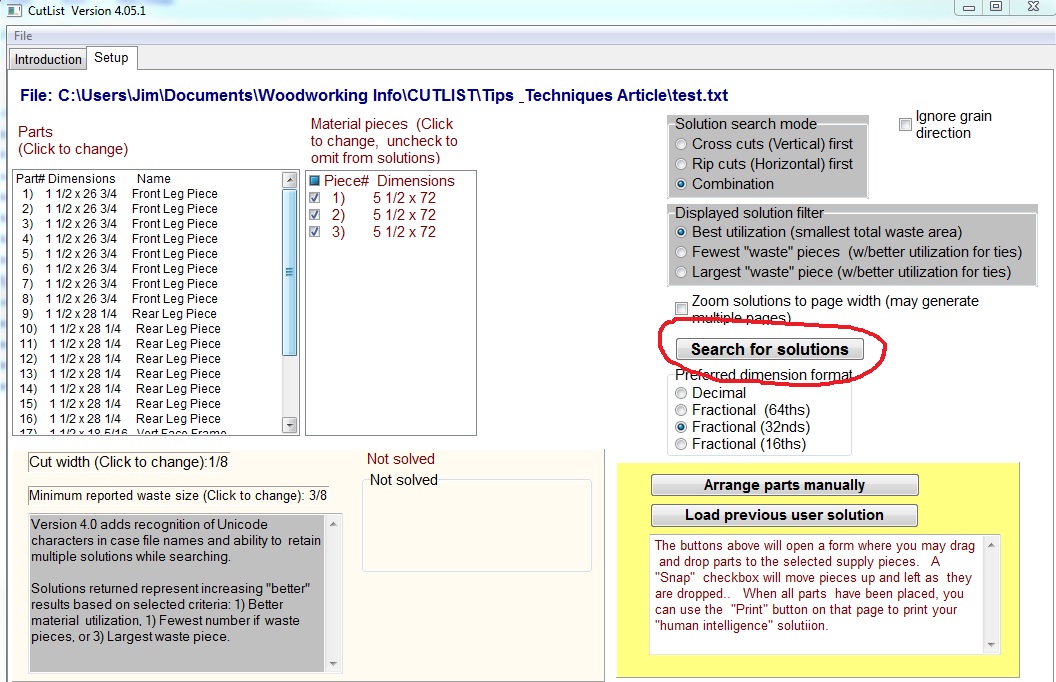
When the program starts you should see a screen like this on the “Setup” tab:
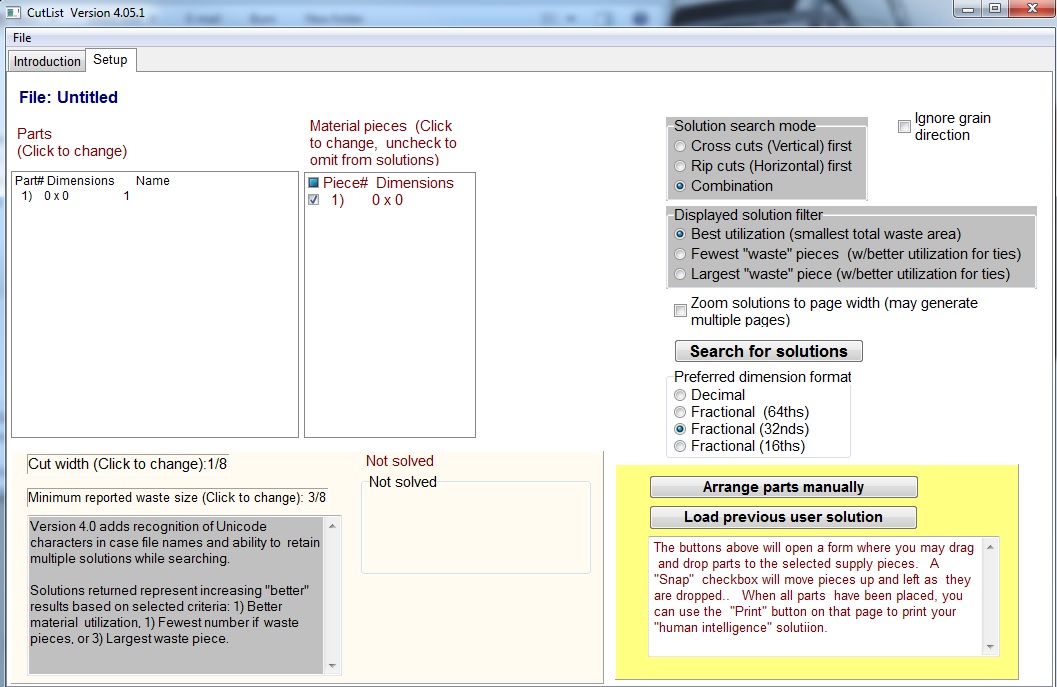
The box on the left is labelled “Parts.” This is where you add the dimensions for all the pieces that you want to cut out. The box on the right of it labelled “Material pieces.” This is where you add the size of the pieces of wood you will be cutting from.
Step 1: Populating Parts & Material Pieces
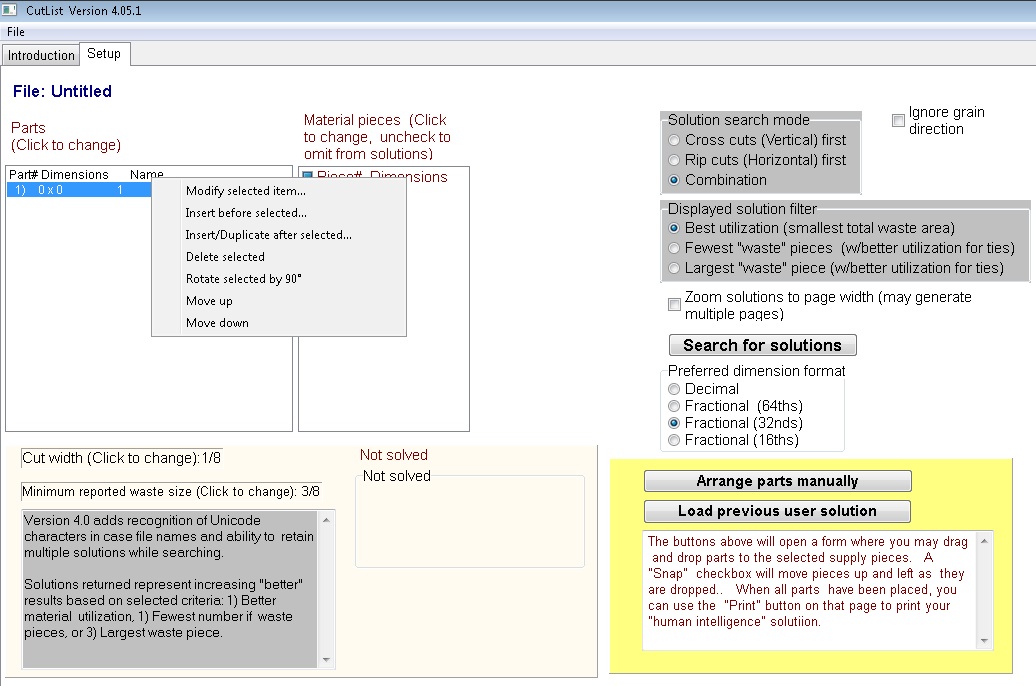
I will go thru an example of what I did to generate a cut list for the 3/4” hardwood pieces for the 2 HAART desks that we were going to build. To start adding the pieces that you want to cut out, you will first click on Part# 1 to select it and it will be highlighted in blue.
You then right click on that highlighted Part#, and you will get a dialog box of options to choose from:
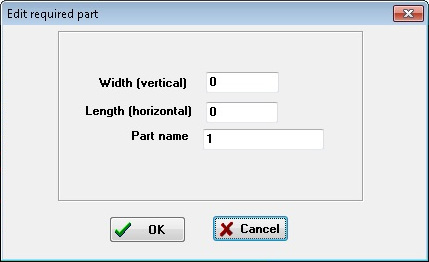
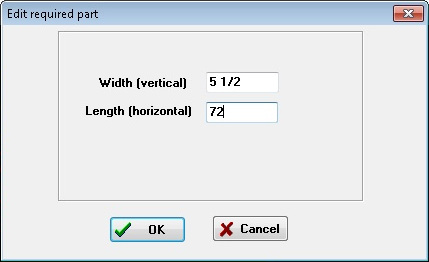
If you click on “Modify selected item…,” you will then get a dialog box that pops up asking you for the dimensions of that part:
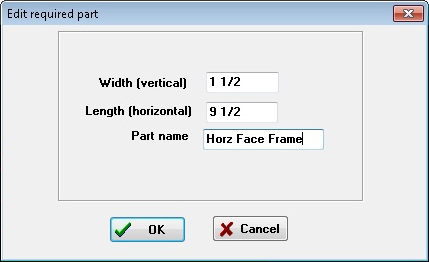
Enter in the Width and Length of the first piece you want to cut out. You can enter the dimensions as either decimal or fractional (e.g., 4.125 or 4 1/8). You can then enter the Part Name. So I added the Horizontal Face Frame piece which is 1-½” wide and 9-½” long.
After you click on “OK”, you will see the piece added to the Parts list box.
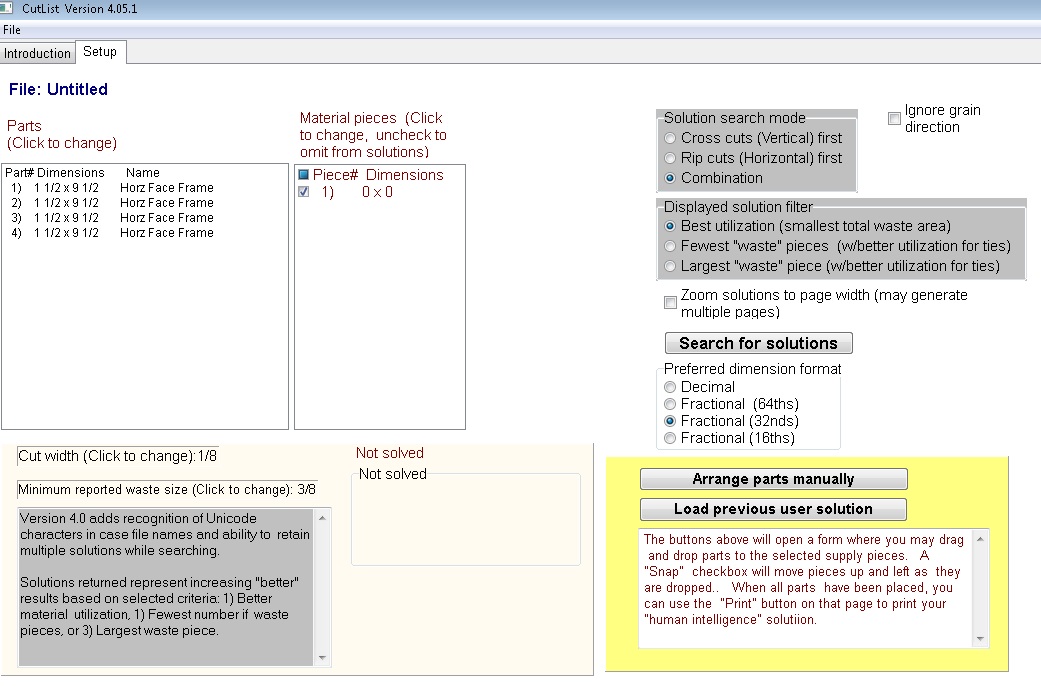
Since we were building 2 desks and there are 2 identical sized Horizontal Face Frame pieces per desk, I needed a total of 4 Horizontal Face Frame pieces. So I selected the Horizontal Face Frame piece by clicking on it and then right clicking on it to bring up the dialog box of options. I then selected the option to “Insert Duplicate after selected”. Since I needed 3 more pieces to make a total of 4 pieces, I entered 3 into the “How many to add?” field.

After you click on “OK,” you will see 3 more identical pieces added to the Parts list:
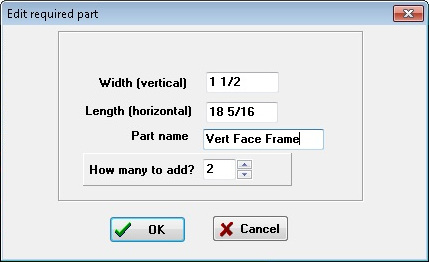
I then continued adding the other pieces. I clicked on Part# 1 to select it, right clicked on it to bring up the option dialog box and then selected “Insert before selected…..” I then added the Vertical Face Frame pieces which are 1-1/2” x 18-5/16” and I need 2 of these pieces since we are making 2 desks.
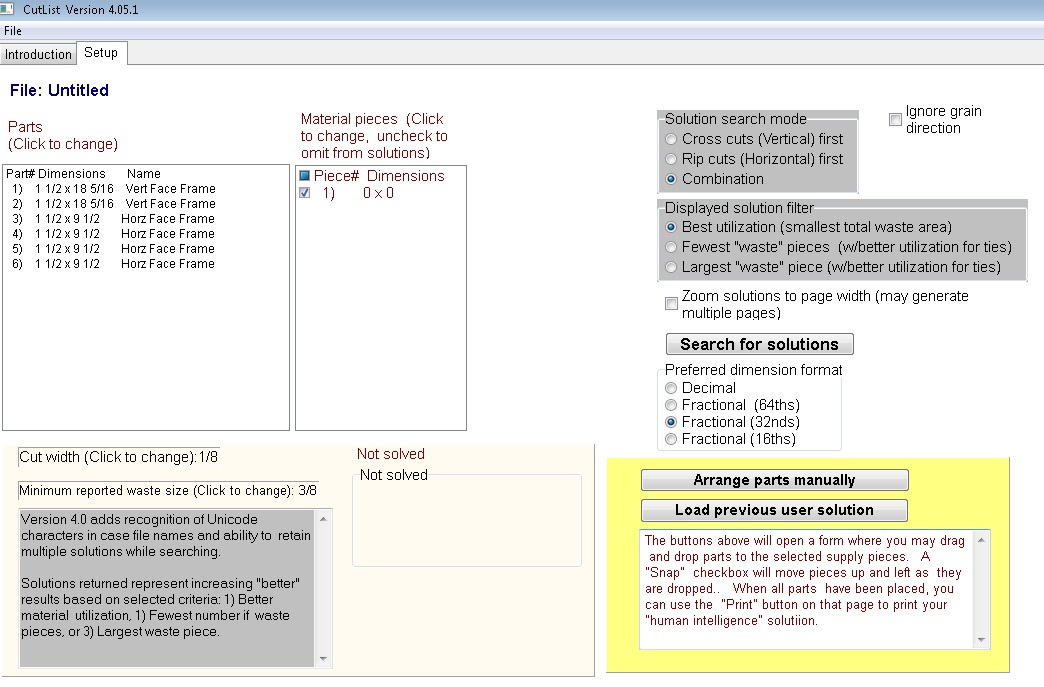
After clicking “OK”, the 2 Vertical Face Frame pieces are added above the Horizontal Face Frame pieces.
I then continued adding all the different pieces needed like the Rear and Front Leg pieces and ended up with this Parts list:
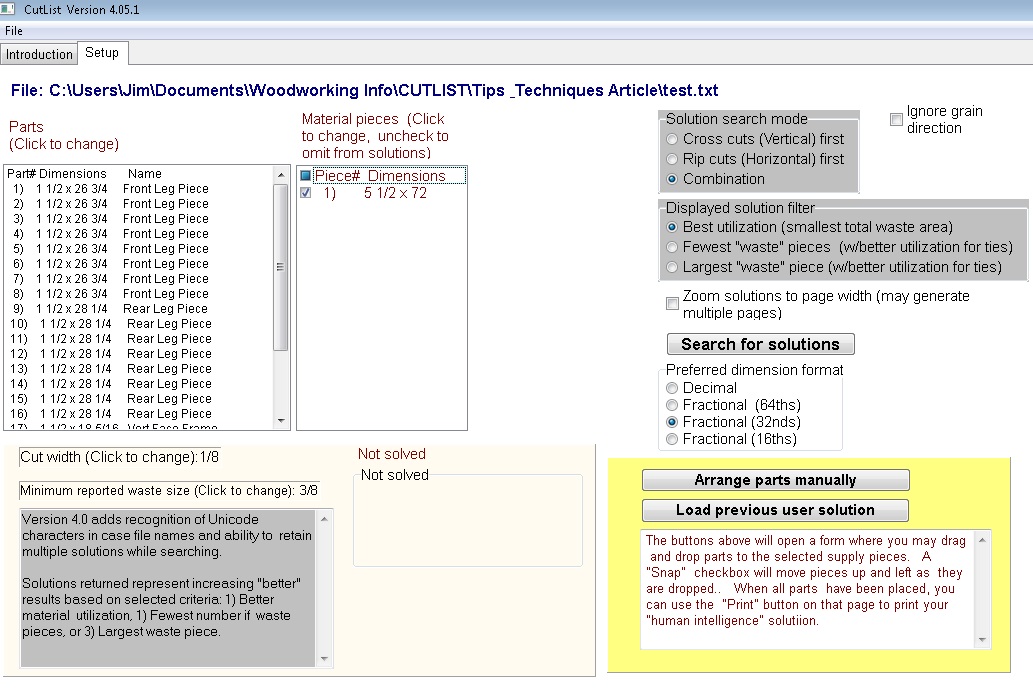
Now you need to enter in the size of the wood pieces you have to cut from. I have 6-foot long 1×6’s that are ¾” thick so following the same process as used on the Parts, I click on the Piece# 1 in the Material pieces box and then right click on it the bring up the option dialog box and select “Modify selected item …”. I then enter the dimensions of the 1×6 to cut from which is 5-½” wide by 72” long.
After clicking on “OK”, the piece shows up in the Material pieces box.
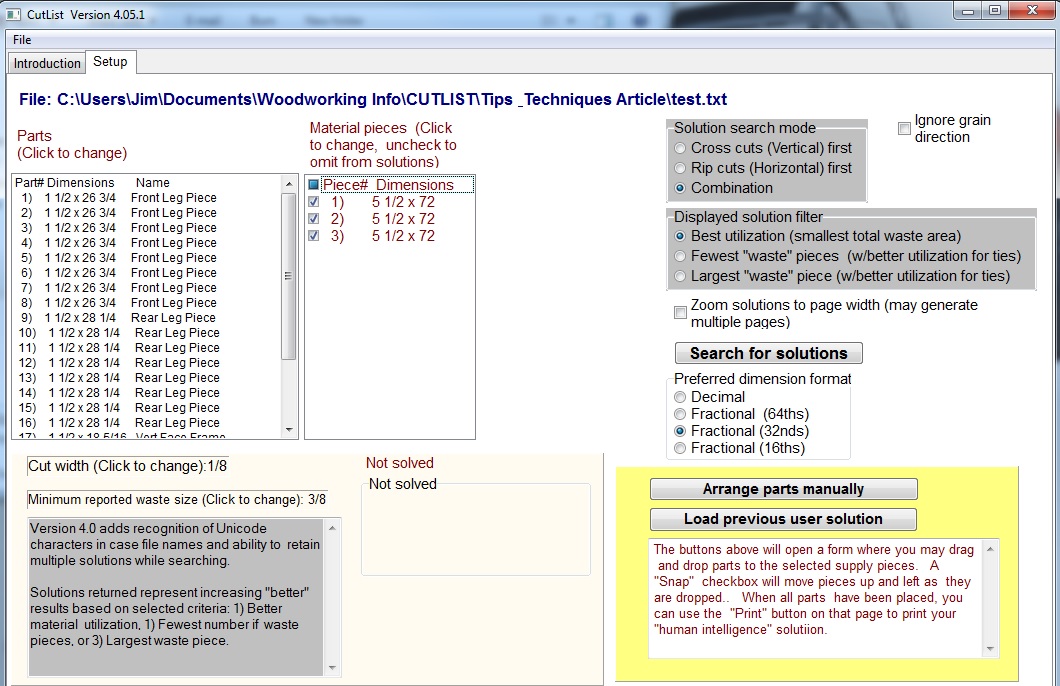
Since I think I need 3 pieces of the 1×6, I then click on the Piece# 1 and right click on it to bring up the option dialog box and select “Insert/Duplicate after selected…” and add 2 other identical pieces. After doing this, the Material piece list should look like this:
Now, the last thing I need to do is tell the program the thickness (kerf size) of the blade that I’m using to cut the wood so it can take that into account. Just below the Parts list box is a box that says “Cut width (click to change).” When you click on it, a dialog box pops up, asking you to enter is the blade thickness. I entered 1/8” as the thickness of my blade:

Generating the Cut Lists
OK, now I’m ready to run the program to generate a cut list. I click on the “Search for solutions” button
After clicking the button, it will tell you there a many possible ways to cut the parts and you will click the “OK.” You will see a progress box showing the percent progress and below that box you will start seeing the number of Solutions found.
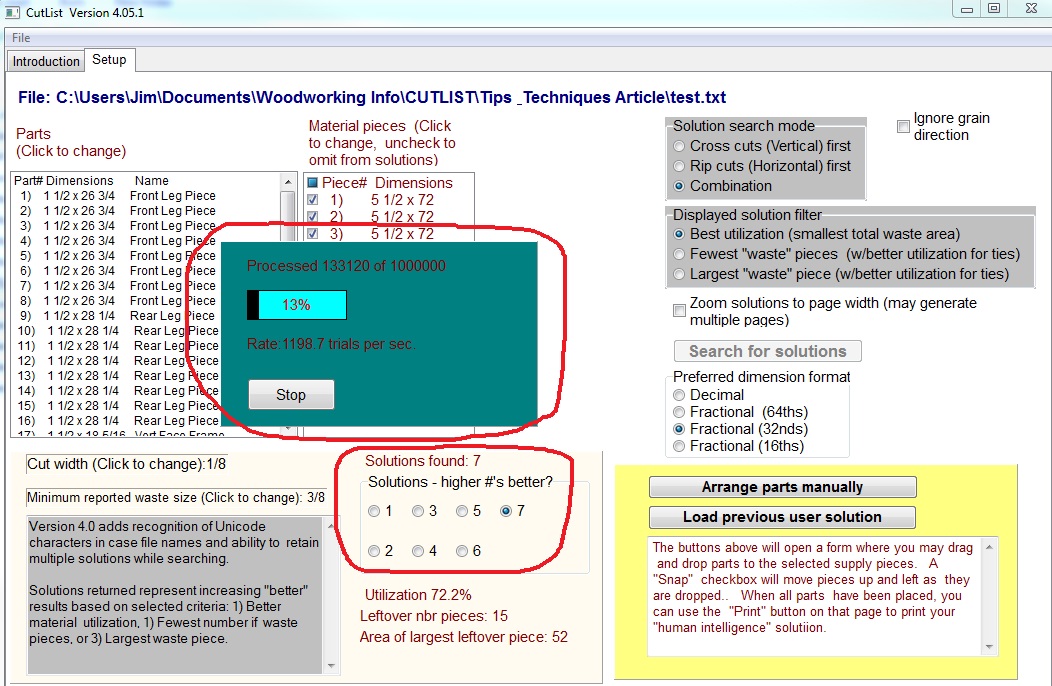
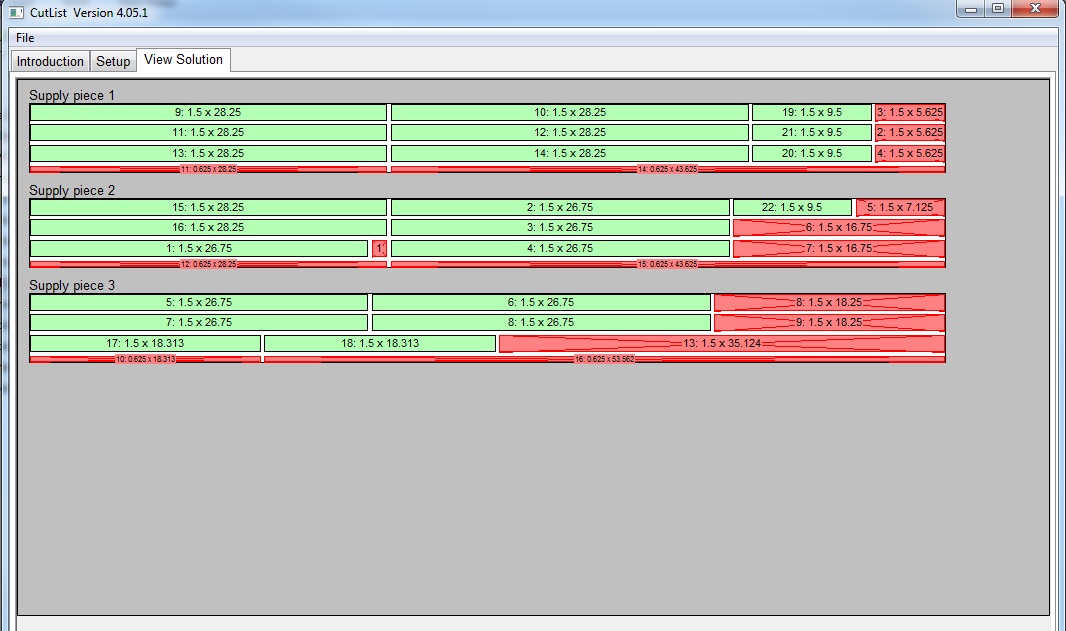
You can wait until it goes thru all the different combinations or you can click on Stop once you see several solutions. Typically the higher numbered solution is the optimum one. If you click on Stop or you click on the “View Solution” Tab, you will see the selected solution.
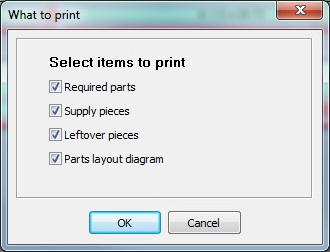
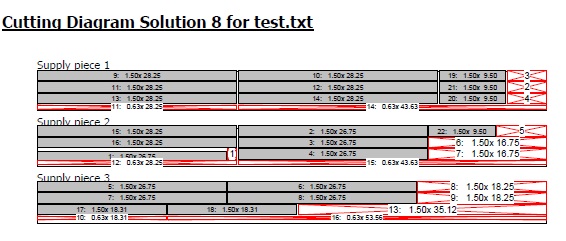
If you click on “File” on the Toolbar at the top, you can select “Print” and it will popup a dialog window with several options. I checked all of them to show you what you will get.
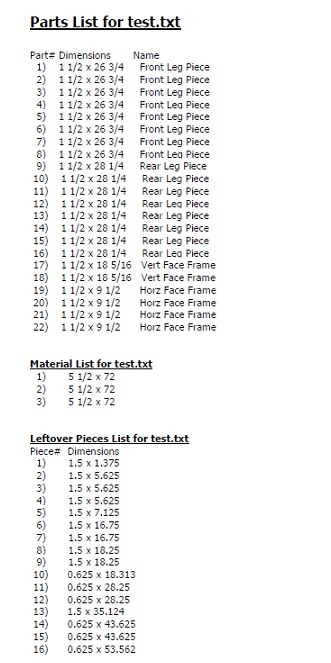
Here is what the printout will look like:
Tips
I guessed that I needed 3 1×6’s and it worked out. If I happened to select only 2 1×6’s, it would not have found a solution. If I would have selected more than I needed, like 4 1×6’x, the solutions would show only 3 pieces of wood being used.
Also, if grain direction is important, you will need to make sure you enter the dimensions of the parts correctly to get the grain running in the right direction. For example, when I enter in the hardwood as my Material pieces, I inputted it as 5-1/2 ” wide (vertical) and 72” length (horizontal). Therefore, the grain of the board is running in the length or horizontal direction. Therefore, when you add parts, the grain will always be running in whatever dimension you enter into the length/horizontal input box.
You can save the cut list by clicking on “File” on the Toolbar at the top and selecting “Save” or “Save As” and then the next time you start the program you can bring up the saved cut list by using the “Open” command. I tried to show the basic method to use this program. There are several other options in this program I haven’t used but you can experiment with them to see if they are helpful. Good luck!
Retired Electrical Engineer, married 35 yrs to wife Janet, have 2 sons, David 34 and Ryan 32