Building a Crown Molding Fence
Summary of my presentation at March 2023 Meeting on how to correctly cut crown molding with the use of a temporary fence for his miter saw. The following is how I built the temporary fence that made the cutting so easy.
Step 1: Make the temporary fence
How to Build a Crown Fence for Your Miter Saw
You will need a piece of ¾ inch plywood for the Crown Fence. Any scrap piece you have on hand that will fit the dimensions specified below will be OK. I have always used ¾ inch plywood for this but you might want to try it with ½ inch plywood if that is what you have available.
The length of the Crown Fence can be longer than the fence on your miter saw but you can simply match the length of your miter saw fence and that should be sufficient. The width of the Crown Fence needs to be such that there will be sufficient material to hold it together when you cut a 90 degree and two 45 degree slots into the Crown Fence. So the width of the Crown Fence depends on the miter saw dimensions. If you have a sliding compound miter saw you will need to restrict the sliding action so that you don’t cut through the Crown Fence. Set the slider so that it will cut the piece of crown molding and maybe a bit more just to make sure that the crown is completely cut through. Yes, you will not be able to see the miter saw’s detent settings. This is one reason why you cut the Crown Fence at the 90 and 45’s. These cuts can also help you line up your cuts on the crown molding.
The distance that the Crown Fence is located relative to the miter saw fence is determined by the wall projection of the crown molding. You can find this by setting the crown molding in the nested position on your miter saw fence. Put the crown molding with the bottom of the molding up against the fence and the top of the molding down on the miter saw base. Make sure that the “flats” are completely touching the miter saw fence and the base of the miter saw. Make a mark on the base of the miter saw where the crown molding is located. Measure the distance from the bottom of the miter saw fence to the mark you just made. This is the wall projection of your crown molding. The most accurate way to position your Crown Fence on the miter saw is to rip a piece of scrap to the width of the wall projection you just measured then insert it flush up against the miter saw fence followed by your Crown Fence. You can attach the Crown Fence to your miter saw with clamps, double sided tape, or cyanoacrylate glue (CA glue). Just make sure that the Crown Fence is tight against the scrap piece you just ripped. Remove the scrap piece and make your 90 and 45 degree cuts in the Crown Fence and you are ready to cut crown.
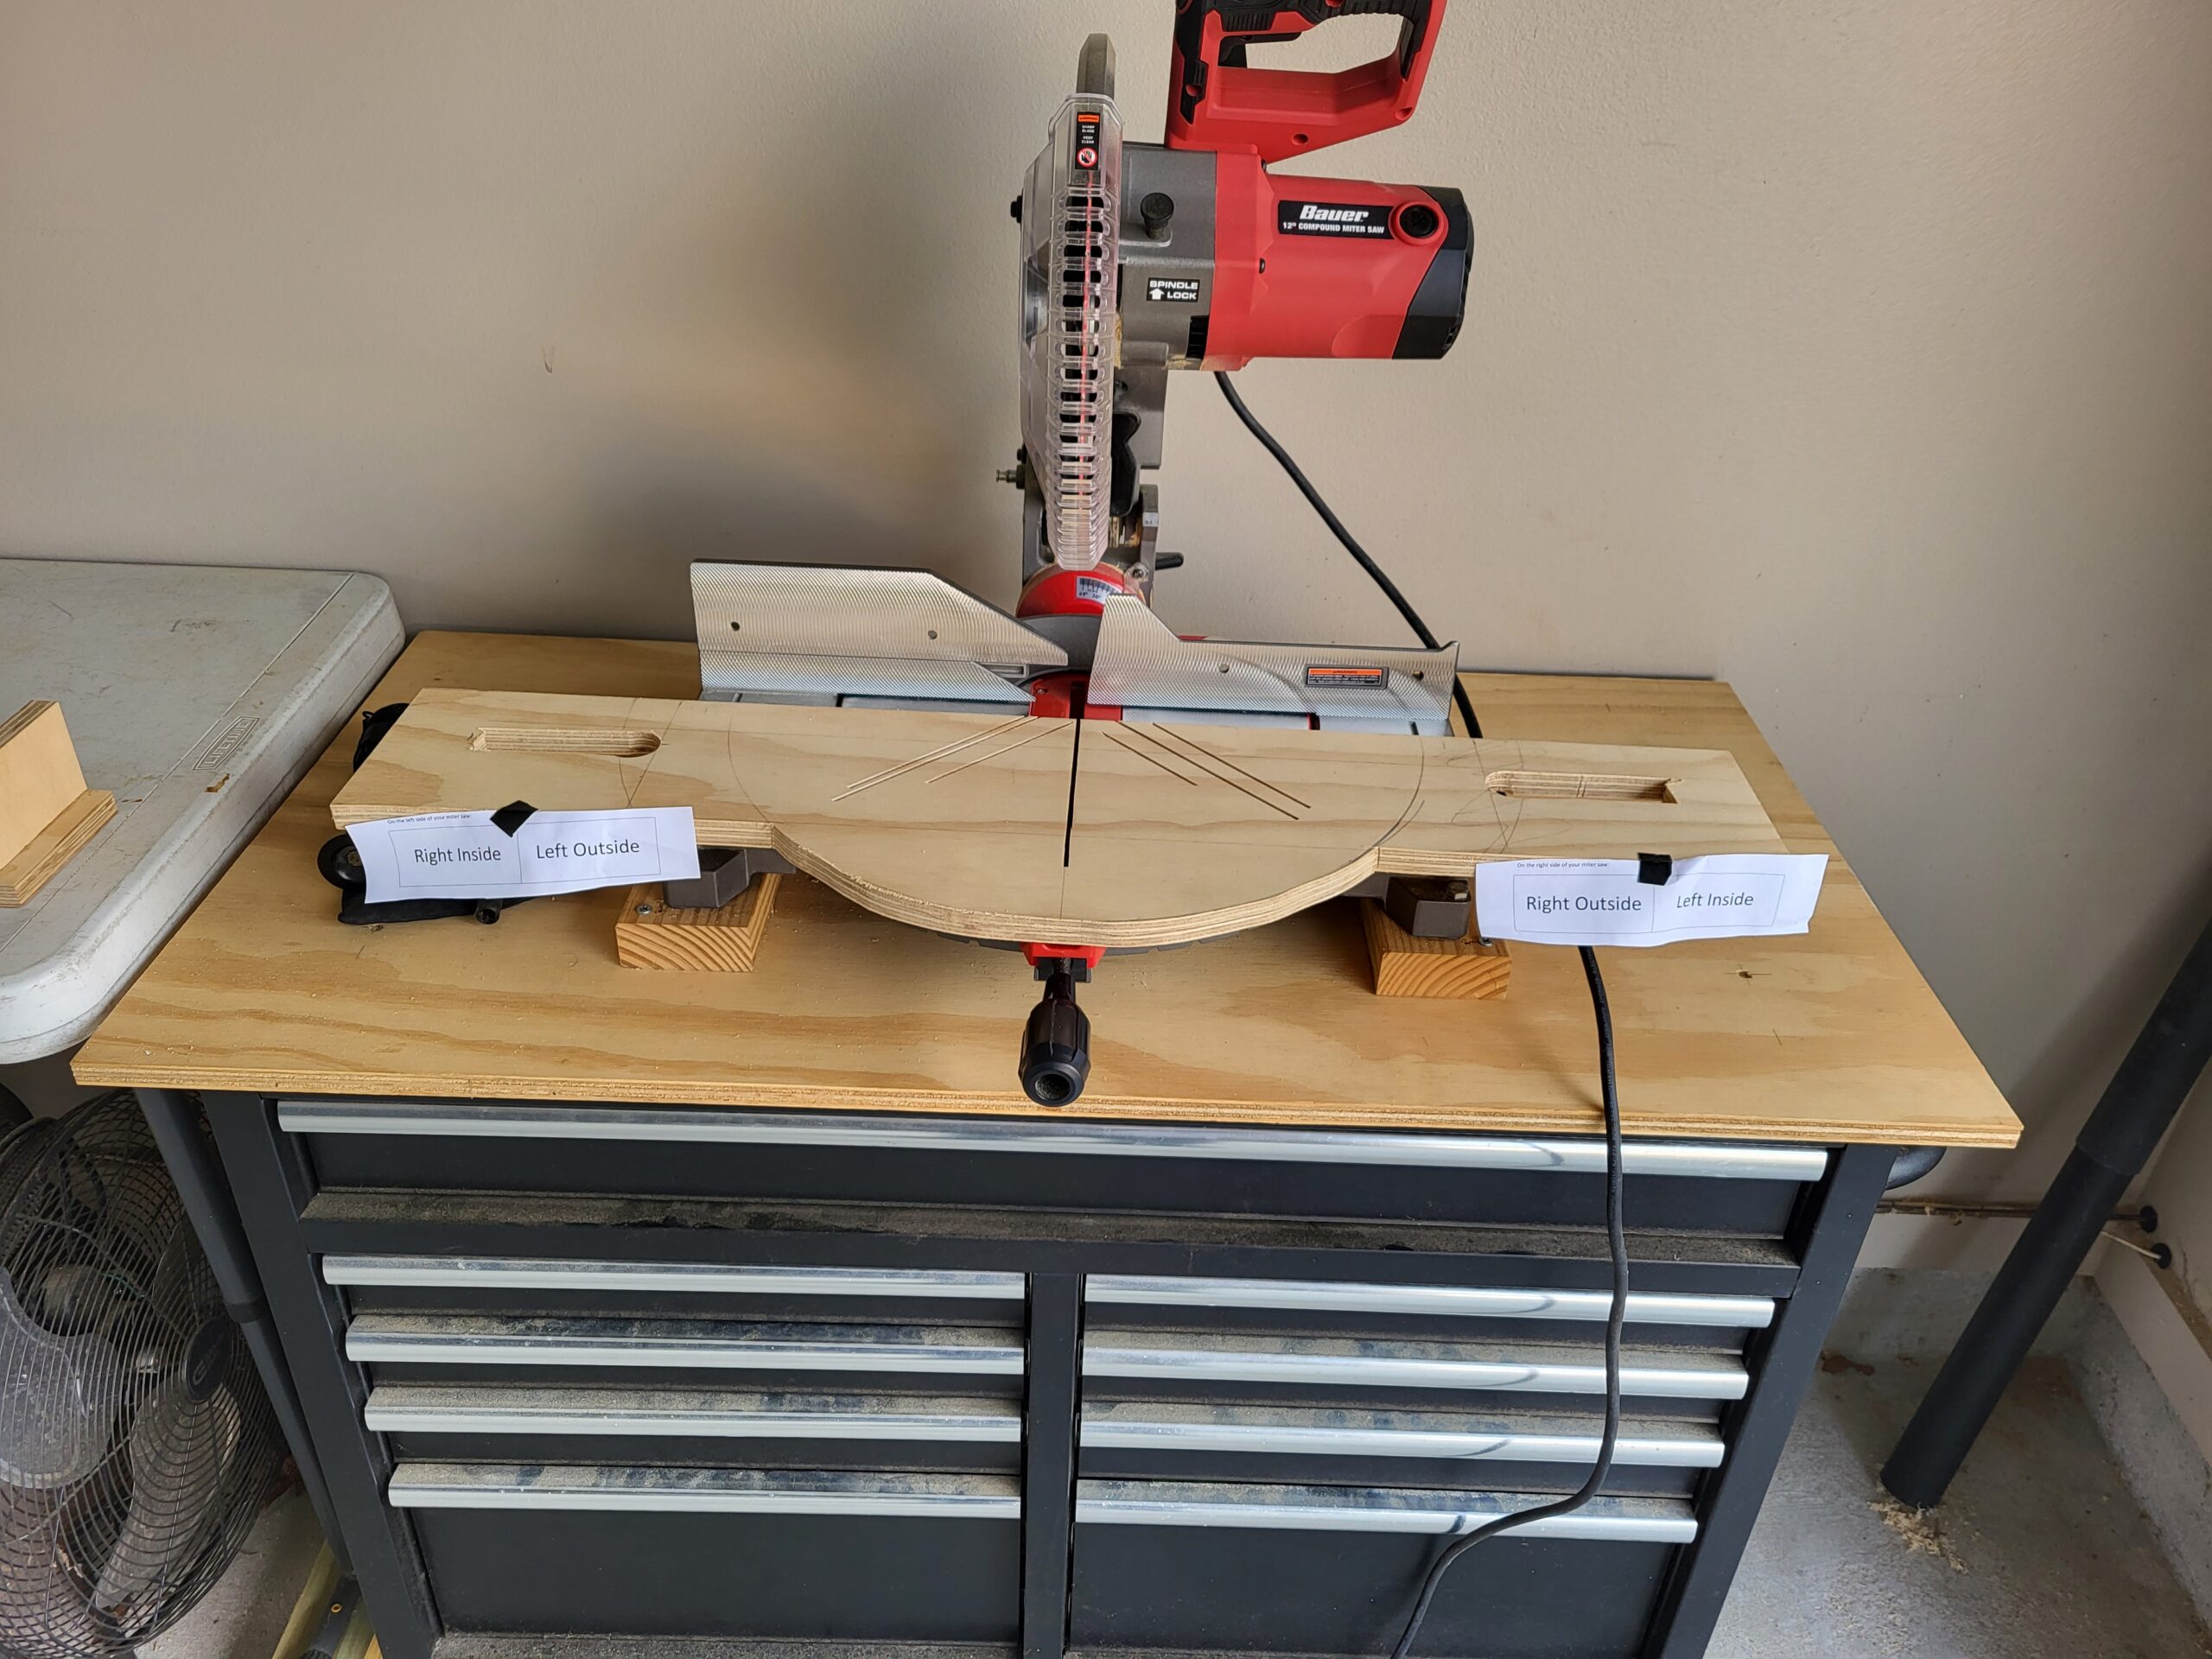
Step 2: Cut the molding
Cutting Crown in Nested Position on Miter Saw
When cutting in the nested position you set your saw’s bevel to zero degrees and leave it there. Always, put the top of the crown on the base of the miter saw and the bottom of the crown goes against the miter saw fence. The only manipulation you make on the miter saw is pivoting it to either the right 45 or the left 45. The only other decision to be made is where to position the crown, either to the right or left of the blade. The following aids can be taped to either the right or left of the miter saw. All you need to do is figure out whether you are cutting an inside or outside corner and whether it is on the right or left side of the corner. Once you have done that, plug it into the aids taped to your saw and make the cut. It’s pretty much automatic after that.
Here are the signs to be taped to your miter saw:
On the left side of your miter saw:

On the right side of your miter saw:

The placement of the sign on the right or left side of the saw tells you which side to pivot your miter saw. The line down the middle of the sign separating the two cuts tells you which side to place the part of the crown you want to keep. For example, if you want to cut a right outside miter you would pivot the saw to the right because the sign is placed on the right of your miter saw and you would put the part of the crown you want to keep to the left of the blade. In other words, the placement of the sign tells you which way to pivot your saw and the placement of the text tells you which side of the blade to place the crown that you want to keep. I hope this is helpful. Any questions give me a call.