Building an Optical Illusion End Grain Cutting Board
Co-author: [brwc_user id=”3″]
Building this cutting board is not hard, but it requires accuracy. The plan is freely downloadable from mtmwood.com, although you will need to register on the website in order to download the plan.
There are many other plans you can download as well. Some are free, others are not.
The plan is very detailed and is an excellent instructional with all of the information you need to successfully build this board. As a bonus you can also download a SketchUp model of the cutting board. This is important because the plan is in metric dimensions, and SketchUp will let you convert to imperial measurements with whatever granularity you require. We converted to the nearest 1/16″. If you want to work in millimeters then no conversion is necessary.
We built these boards with hard maple and black walnut, but you can use other woods as long as there is a distinctive color difference. Our stock was rough 8/4 so we planed all of it to 1-3/4″. We also had to establish a clean edge using a jointer.
Once the stock was milled we cut 30″ strips according to the plan on the table saw. 42 strips were cut, so there was a considerable amount of waste just due to the blade kerf. Plan to lose about 5″ of board width when making these cuts. Oversize a little to allow planing of each strip. It’s very critical that all strips of the same size be planed to exactly the same thickness. As we planed the strips we marked the thickness on each with pink chalk so that it would show up well on both the light and dark wood. Don’t use a Sharpie because it will soak into the wood and may be visible later.
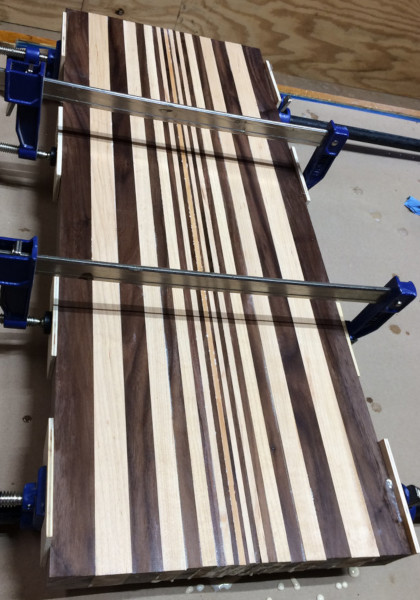
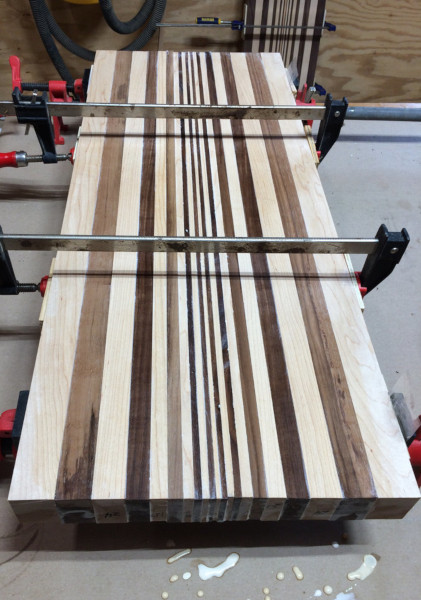
Once the strips are cut and planed we glued them up into panels (Figs 1 and 2) using Titebond III (waterproof). Note that these panels are color opposites of each other.

Fig. 1 
Fig. 2
After the glue dried overnight we cleaned them up by planing each panel to the same thickness. This required a 13″ planer.
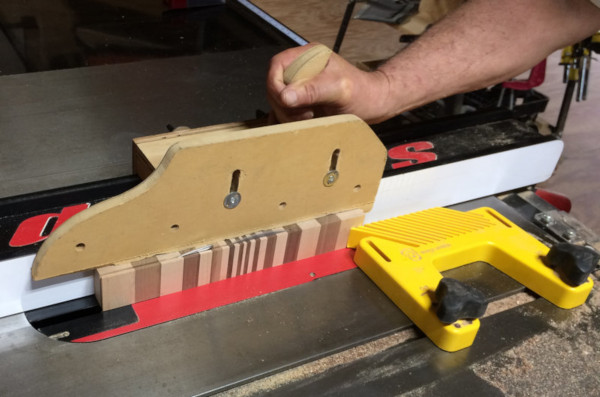
We then cut a number of 1-3/4″ strips from each of these panels (Fig. 3). This dimension will determine the thickness of the cutting board.

Fig. 3

These strips are rotated 90 degrees so that the end grain is facing upward. Strips of varying thickness were cut from these blanks as per the plan. (Fig. 4)

Fig. 4
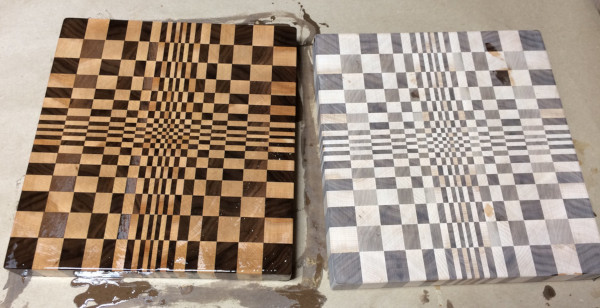
Here are the strips laid out for two boards (Fig. 5). You can see the different thicknesses.

Fig. 5
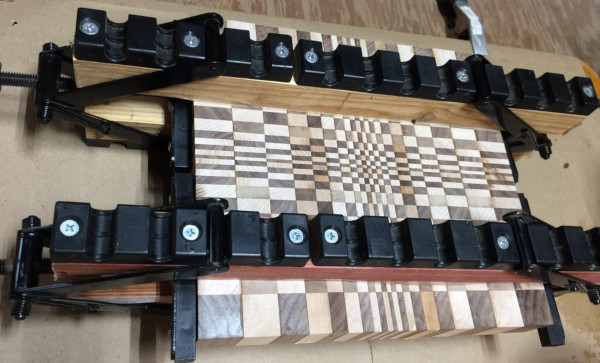
These strips were assembled in the proper order, glued, and clamped (Fig. 6). Panel clamps help keep it flat.

Fig. 6
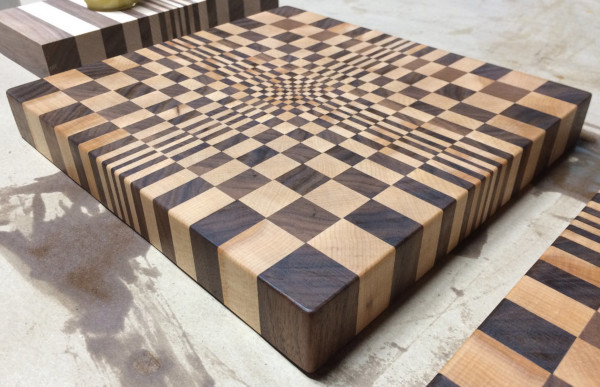
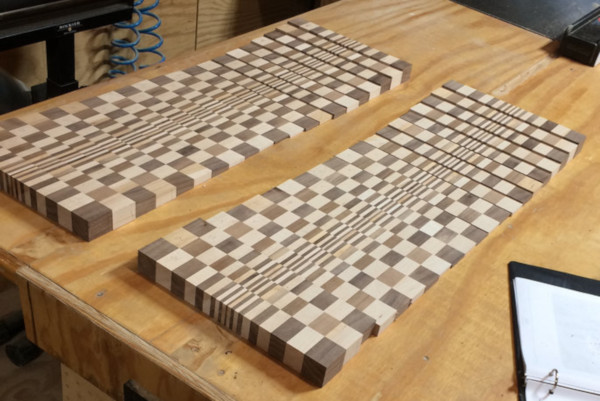
After drying overnight the cutting boards were run through a drum sander, then sanded again with an orbital sander using 320 grit. Corners were eased with the orbital sander. After sanding the boards were finished with mineral oil, which is the traditional cutting board finish (Fig. 7).

Fig. 7
If you’re interested in building a cutting board like this please go to mtmwood.com to get the plan. Again, it’s excellent and very detailed.