Faux V-Groove Dado Joint
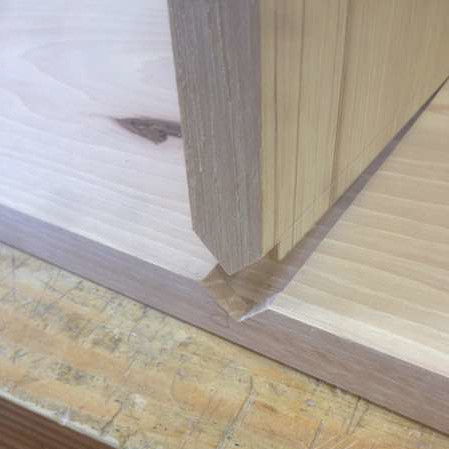
In my recent end table build, the design called for the use of a v-groove dado joint to attach the middle shelf to a table side. However, the grain directions of miter joints are known to weaken the glue bond, and the mechanical support of v-groove dado joint appears to be weaker than (square) dado joints. This posed a conflict in the design: aesthetics vs. strength. This dilemma was resolved by introducing a third factor: complexity (= time). I turned to a more complex joinery, which I call it “faux v-groove dado joint.” (I have been looking for a formal name for this joint but so far unsuccessful. If you know of one, please leave a comment below.) This joint essentially is a stopped dado with its ends dressed as v-groove. The joinery strength comes from the hidden dado while preserving the desired look. This article outlines my construction procedure.
Step 1: Cut stopped dado
The first step is to cut a regular stopped dado. There are a number of approaches to cut stopped dados, and what I’m showing here perhaps is an unconventional way: Using both machines and hand tools but free of jigs. My general woodworking tendency is to avoid jigs as much as possible. (They take time to build or money to buy, and they take up space in my already packed shop if they are built for multi-project use.) This being said, the funny thing is that I later realized how many more stopped dados are called for in this project, so I ended up rigging up a straight-cutting router jig to speed up the process.
Given two boards milled to the final dimensions, we start by marking the location of the dado:

Place shelf at the right position Check for squareness Mark (both knife and pencil)
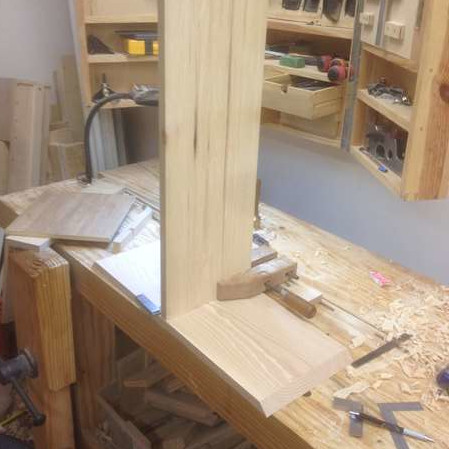
The knife lines are essential as the chisel is later used to establish the dado walls. After the dado walls are marked, the stopping lines (I chose 1/4″ from the edges) are also marked.
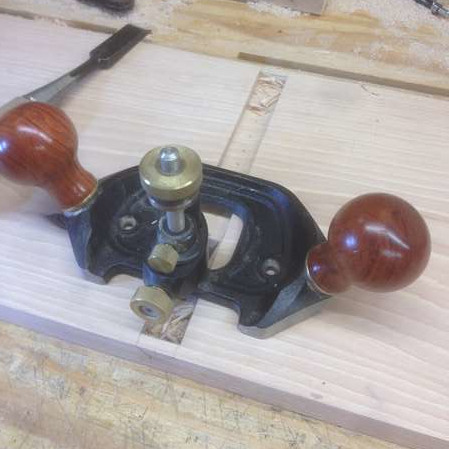
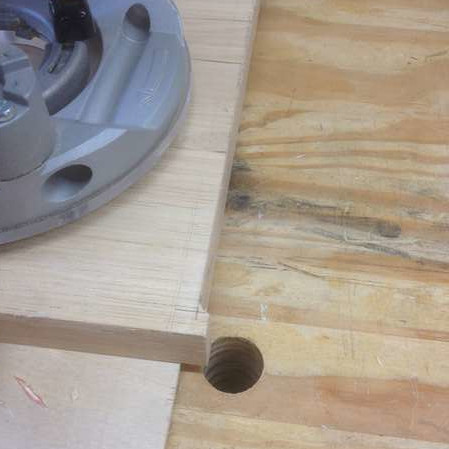
Then, we hog out as much of materials as possible with power tools:
Drill press + Forstner bit Trim router + 1/4″ downcut spiral bit
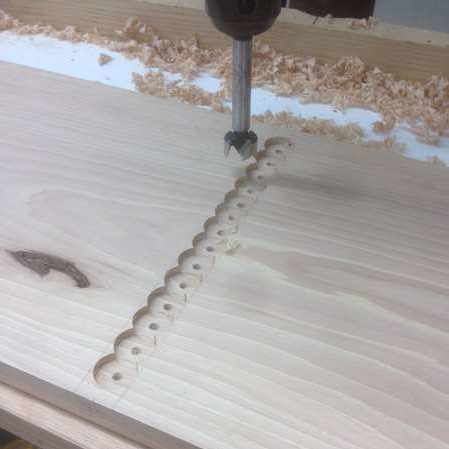
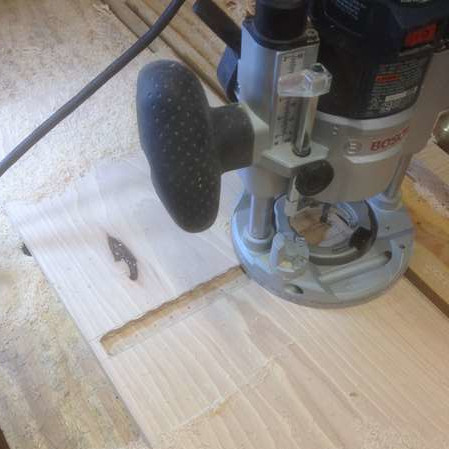
The Forstner bit chucked on drill press is a good option to hog out material, especially if your only other arsenal is a trim router like me. The bit placement is aided by a knife line straight across in the middle of the dado. I set the drill press to drill a tad shallower than the final depth and let the router to establish the final depth. Routing also knocks out the material between the holes. I could get pretty close to the line by operating the router free-handed.
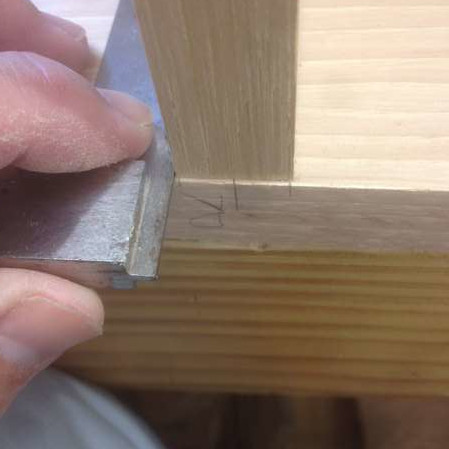
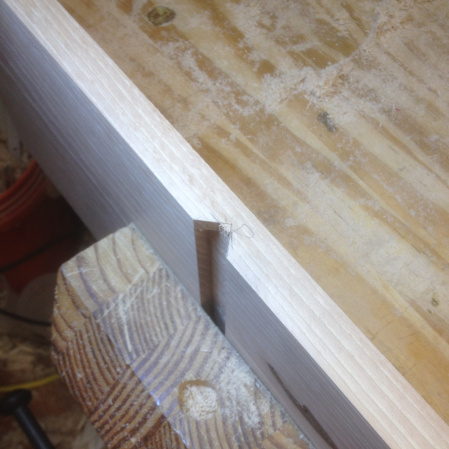
The dado walls are then established with chisel, and the router plane is used to eliminate any depth deviations:
Pare to the lines Router plane to the final depth Test fit
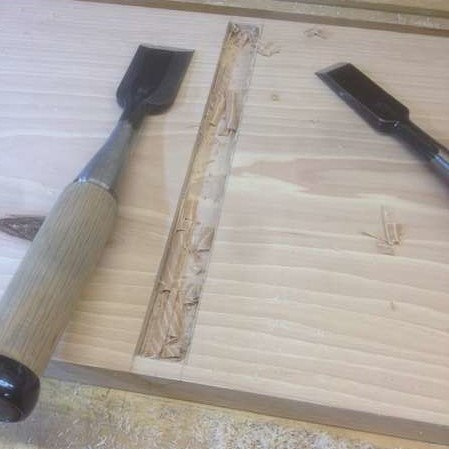
If you free-hand routed very close to the lines in the previous step, you can pare (instead of pound) to the knife lines with the chisels.
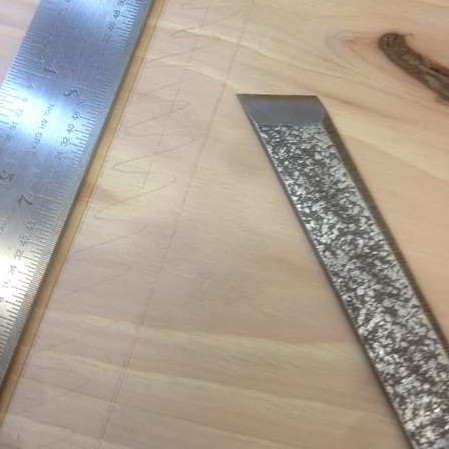
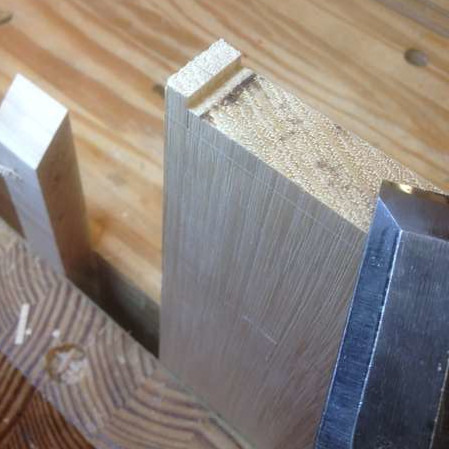
Step 2: Dress edges as v-groove dado
Now, to make it appear as a v-groove, the edges of the stopped dado must be dressed accordingly:
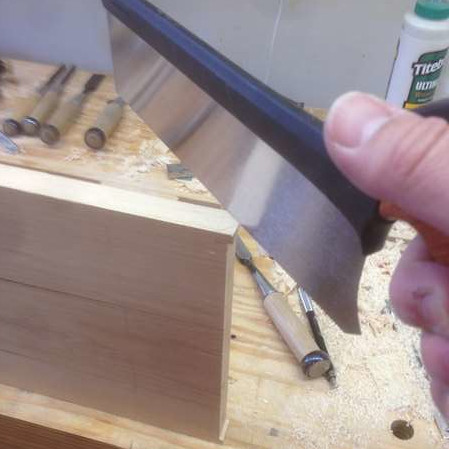
Mark the lines Hog out with chisel Stop at the dado depth Turn sideways to finish 
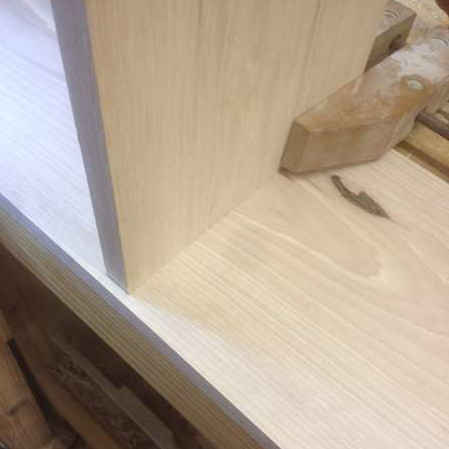
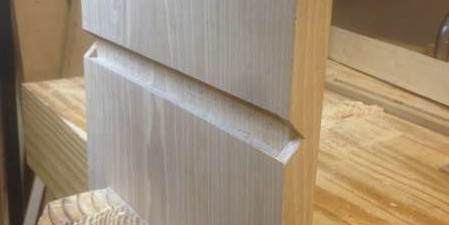
Completed
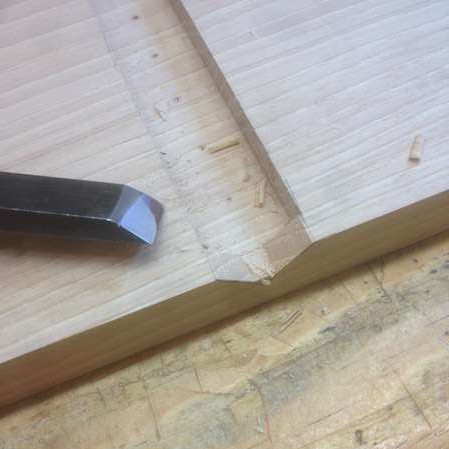
You could chisel the whole thing without turning to its side, but I felt more comfortable chiseling plumb along the knife line than paring at an angle to the line while maintaining square to the edge.
Step 3: Fabricate the mating board
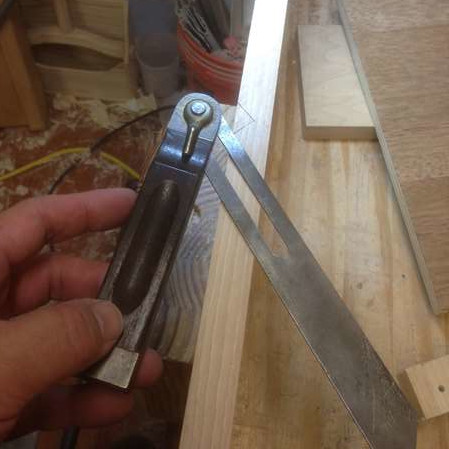
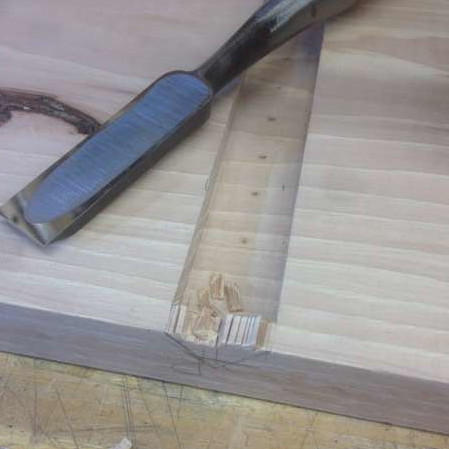
The male end of the joint also needs to be dressed. The key here is that the v-groove tip sticks out further than the bottom of the dado. So, the mating end of the shelf board must be fabricated accordingly:
Route out the middle Edges remain at the full length Chisel to square the corner Cut the edge to birds-mouth shape Chisel to the lines to finish up

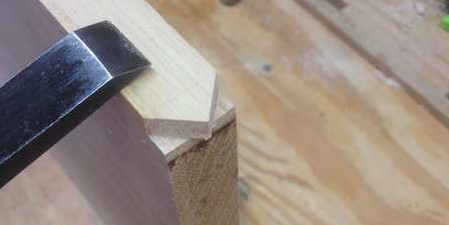
The amount to remove in the middle can easily be determined after you mark the v-groove knife lines. Where the miter lines meet the edges (between the side and faces) establish the baseline for the dado joint, and the actual cut line is parallel to the baseline, offset by the depth of the dado towards the end of the board. This method to me is easier than trying to predetermine it using math.
Finally, the fitting of the joint:
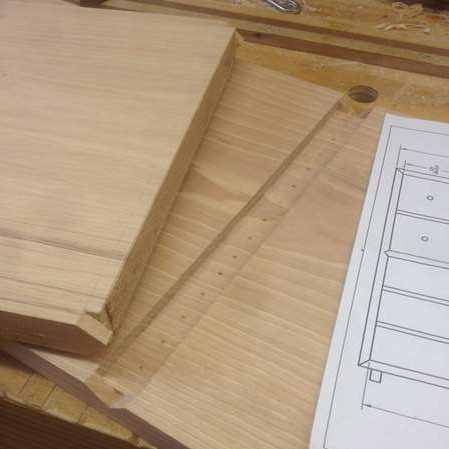
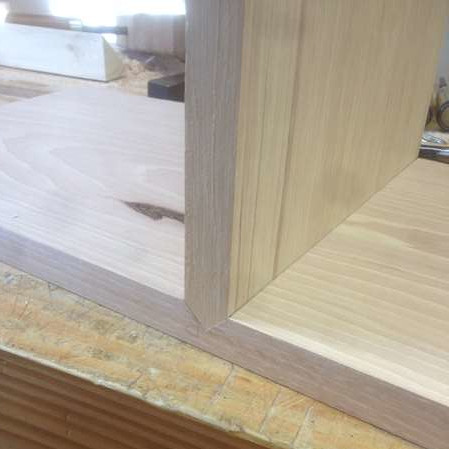
If there is a visible gap, tweak the offending face.
So, there you have it. Starting with a well-fitted stopped dado, cutting this joint is not too difficult, making it a good marking & hand-tool exercise.
If you have any questions, leave them in the comment section below. Also, how I cut it is a reflection of my tooling, and I’m sure there are other ways to achieve the same result. If you could think of alternate ways, describe them in the comment section as well! Thank you for reading
[Edited on 4/21/2019] Changed the joint name from “bird’s mouth miter dado” to “faux v-groove dado”
Self-taught hobbyist woodworker, aspired to build fine furniture. As his 15'x8' shop limits housing large power tools, he often takes hand tools to the work to achieve many of his woodworking tasks. Despite being Japanese, he reaches out to western saws and planes first.
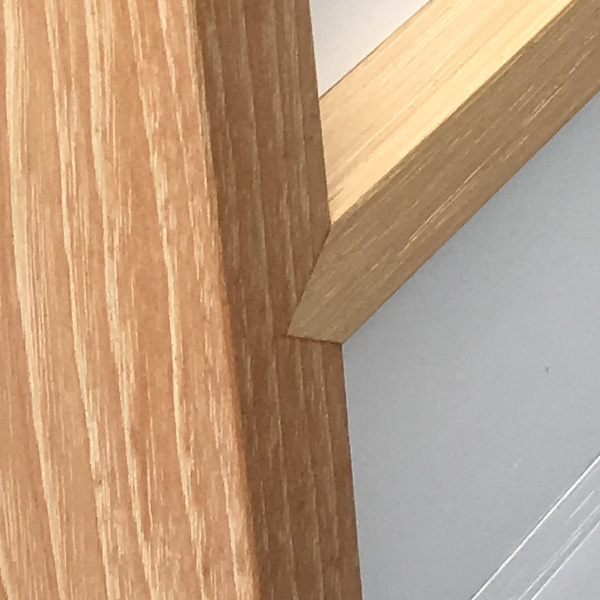
I really like this decorative touch. I’ve never seen it before so it’s also unique. Thanks for the information and the idea.