Bleaching wood is not something you should or will do very often, but there are times when it can be of great benefit. If you routinely refinish old furniture you may already be familiar with using different types of bleach to lighten wood, eliminate stains, and remove old dye in preparation for new coloring and finishing.
Bleaching can be an effective way to even out the color variation of different boards within a wood species, so that mismatched boards can be used together in table tops, door panels, etc.
There are three major types of bleach that are available and suitable for use with wood: household chlorine bleach, two‐part bleach, and oxalic acid. In this article we’ll take a look at each one to understand what they do and how to best use them.
Warning: These chemicals can be dangerous if used improperly. Be sure to wear rubber gloves and chemical goggles when working with any of these products, and read the safety information that comes with each one prior to using.
Household Chlorine Bleach
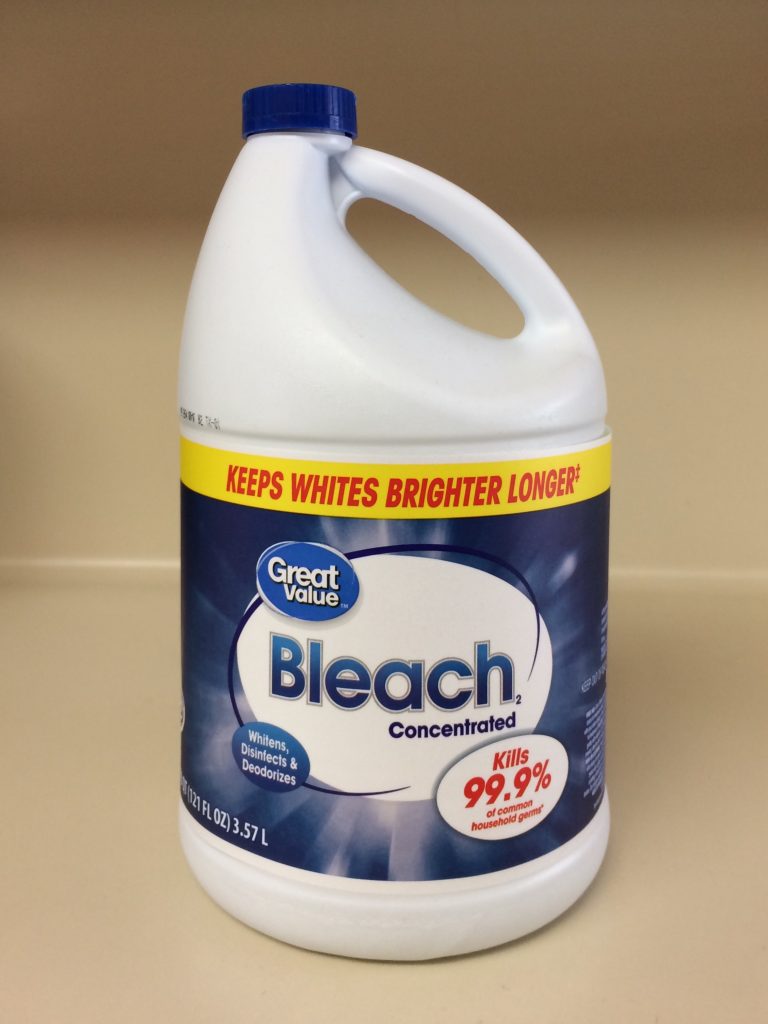
You likely have some chlorine‐based household bleach in your laundry room. The most common brand is probably Chlorox although there are lots of store brands available as well. Chlorine bleach is generally sold as a 6% solution of sodium hypochlorite (NaOCl) in water, which is the strongest I’ve been able to find locally.
You should check the label and avoid anything weaker than 6%. A stronger bleach can be made by mixing calcium hypochlorite crystals (Ca(ClO)2) available from a pool supply store with water. Mix a saturated solution by warming the water and dissolving as much of the calcium hypochlorite as the water will hold.
Household chorine bleach has a definite shelf life, usually 6‐12 months after manufacture. If your bleach is too old it will not work well and should be replaced. Fortunately this type of bleach is inexpensive to there’s no reason to waste time with old bleach.
Expectations:
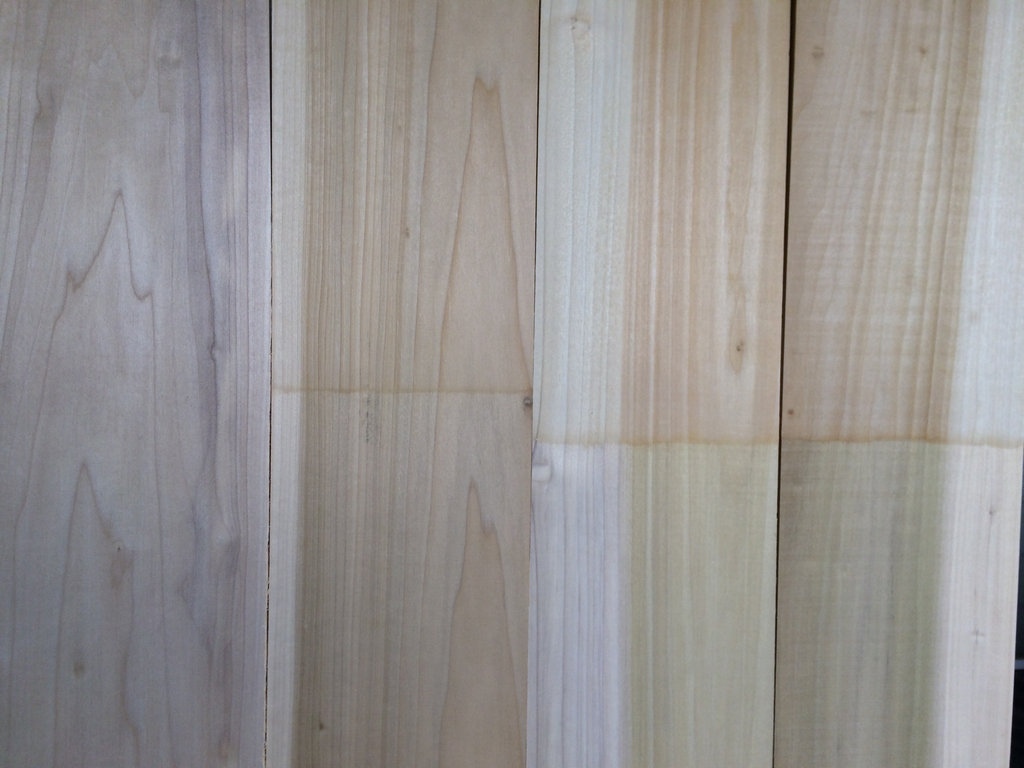
Household chlorine bleach will lighten wood somewhat, but will not remove the wood’s natural color. It will, however, remove the greenish gray coloring that is common in poplar, returning it to a more natural wood color. Chlorine bleach may also remove some stains or discoloration in the wood.
In Figure 1 below the top half of the three poplar boards on the right was bleached with chlorine bleach; the board on the left was not touched. You can see that the green and gray coloring was changed to a natural wood color but the color itself was not removed. The bleached sections are also slightly lighter in color overall.
Another interesting fact about chlorine bleach is that it will completely remove any trace of water soluble aniline dye from wood. So if you make a mistake or don’t like a color once you have applied a dye you can easily remove it and start over, as long as you have not put a topcoat of finish over it.
The board in Figures 2 and 3 was completely dyed with JE Moser’s Natural Antique Cherry water soluble aniline dye (Figure 2), allowed to dry overnight, and then the right side was bleached with chlorine bleach (Figure 3).
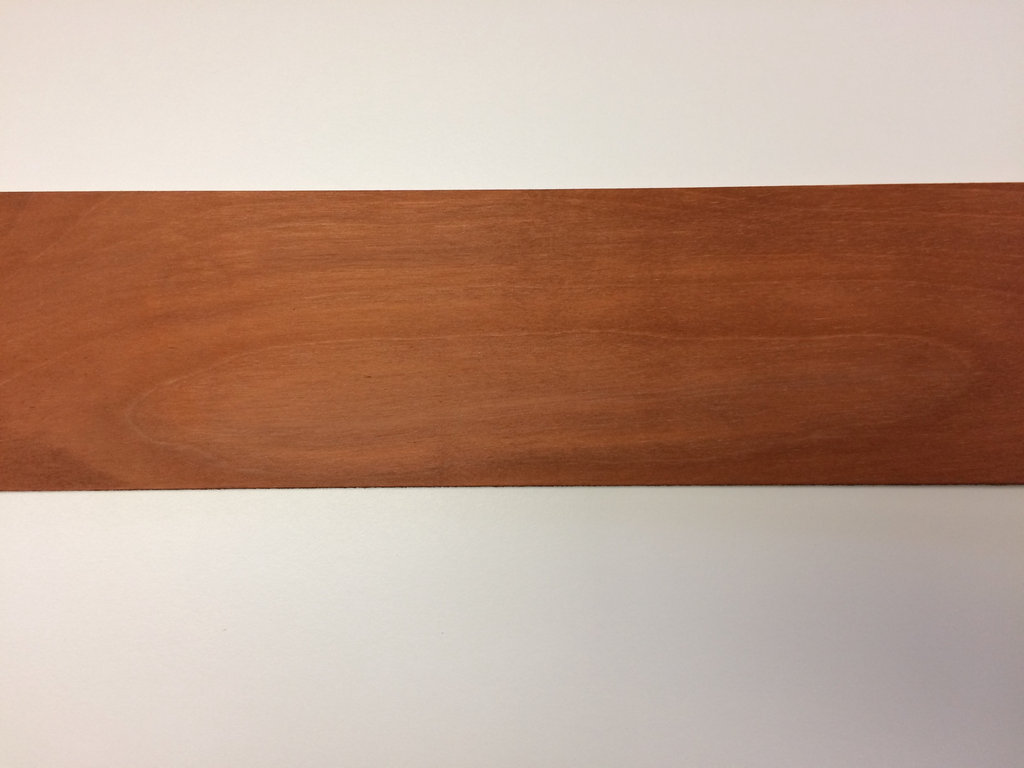
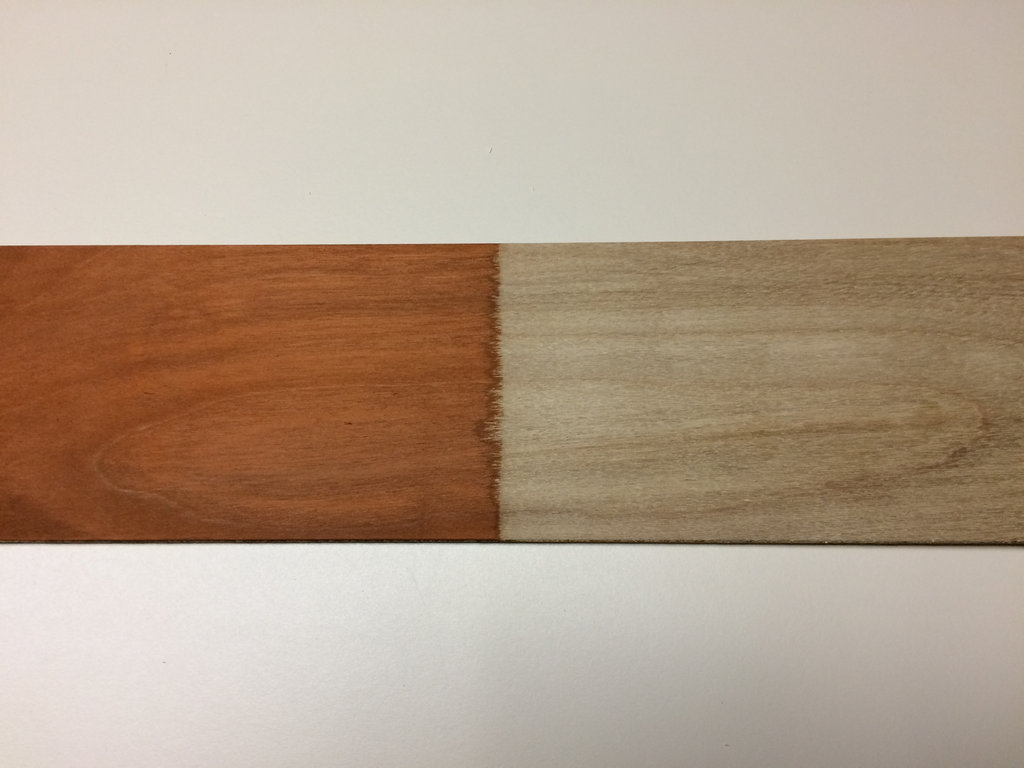
As you can see the dye was completely removed and the right end of the board is ready for recoloring. This will work only on dyes, not pigmented stains.
Application:
You can apply chlorine bleach with a rag or paper towel.
Soak the wood with the bleach and let it dry overnight. If the wood is not light enough you can repeat the process. This may or may not make a difference.
When you have finished bleaching just wipe the wood down with a wet rag and allow to dry. Since sodium hypochlorite is neither acidic nor basic no neutralization of the wood is necessary.
Water will raise the wood grain so sand very lightly with 220 or higher sandpaper when the wood is dry. Don’t sand too much or you’ll go into wood that has not been bleached.
Two‐Part Bleach
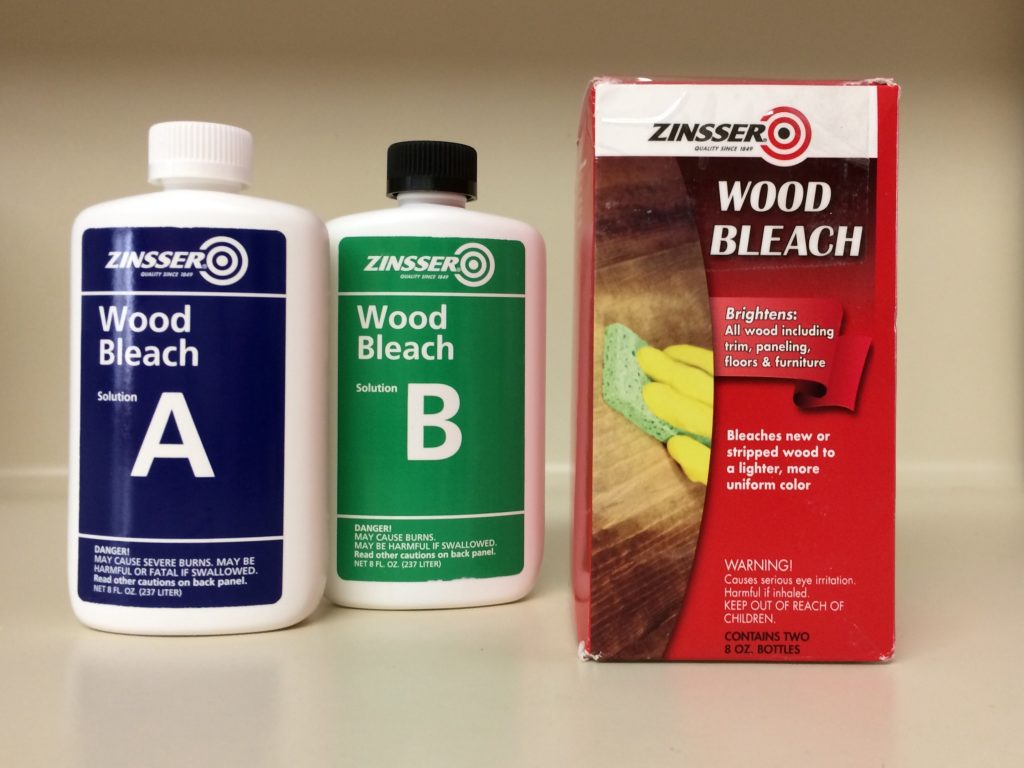
As the name implies there are two components in two‐part bleach that must be mixed, either prior to application or on the wood itself by applying one directly after the other.
The first component is sodium hydroxide (NaOH), also called caustic soda or lye. The second component is hydrogen peroxide (H2O2). When mixed they react quickly to form sodium peroxide (Na2O2), a strong oxidizing agent.
This reaction can be fairly violent so it’s important to read the instructions on the packaging carefully. Only mix the two components together prior to application if the instructions tell you to do so. If premixed the solution must be applied immediately as the bleaching strength dissipates rapidly.
Expectations:
Two‐part bleach is the only way to actually remove the natural color from wood, and it works amazingly well on some species such as red oak and walnut. However, this may not be what you want as it can remove the tonal variances that make wood interesting.
Pine and poplar are already fairly light so don’t expect them to lighten much.
Others like cedar, redwood, and elm are difficult to bleach. Always test on scrap wood or on a hidden area if possible.
Two‐part bleach may also lighten some pigmented stains, but is likely to be ineffective with dyes.
This bleaching system is expensive relative to household bleach, so try the household bleach first to see if it does what you want. You can expect to pay $17–$19 per pint for two‐part bleach compared to about $6 per gallon of chlorine bleach.
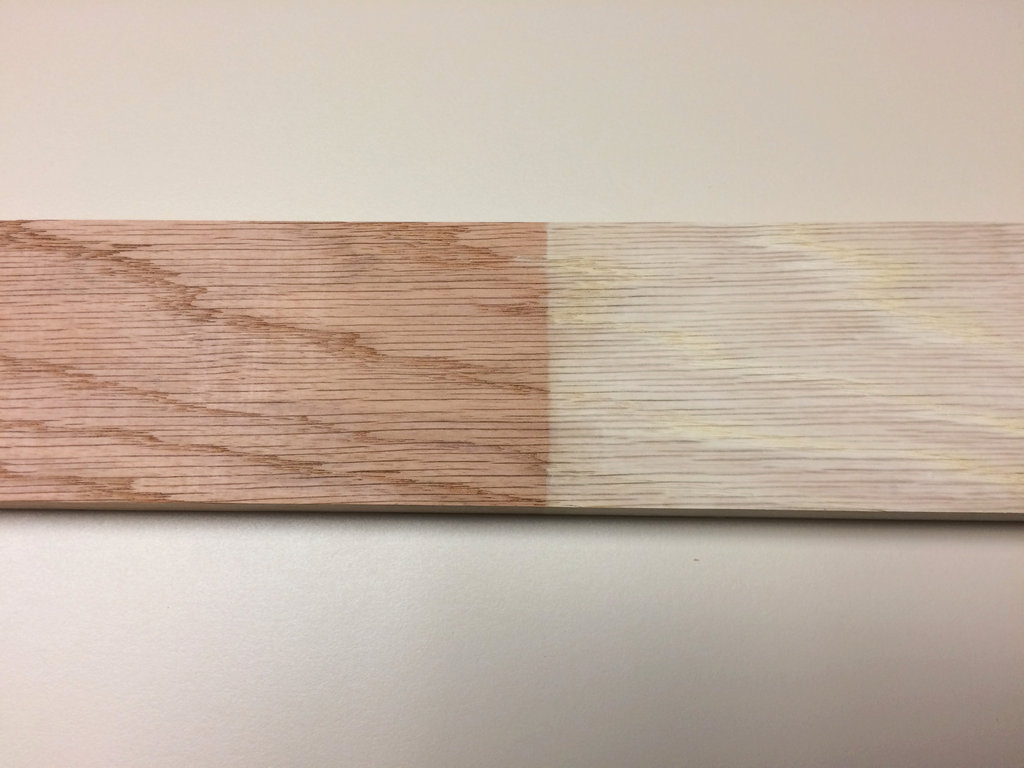
In Figure 4 below you can see that red oak will turn bone white with a single application of two‐part bleach.
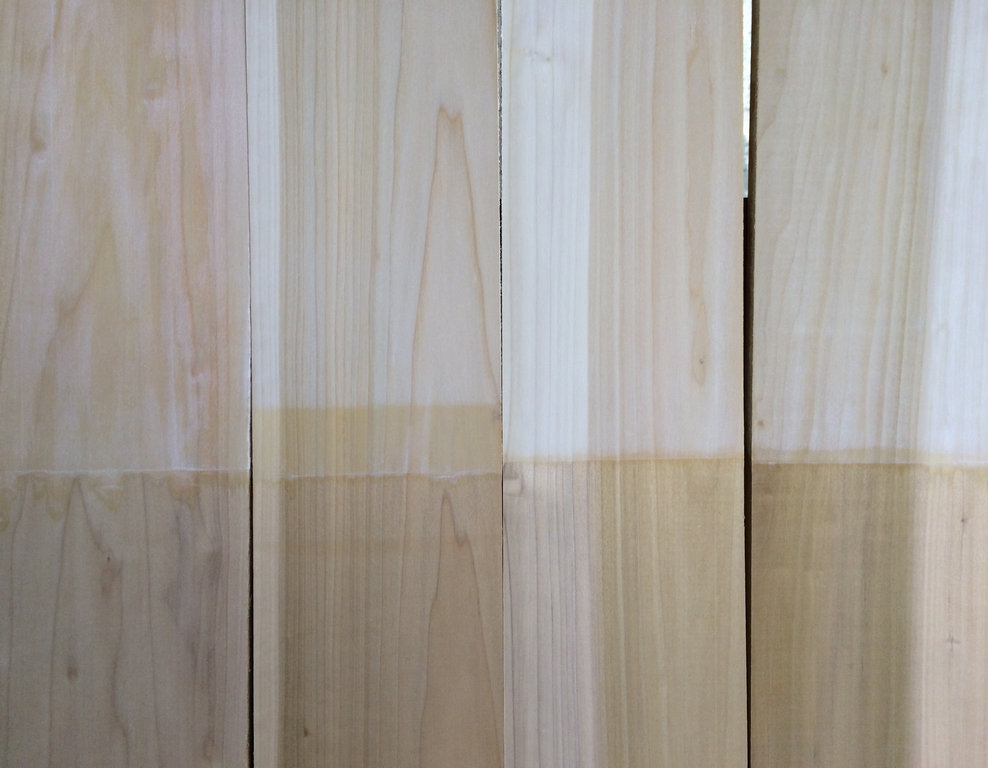
Using the same four‐board poplar panel that was used to test the effectiveness of household bleach, I applied two‐part bleach to the top half of all four boards.
The three boards that had been previously bleached with chlorine bleach got lighter, and the board that had not been bleached (on the left) lightened as well but had a more yellowish hue (Figure 5).
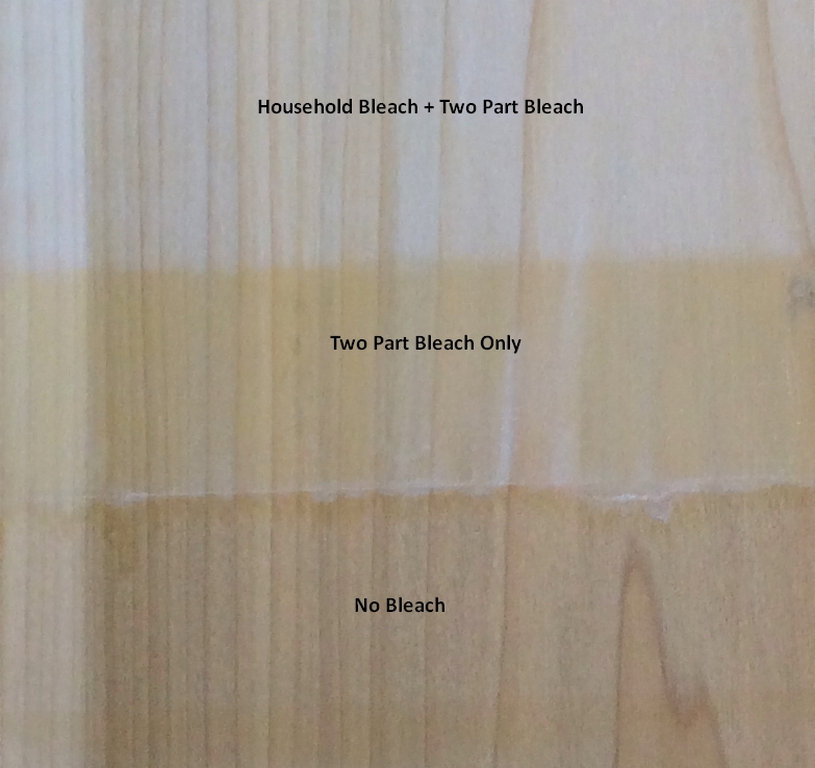
The effect of using more than one type of bleach on the same piece of wood is evident when taking a closer look at one of the boards where the two‐part bleach overlapped onto a section of previously untreated wood (Figure 6).
Application:
Two‐part bleach may be applied with a rag or with a synthetic bristle brush. I tried both and found that brushing was much easier and gave more even coverage than using a rag. Use either glass or plastic containers to mix the components (if the instructions say to to so) or to hold the chemicals. Do not use a metal container.
If applying each component directly to the wood without prior mixing use the order described in the instructions that came with your brand of bleach, although it probably doesn’t make much difference. If applying the caustic (NaOH) first you might notice the wood turning darker. Don’t worry; this will quickly reverse itself once the second component is brushed on.
Allow the wood to dry overnight.
If you’re not satisfied with the results then repeat the bleaching process.
Once you are happy with the color the wood must be neutralized with a mild acid to get rid of any caustic residue. Flood the surface with a 50/50 mixture of water and white vinegar, then rinse with clear water and let dry overnight.
Sand lightly when dry with 220 or higher sandpaper, again taking care not to sand too aggressively.
Oxalic Acid
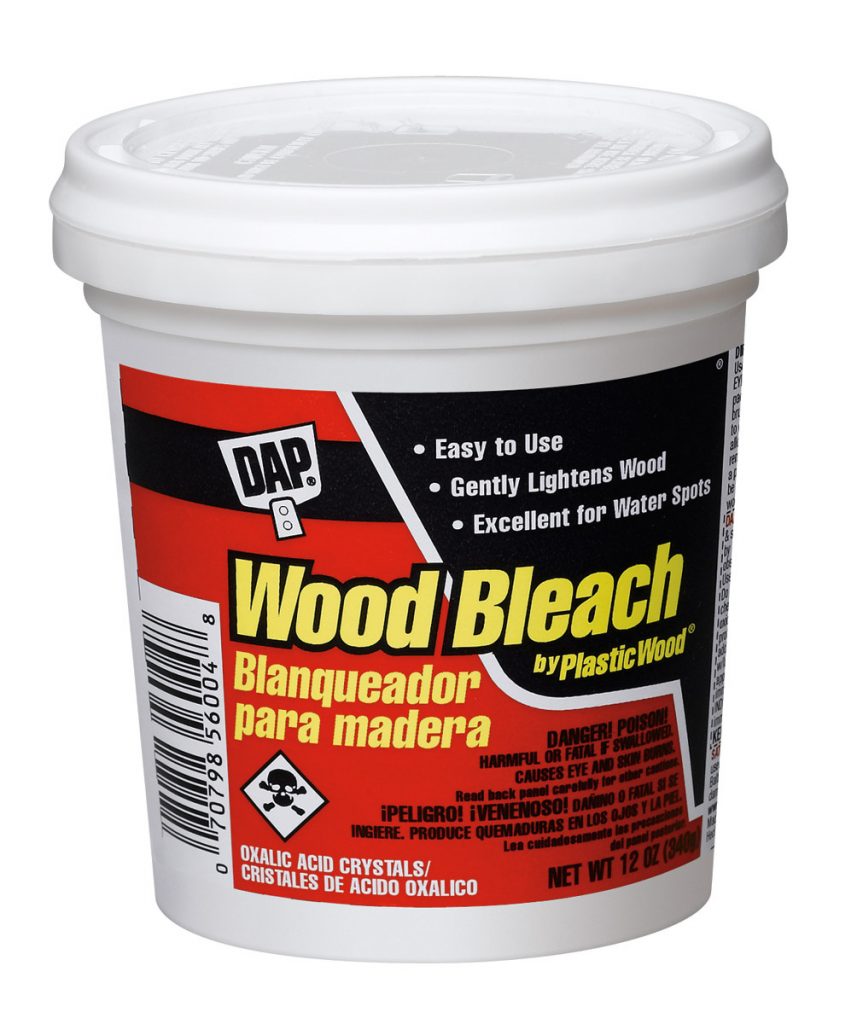
Unlike the previous two bleach types oxalic acid is used primarily to remove dark water/rust stains in wood. It is often labeled as “Wood Bleach”, and it’s easy to mistakenly order oxalic acid when what you really wanted was a two part bleach.
Expectations:
When iron is in contact with tannin in wood it produces a dark stain in the wood. This is usually seen around
nail or screw holes or maybe where an old set of hinges once was. Oxalic acid will remove that discoloration. Tap water can also cause dark stains on wood with high levels of tannic acid because it usually contains trace amounts of iron.
While it will not normally change the wood color itself you should treat the entire surface, not just the area around the stain. Oxalic acid will remove wood oxidation and return grayed and weathered wood to a natural color. Treating the whole surface will ensure that there are no areas that appear lighter than the surrounding wood.
Application:
Oxalic acid is sold in a granular form. To create a saturated solution stir the oxalic acid crystals into hot water in a glass container until no more will dissolve. This solution may be stored for as long as you need to keep it.
Warning: Oxalic acid is very toxic. Be sure to wear a dust mask to avoid inhaling any solid particles while handling.
Apply oxalic acid solution to the work surface with either a rag or a plastic spray bottle until the entire surface is saturated.
Let the wood dry and then re‐wet to be sure the stain is gone. If not then treat again.
Once the stain has been eliminated the wood must be neutralized to remove traces of the acid before applying a finish.
Wash the wood several times with water and baking soda, followed by a clean water rinse.
Let the wood dry overnight and sand lightly as you would with the other types of wood bleach.
]]>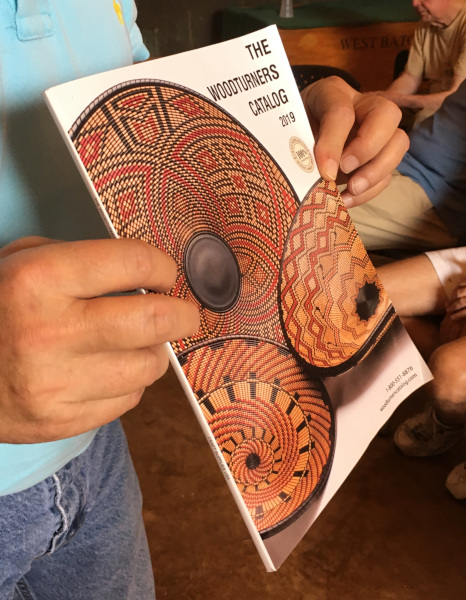
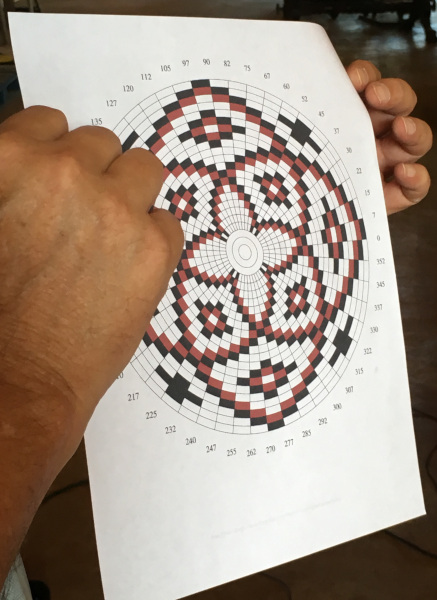
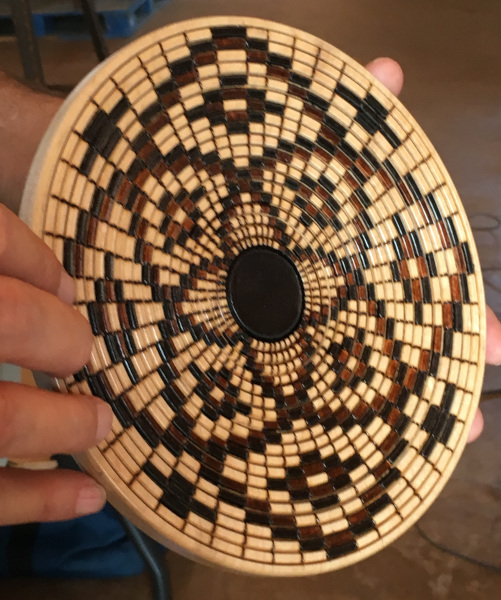
I got interested in the basket illusion on turned items when I saw the bowls on the cover of the latest woodturners catalog from Craft Supplies USA. I have done some research online and gave it a try on a small plate that I turned.
]]>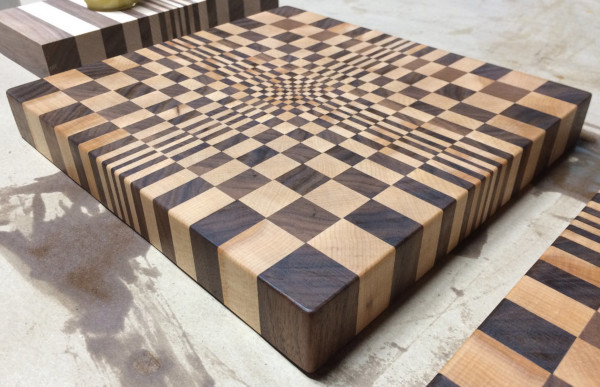
Building this cutting board is not hard, but it requires accuracy. The plan is freely downloadable from mtmwood.com, although you will need to register on the website in order to download the plan.
There are many other plans you can download as well. Some are free, others are not.
The plan is very detailed and is an excellent instructional with all of the information you need to successfully build this board. As a bonus you can also download a SketchUp model of the cutting board. This is important because the plan is in metric dimensions, and SketchUp will let you convert to imperial measurements with whatever granularity you require. We converted to the nearest 1/16″. If you want to work in millimeters then no conversion is necessary.
We built these boards with hard maple and black walnut, but you can use other woods as long as there is a distinctive color difference. Our stock was rough 8/4 so we planed all of it to 1-3/4″. We also had to establish a clean edge using a jointer.
Once the stock was milled we cut 30″ strips according to the plan on the table saw. 42 strips were cut, so there was a considerable amount of waste just due to the blade kerf. Plan to lose about 5″ of board width when making these cuts. Oversize a little to allow planing of each strip. It’s very critical that all strips of the same size be planed to exactly the same thickness. As we planed the strips we marked the thickness on each with pink chalk so that it would show up well on both the light and dark wood. Don’t use a Sharpie because it will soak into the wood and may be visible later.
Once the strips are cut and planed we glued them up into panels (Figs 1 and 2) using Titebond III (waterproof). Note that these panels are color opposites of each other.
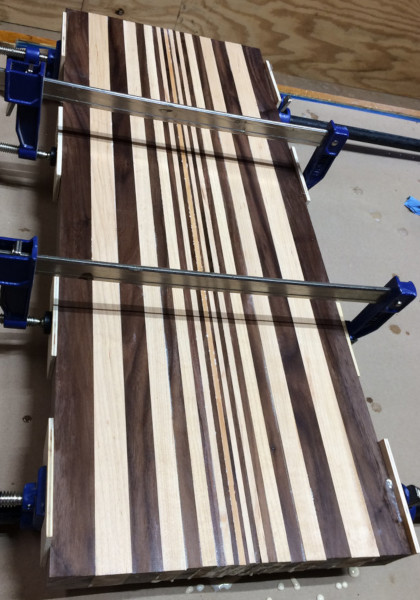
Fig. 1 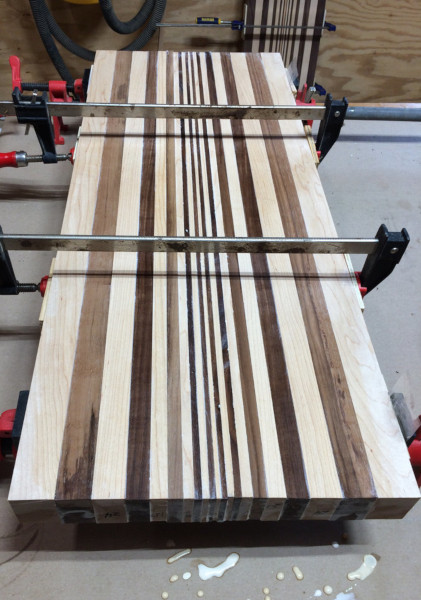
Fig. 2
After the glue dried overnight we cleaned them up by planing each panel to the same thickness. This required a 13″ planer.
We then cut a number of 1-3/4″ strips from each of these panels (Fig. 3). This dimension will determine the thickness of the cutting board.
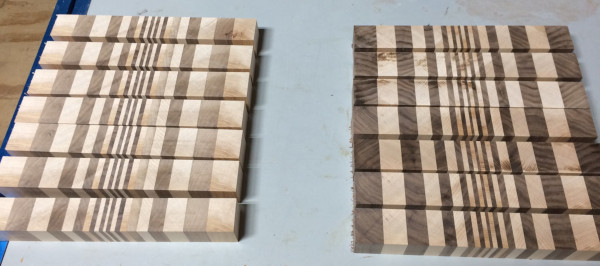
Fig. 3
These strips are rotated 90 degrees so that the end grain is facing upward. Strips of varying thickness were cut from these blanks as per the plan. (Fig. 4)
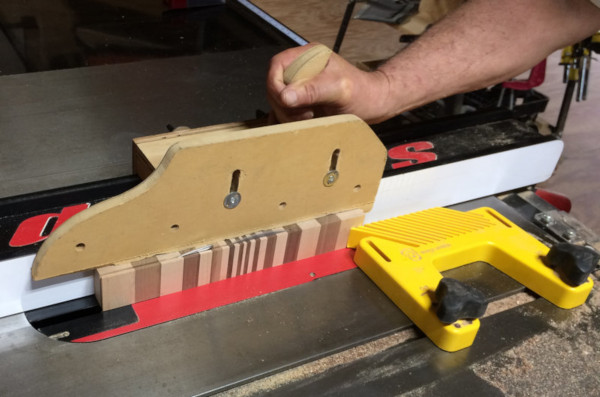
Fig. 4
Here are the strips laid out for two boards (Fig. 5). You can see the different thicknesses.
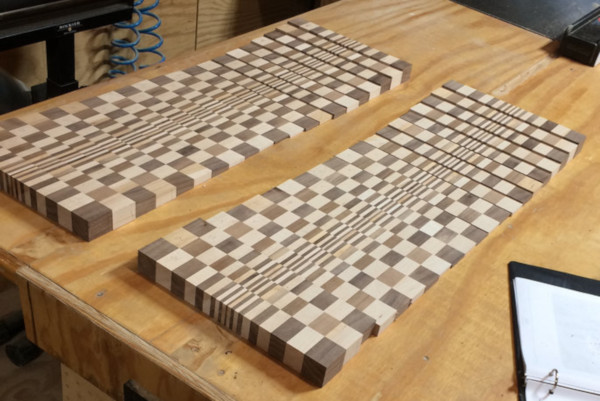
Fig. 5
These strips were assembled in the proper order, glued, and clamped (Fig. 6). Panel clamps help keep it flat.
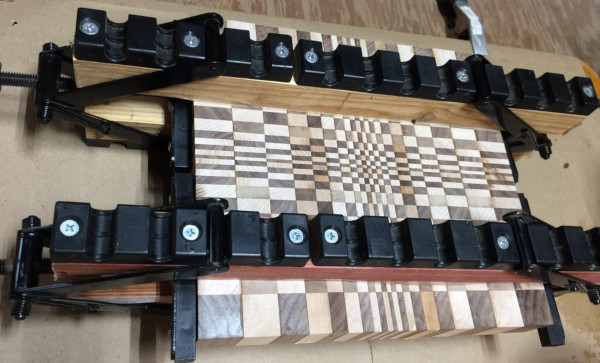
Fig. 6
After drying overnight the cutting boards were run through a drum sander, then sanded again with an orbital sander using 320 grit. Corners were eased with the orbital sander. After sanding the boards were finished with mineral oil, which is the traditional cutting board finish (Fig. 7).
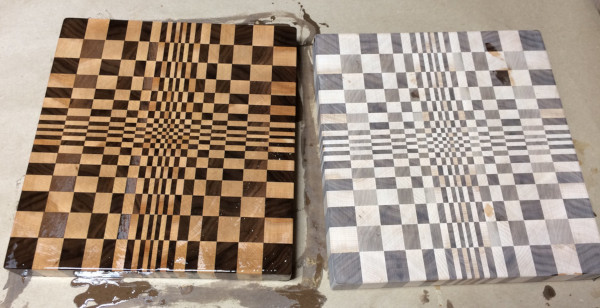
Fig. 7
If you’re interested in building a cutting board like this please go to mtmwood.com to get the plan. Again, it’s excellent and very detailed.
]]>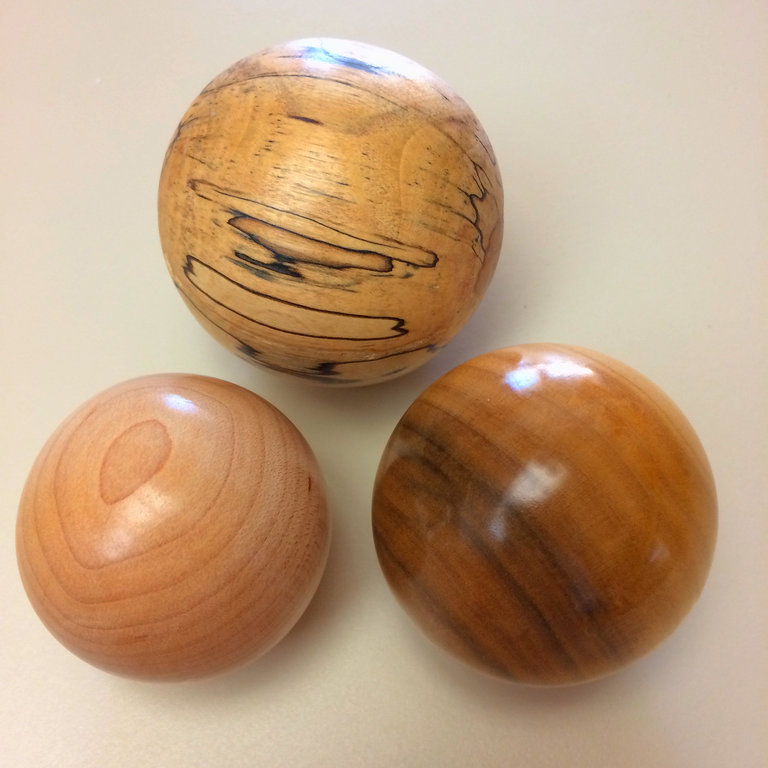
Turning a sphere on a lathe can be a frustrating experience. It’s virtually impossible to free-turn a perfectly round ball by eye without a solid methodology. There is at least one commercially available jig that will accomplish this, but it’s quite expensive unless you need to produce a large number of balls quickly.
I became interested in this strictly because it presents a unique woodturning challenge. I was looking for a method that didn’t require special (or expensive) tools, and this seemed to fit the bill. I can’t take credit for the method described here. I learned this technique from a YouTube video by Alan Stratton although I don’t think he takes credit for the method either. I’ve added a couple of minor things that I think improve the accuracy and ease of use. If you want to watch his videos, they can be found at the end of this article.
Step 1: Create homemade chucks to hold your ball
You will need some special chucks later in the process to turn your ball. These are relatively simple to make although you will need to be able to drill and tap two blanks that will mount on your headstock spindle and on a threaded live tailstock center (Figure 1). In my case I needed a tap that matched my headstock (1″ 8TPI) and one for my OneWay tailstock live center (3/4″ 10TPI). Bore a hole on the lathe 1/8″ smaller than the tap you intend to use, then cut the threads while the blank is mounted on the lathe (not turning).
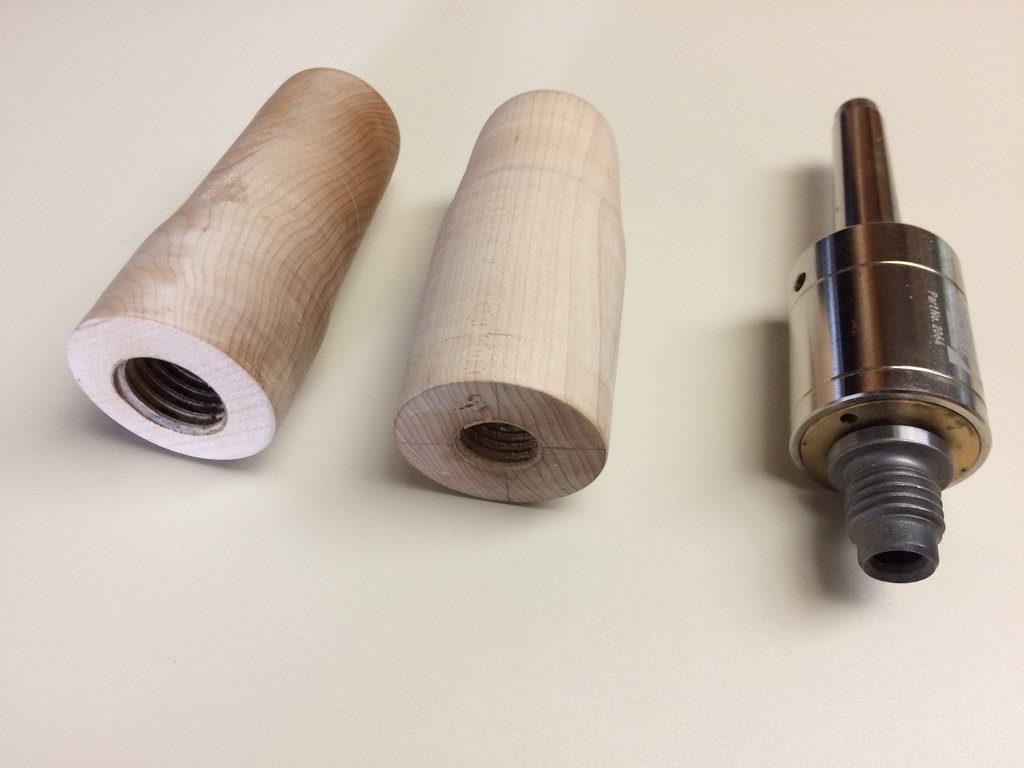
Figure 1. 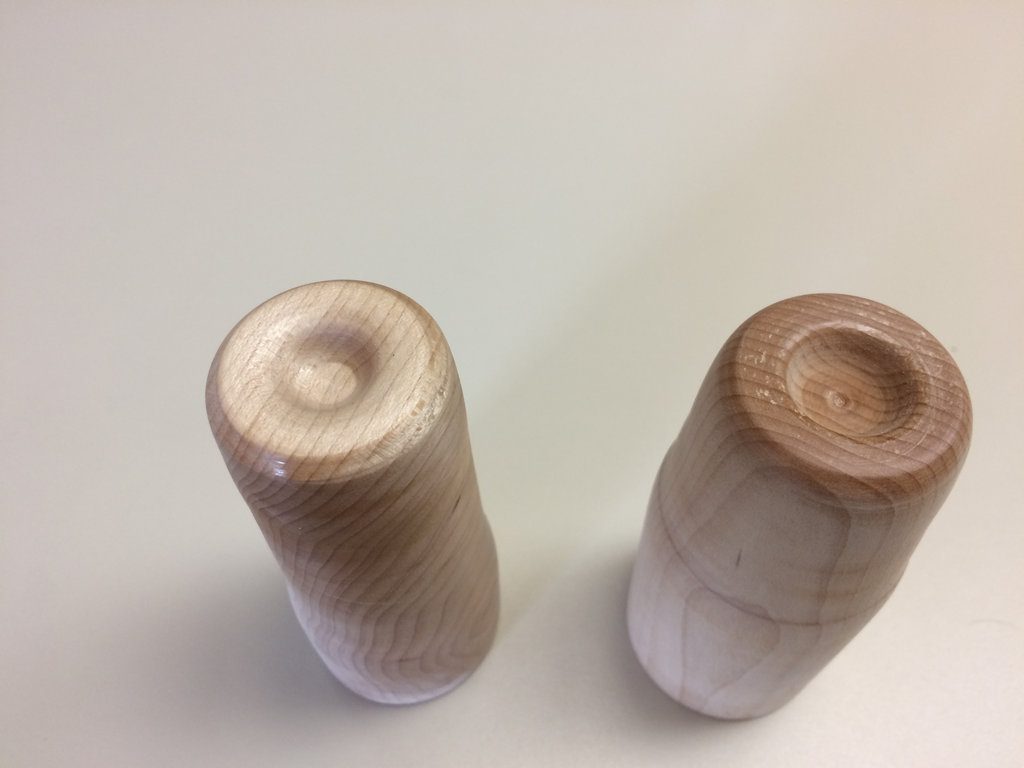
Figure 2.
You then need to turn a small cup on the opposite end that will seat against and center the ball (Figure 2).
Alan Stratton also has a video that shows how to do this (the second video below), and you can modify the method to meet your needs, particularly if you don’t have a threaded tailstock center.
You can use almost any wood to make these chucks, but I used hard maple because I think the threads will last longer.
In Figure 3 you can see the tailstock chuck mounted to the OneWay live tailstock center.
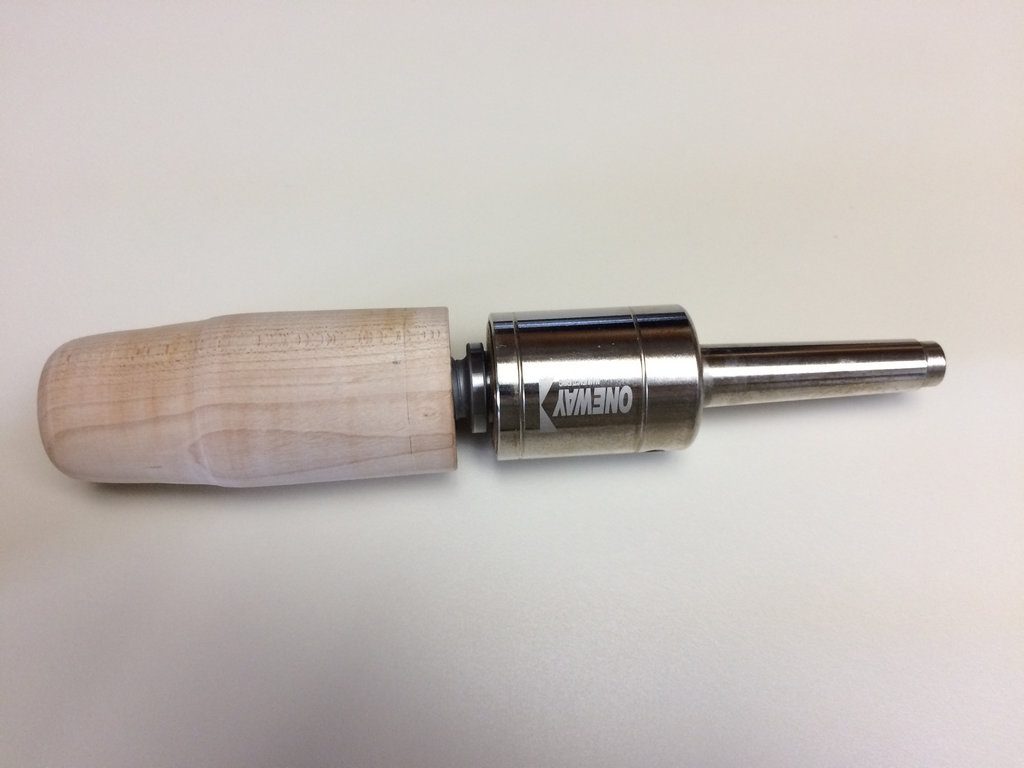
Carter makes a neoprene cup system that will take the place of these chucks if you don’t want to make them. There are currently two versions. One threads directly to the headstock and has a threaded tailstock cup that will mount to your 3/4″ live tailstock center (like the OneWay center in Figure 1). It sells for about $80. The other has its own live tailstock center and sells for about $100. Either can handle balls from 2″ to 6″ in diameter.
Step 2: Turn the blank
Turn a cylindrical blank with approximately the same diameter across the length of the workpiece (Figures 4 and 5). If you’re starting with rough wood use a roughing gouge to cut the wood down.
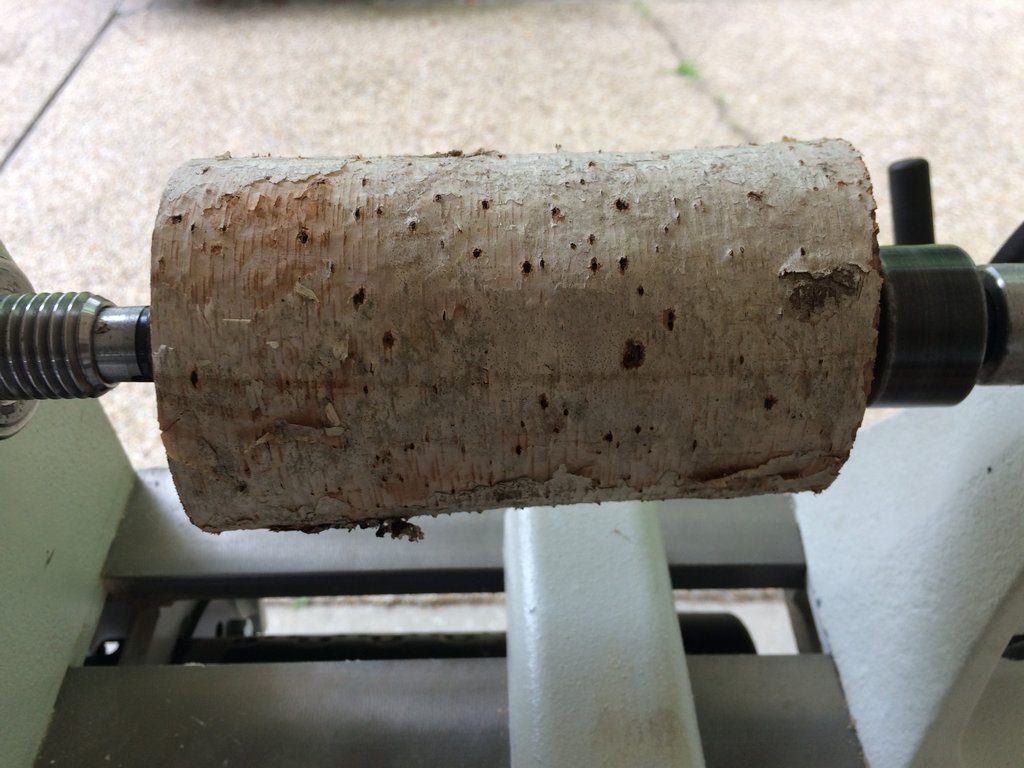
Figure 4. 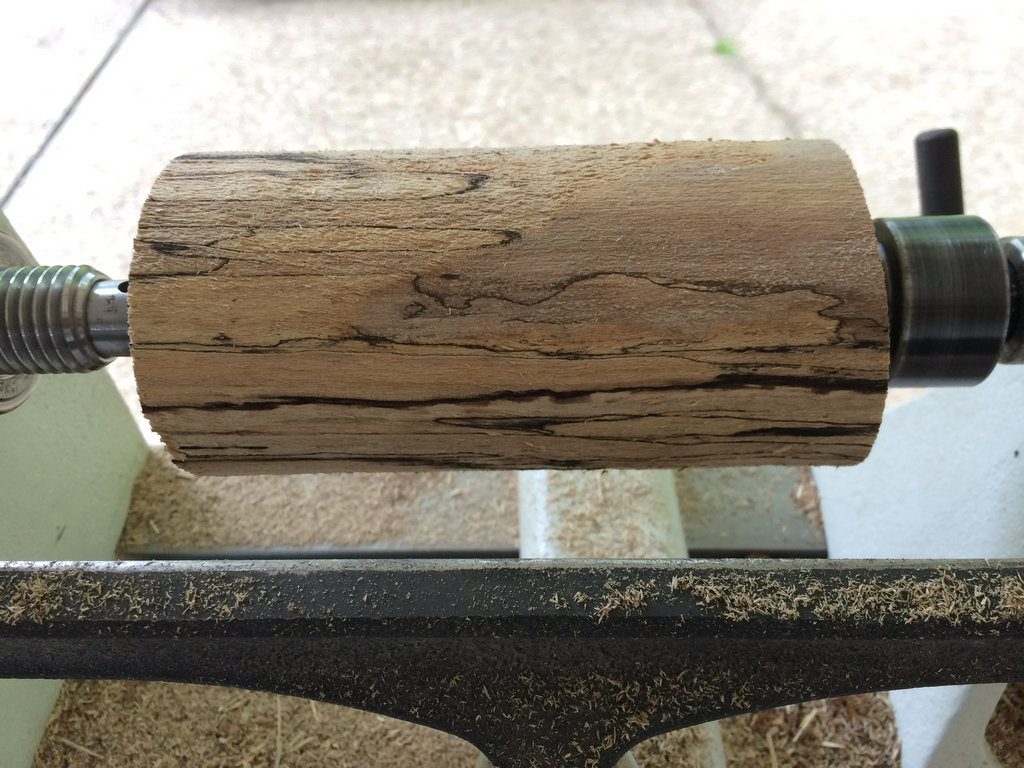
Figure 5.
Step 3: Rough out the sphere
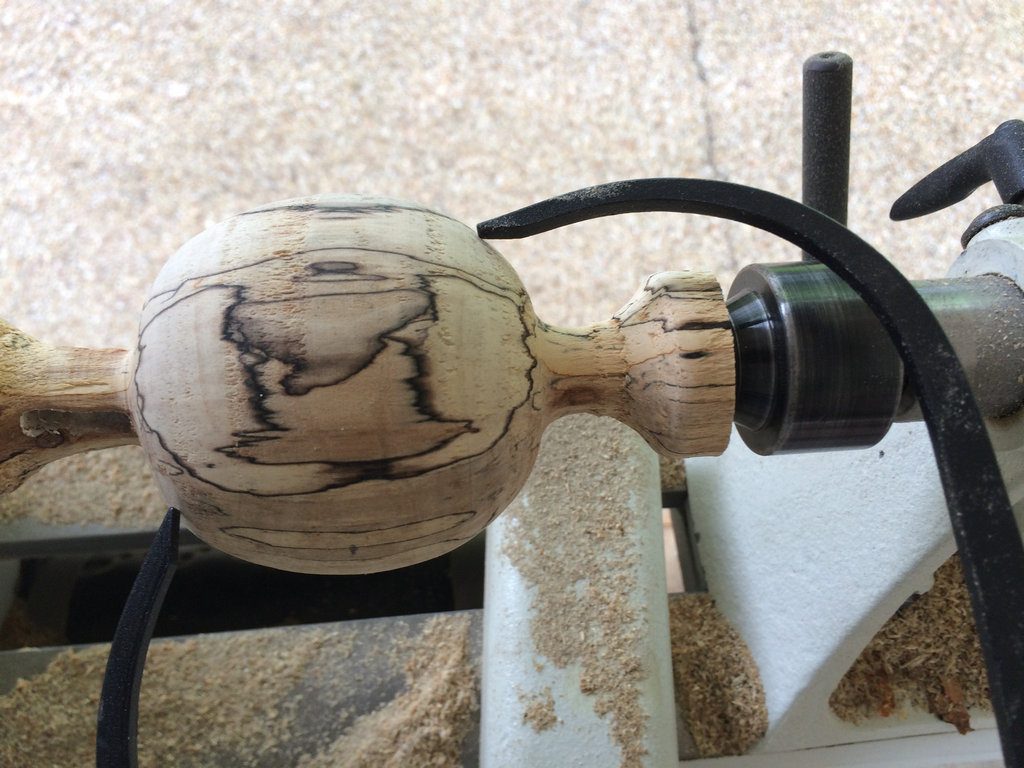
At this point you can begin to remove waste to approximate a rough sphere (Figure 6). It’s important to make sure that the elliptical form is longer than the diameter of the blank. The goal is to make it somewhat egg shaped. This gives you room later to shape it to match the original diameter of the blank. This will become more clear in the next steps
Once you have the ball roughed out then use your caliper to find the greatest diameter (Figure 7).
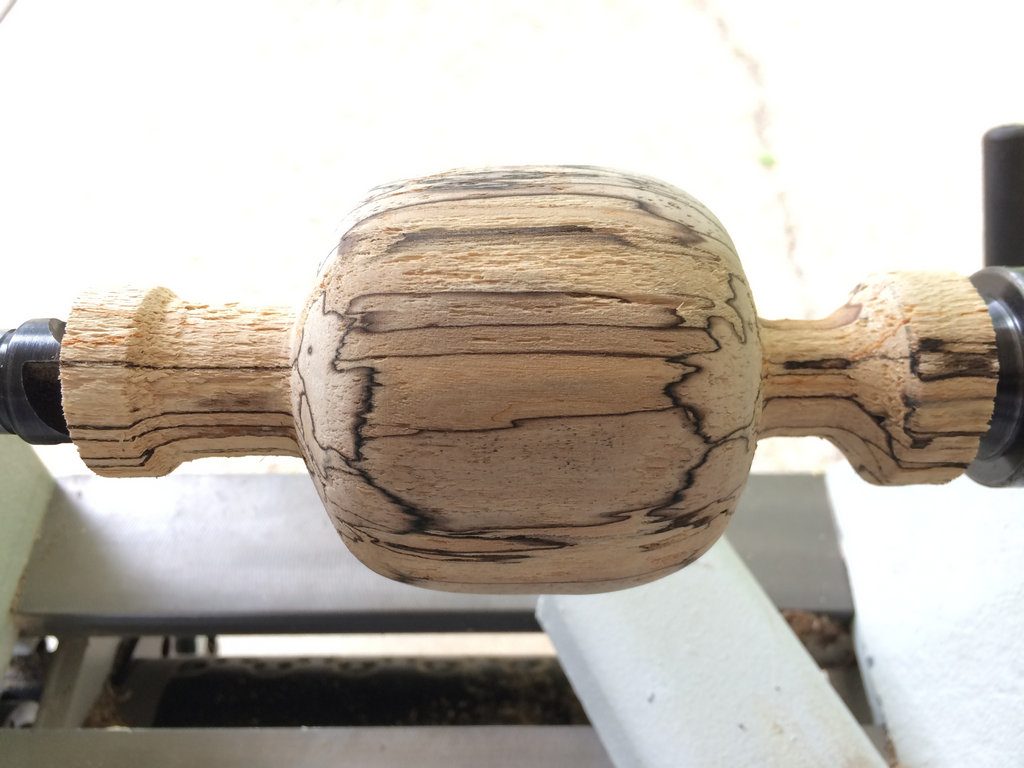
Figure 6. 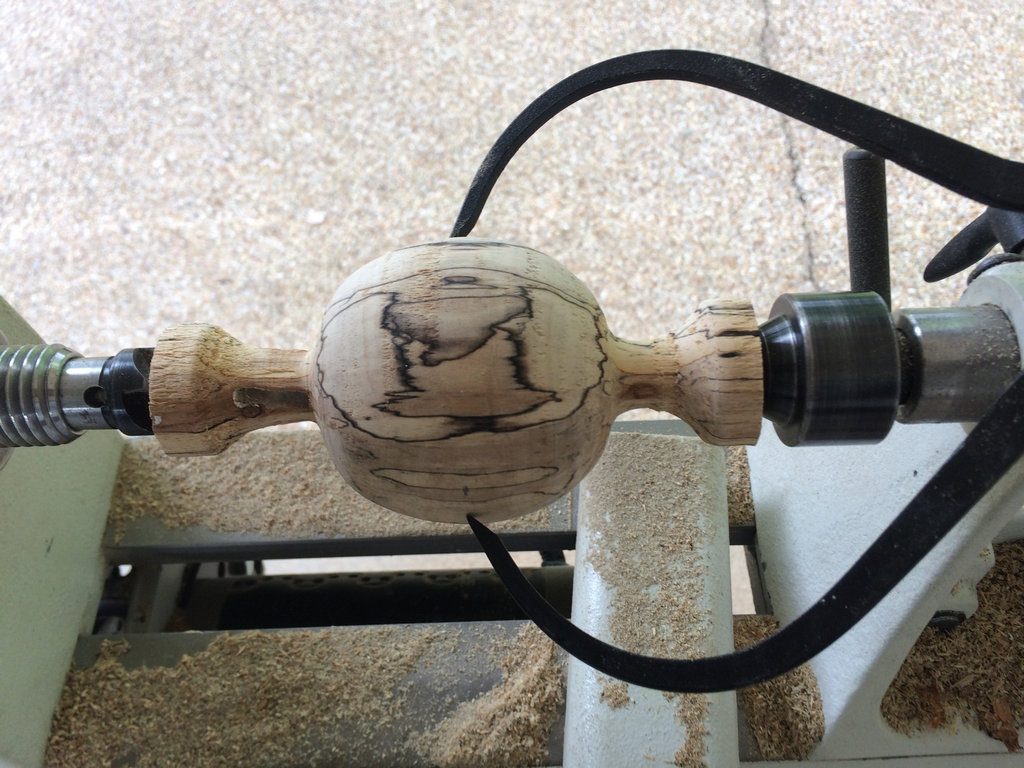
Figure 7.
As you continue to turn check frequently to ensure that the outlying areas of the ball are not smaller than the original diameter of the blank (Figure 8).
Step 4: Mark the center
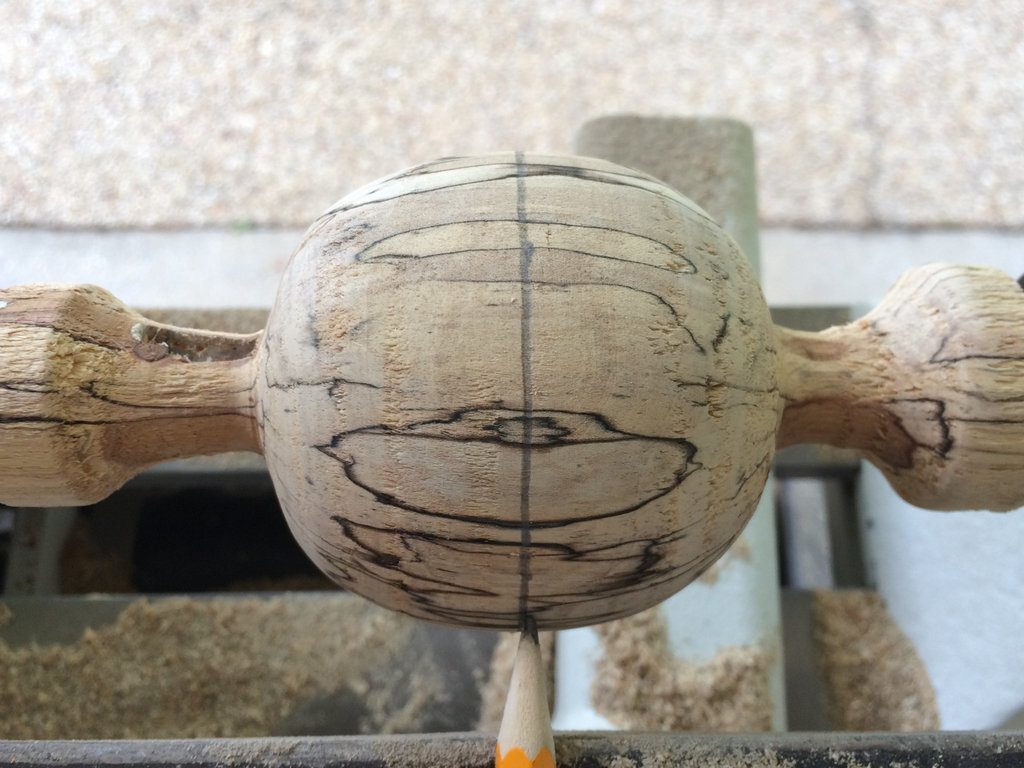
When you’re fairly close to an approximately round ball again use your caliper to find the greatest diameter and mark it by placing a pencil against the workpiece and manually rotating the lathe to draw a line completely around the workpiece (Figure 9). Don’t forget this step!
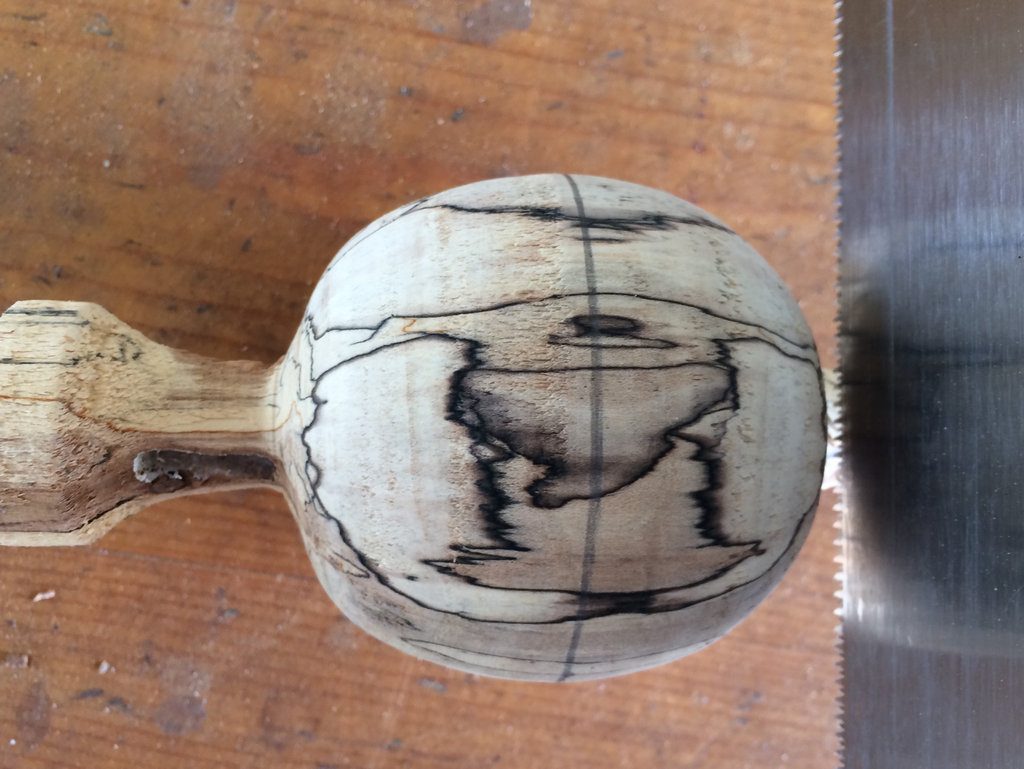
Now you can remove the workpiece from the lathe and cut off the connecting pieces (Figure 10).
Step 5: Mount the rough ball on your homemade chucks
Ok, at this point, we have a rough ball that has been turned along one axis. Now we have to turn the ball along a perpendicular axis. To do this first mount your homemade chucks on the lathe and butt them together. Place a pencil mark on each (Figures 11 and 12) so that you can align the line you previously marked on the ball with the centerline of the lathe.
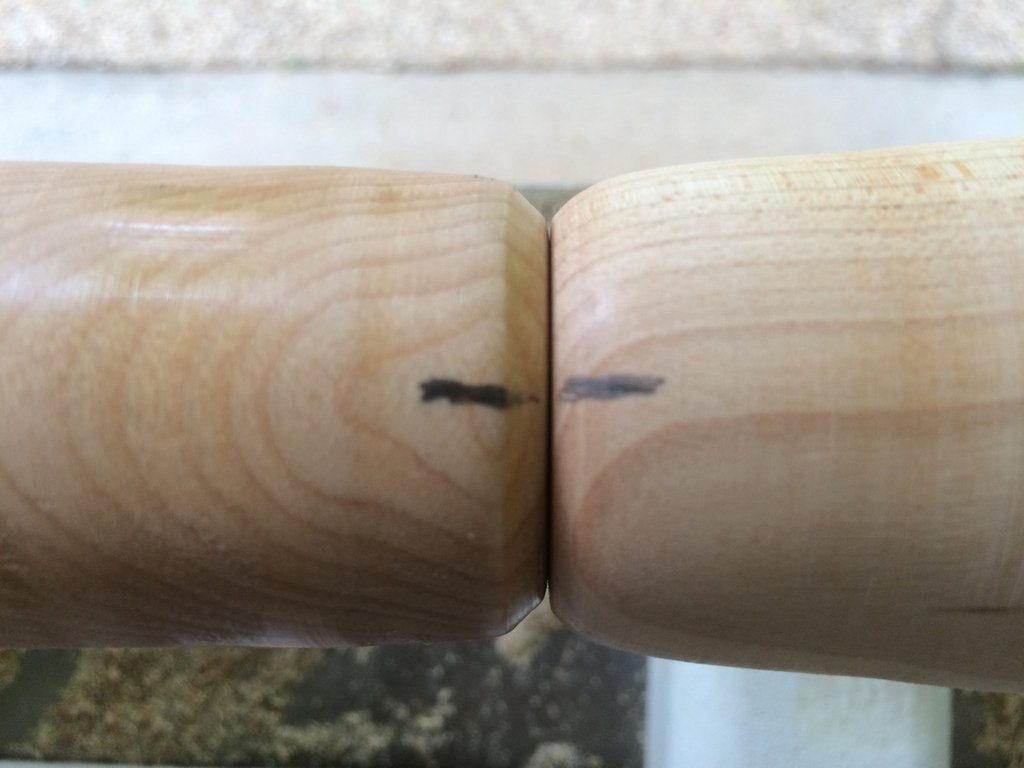
Figure 11. 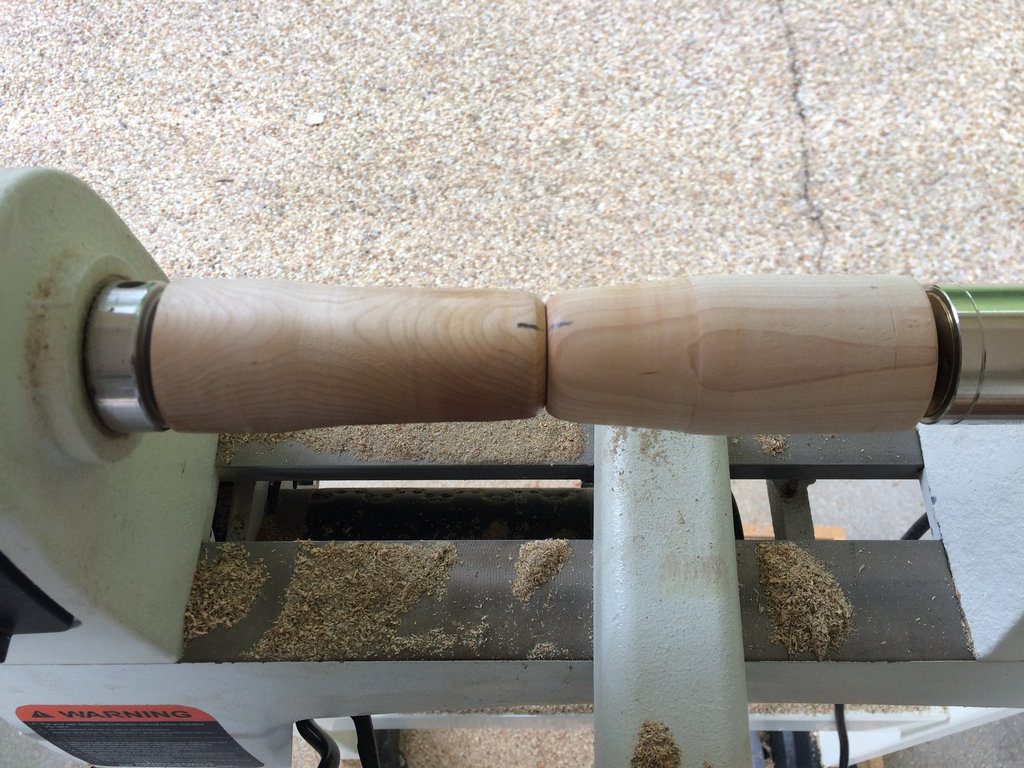
Figure 12.
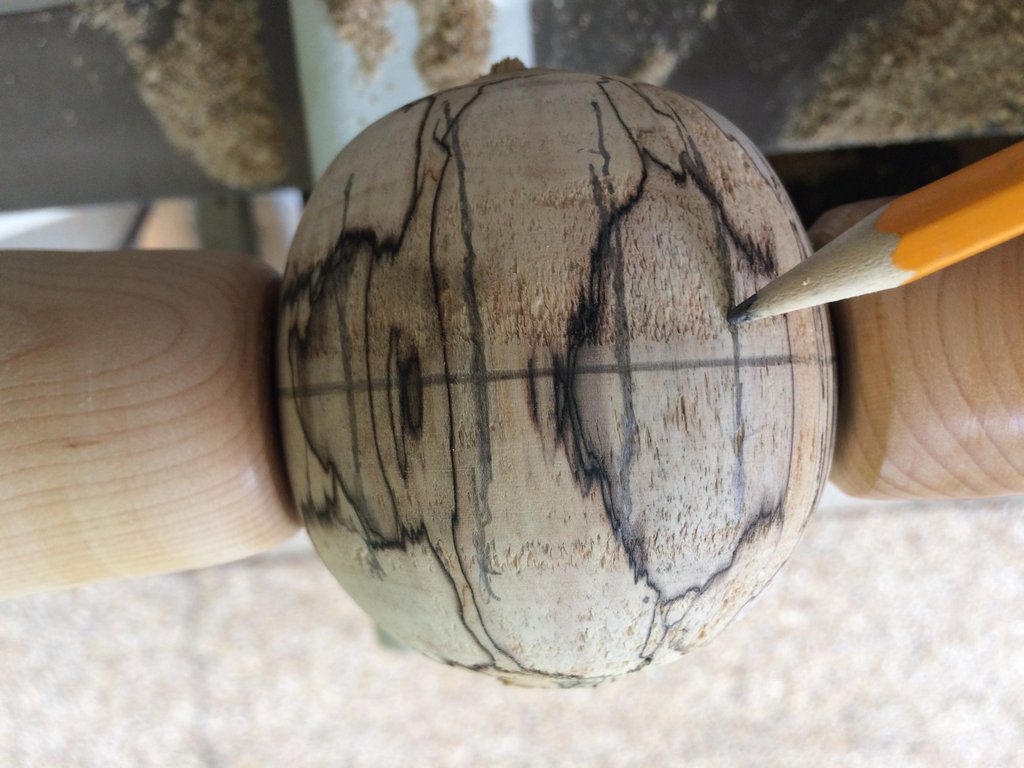
Mount the ball between the chucks and draw some additional lines perpendicular to the original line. This will let you gauge how close you’re getting to the original line as you turn on the perpendicular axis (Figure 13).
Step 6: Turning in a perpendicular axis
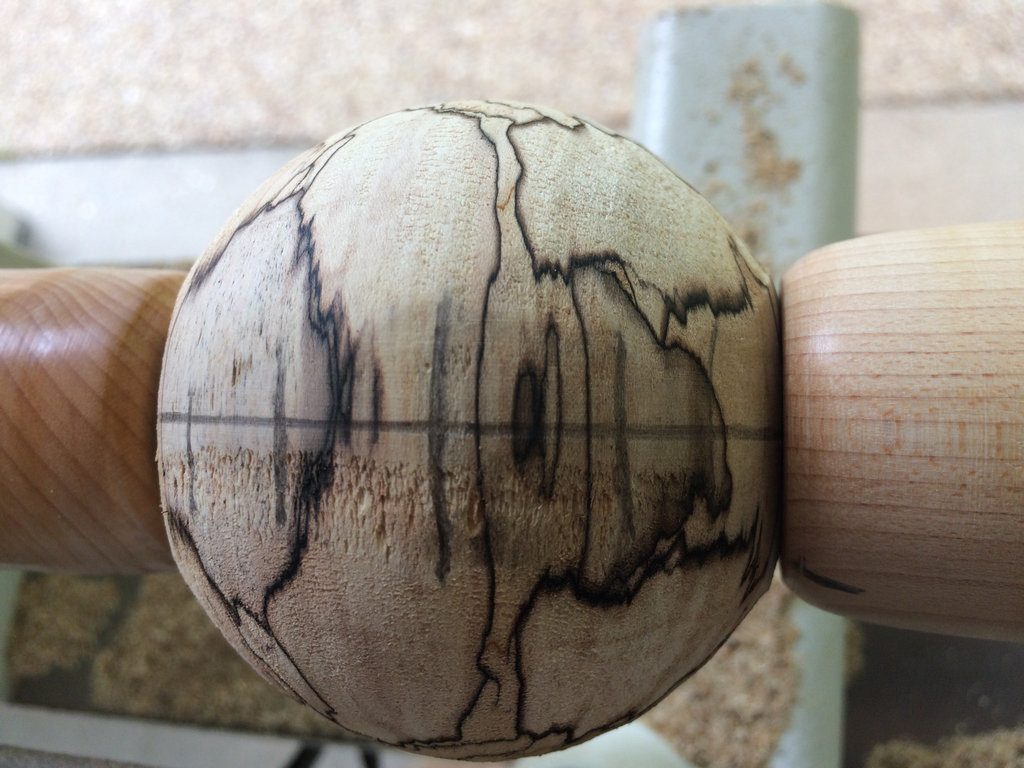
The idea here is to turn in this axis until you get very close to cutting through the centerline mark. You need to be really careful here, and stop often to check how close you’re getting. This is where the perpendicular lines you made previously are very helpful. They let you see how close you are without actually cutting through the original circumference line (Figure 14).
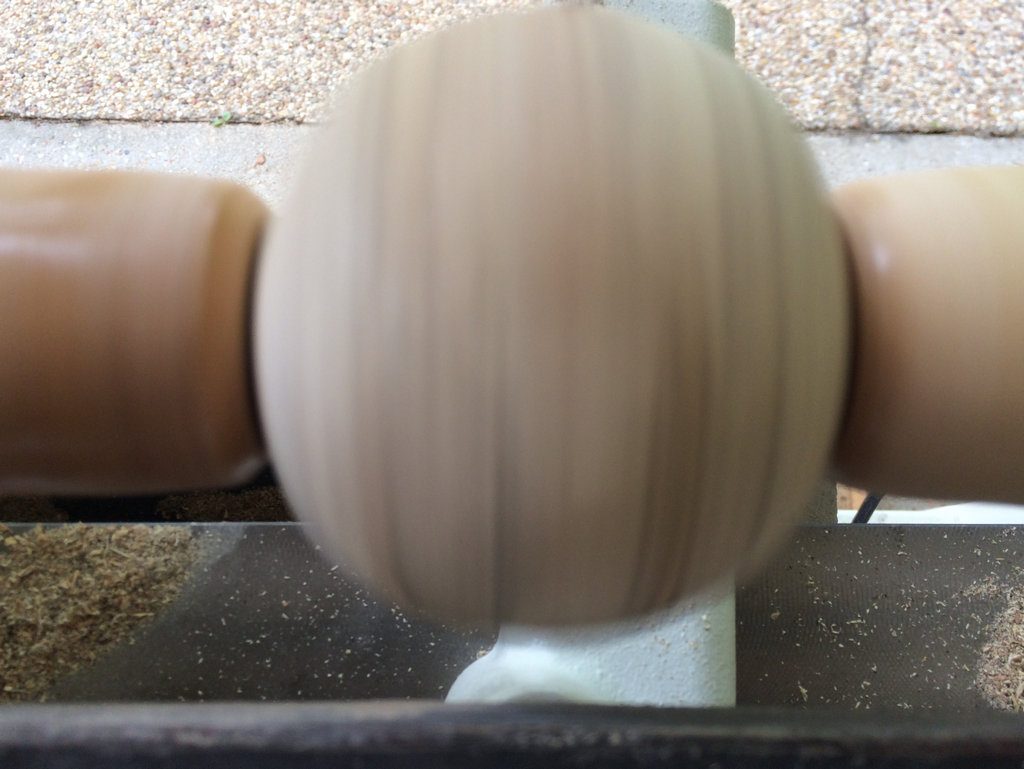
Initially you can also watch the “ghost” image as the ball is spinning to see how much out of round you are. Look at the bottom of the image (Figure 15) and you can see this. You should only rely on this until you get close to round, then go slowly, stopping often to check the perpendicular marks (Figure 14).
Step 7: Final steps
The only thing left to do is to clean up the small area that has been protected by the chucks (Figure 16). Draw another circumference line like you did in Step 4 and rotate the ball in the chucks. Turn off that little area until you reach the new line.
Sand the ball lightly while still on the lathe, constantly moving the sandpaper and turning often to avoid sanding too much in one area (Figure 17). You don’t want to create flat spots anywhere on the ball, so go easy and keep moving.

Figure 16. 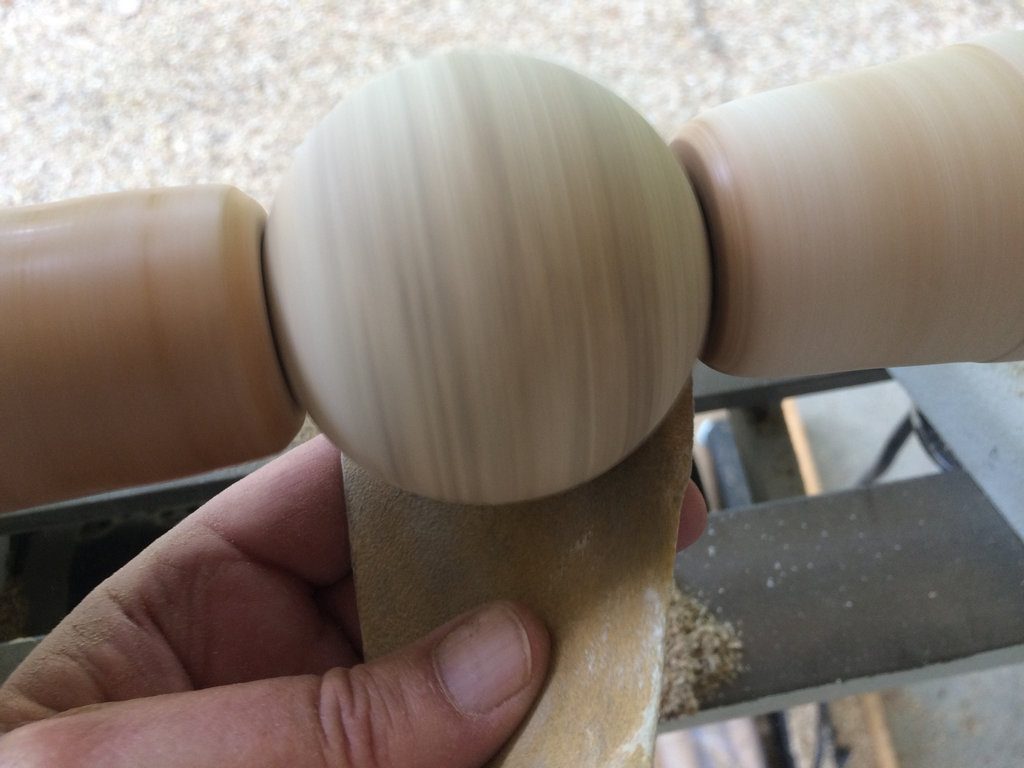
Figure 17.
That’s it! I encourage you to watch the two videos by Alan Stratton below. In makes much more sense when you can actually see the process. Also, I have some useful tips below as well.
Some Additional Thoughts
- As previously noted, in the second video that describes how to make the chucks, there is a short segment in which Alan describes a way to make the tailstock chuck if you don’t have a threaded live center. This is worth noting if you don’t have a threaded center and don’t want to buy one. You can also avoid having to buy a tap to cut the threads for the tailstock chuck. So really the only thing you might have to buy is a tap for your headstock chuck. That’s a pretty economical way to turn some balls, and the headstock tap is useful for making other things like additional faceplates, jam chucks, etc.
- Be careful not to apply too much pressure when mounting your ball between the chucks. Particularly with soft woods you can dent the workpiece.
- If you plan to finish your ball on the lathe you’ll have to finish part of it, let it cure, and then rotate the ball between the chucks to finish the rest. This is a problem (particularly with film finishes) because the chucks will dent the finish you just applied. For this reason I use a wax finish, although I’ve been able to use a friction polish and clean up the damage with 600 grit paper after it’s removed from the lathe. I then had to rub out the sanded areas with polishing compound. This is far from ideal, and a lot of work, so I’ll be taking a look at the Carter chucking system because it uses neoprene cups which shouldn’t damage a properly cured finish.
- I’m also looking for something that I can apply to the homemade chucks that will be soft enough to avoid finish damage. Maybe rubber cement or something similar. It will take some research to find something that works and doesn’t interact with the finish.
- I plan to shorten my maple chucks and recut the cups. I think shorter will run more true, which is essential. If you’re making a set make them shorter than mine, and I think you’ll have better results.
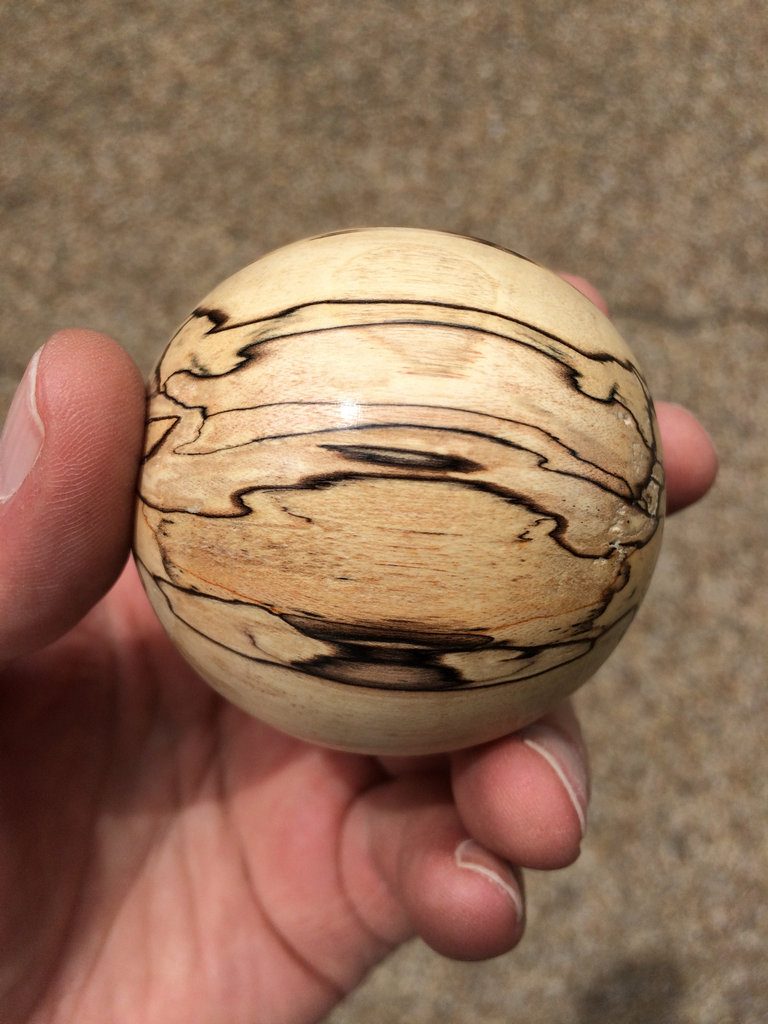
- The wood that I used in this article is spalted river birch finished with Hut Wax PPP. The wood was very punky and did not turn well at all as it tended to break out rather than turn smoothly. If you look closely at Figures 5 and 6 you can clearly see this. I’ve had much better luck with tight grained hardwoods, but it’s hard to beat the color and interesting features of the spalted wood.
Alan Stratton’s YouTube Videos
 ]]>
]]>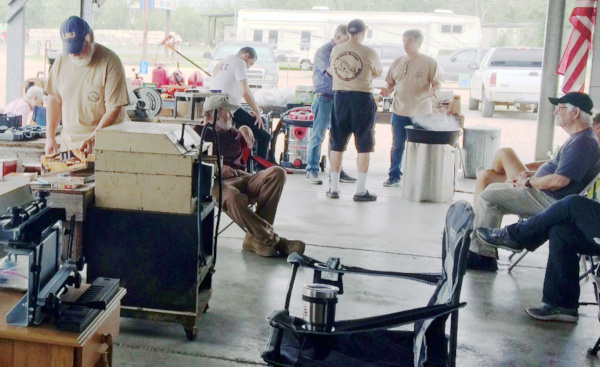
2019 BRWC Tool Swap Event was a big success. Lots of money swapped hands, and lots of tools found new homes. Many thanks to [brwc_user id=”3″] who chaired the planning committee and made the flea market available, and to [brwc_user id=”127″], [brwc_user id=”106″], and [brwc_user id=”93″] who served on the committee and made sure that the drinks, food, utensils, etc. all made it to the event. A special thanks to [brwc_user id=”4″] who again hauled out his cooking rig and cooked an outstanding jambalaya!
I’m not sure how many actually attended since quite a few drifted in and out, but it was a pretty good turnout. The rain did make an appearance, but only briefly.
So again, thanks to all who put this together, and if you didn’t make it save your old tools for next year!
Bob Chambers
Pictures from 2019 Tool Swap Event
[See image gallery at www.brwoodworkers.com] ]]>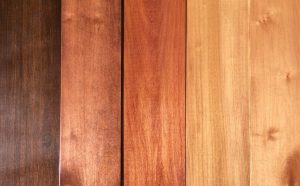
Staining wood is probably the thing woodworkers dread the most, and the reason is that so many common woods that we work with are prone to blotching. Testing your finishing strategy can certainly spotlight potential problems, but unless you test lots of scrap there’s always the chance that you can be in for a nasty surprise once the stain goes on. Gel stains can help tremendously with woods that often blotch, and in this article we’ll take a look at how gel stains work, how they compare to traditional stains, and how to apply them. We’ll also look at a couple of other interesting things that you can do with gel stains that would not be possible with other types of stains.
Stains In General – A Quick Review
Before we dive into gel stains, let’s take a minute to review traditional stains and how they work so that the difference between those stains and gel stains will make more sense. All stains have at least three major components in common. They contain a colorant, a binder, and a solvent.
Colorant
The colorant in a stain is usually a solid, finely ground, synthetic pigment. Stains may also contain a dye, and some contain both. Pigment, being a solid, will sink to the bottom of the can if it’s left undisturbed, so the stain must be well‐stirred before and during use.
When you apply a traditional stain to raw wood the pigment finds its way into all the tiny scratches and pores in the wood and lodges there, giving the wood a new color.
Binder
A binder is what actually keeps the pigment from simply blowing off the wood like dust after the solvent evaporates, so it acts like a glue to hold the pigment in place. Binders can be any of four finishes: oil, varnish, water‐based, or lacquer.
The type of binder used in the stain is critical to how much working time you have to get the stain applied, evened out, and the excess removed. Oil‐based stains give you the longest working time, followed by varnish and water‐based, and finally lacquer, which has an extremely short working time.
Most common stains that you find at the big box stores and hardware stores are oil based. If not they are usually labeled with something that makes sense, so you can usually distinguish between an oil stain and a varnish stain for example. When using an oil stain it’s imperative that you remove all of the excess stain after applying. Oil dries extremely slowly, and never gets very hard. A heavy oil layer on your wood makes it difficult for the finish to achieve a good bond with the wood, and having a soft underpinning for your topcoats can lead to finish failure due to cracking, peeling, or blistering.
Solvent
The solvent in stain is simply whatever the binder is soluble in. In the case of oil and varnish stains it’s mineral spirits. The solvent really plays no role in the staining process itself other than to thin the mixture enough to apply.
Blotching
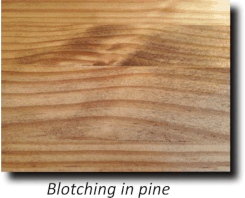
What is blotching and what causes it? Blotching is uneven stain
penetration caused by variations in wood density, and it leads to dark,
splotchy areas of color. Traditional stains penetrate slightly, and varying
density within the wood allows it to penetrate more in some areas than in
others. Softwoods like pine and fir will blotch significantly, as well as tight
grained hardwoods like poplar, maple, cherry, birch, and alder. Some
woods do not blotch. These include oak, walnut, mahogany, and ash.
Typically blotching is controlled by using either a commercially available pre‐stain control agent or a “wash coat” of thinned out finish. Pre‐stain treatments work by partially blocking the sites where pigment can lodge in an attempt to minimize penetration in the less dense areas of the wood.
This can be hit or miss, and it requires lots of testing, especially if you are making your own wash coat. It doesn’t help that in at least one case the manufacturer gets the directions totally wrong, advising you to apply your stain before the pre‐stain is fully cured.
There is a price to be paid for using a pre‐stain conditioner. The very thing that makes pre‐stain conditioners effective will also result in less stain penetration and, therefore, lighter color.
Sometimes blotching is desirable, as would be the case with birdseye maple or burled wood.
Wood Preparation
Any pigment stain requires that there be a certain amount of “tooth” be left on the wood so that the pigment has something to grab onto. Oversanding with very fine grit might feel nice, but you’ll find that when you wipe off the excess you might not have much color left. My preference is to sand to no more than 150 – 180 grit if I plan to use a film finish like varnish, shellac, or lacquer. Just a couple of coats will bury the roughness. If you plan to use an oil finish then 220 grit is probably good enough.
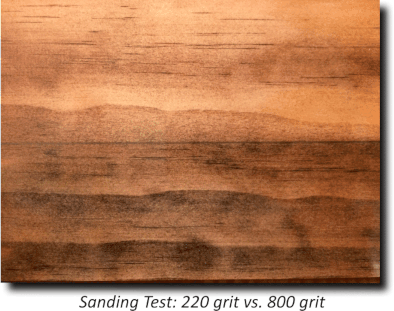
Using an orbital sander is fine, but I always finish sanding by hand in the direction of the grain. This helps eliminate any swirl marks you might inadvertently have.
Of course if you don’t plan to use a stain then sand as smooth as you like.
As a side note, dyes will penetrate fine regardless of how smooth you sand.
In the picture at left the top of this pine board was sanded to 800 grit, the bottom to 220. No pre‐stain conditioner was used that would have affected the coloring, and you can see the difference in color after wiping the excess off. You will also notice the blotching that is typical of pine stained with a traditional oil‐based stain.
Scratches, Gouges and Mill Marks
All stains, including gel stains, make any imperfections more noticeable. Sanding across the grain, cuts from marking knives, gouges, mill marks, etc. on the surface are often very difficult to spot until the stain goes on. Wetting the surface with mineral spirits will sometimes make imperfections easier to see, but not always. Shining a light across the surface may also help you spot them more easily.

As you can see in the pictures above it pays to take extra care to eliminate as many imperfections as possible before the stain goes on. Once that happens there is very little you can do to resolve the problem short of sanding back to bare wood and starting over.
Gel Stains
Finally we get to the point of the article—gel stains. Gel stains are similar to traditional stains in that they also contain a colorant (almost always pigment), a binder, and a little solvent. But they differ in one important aspect ‐ they are many, many times thicker. Think of chocolate pudding, and you won’t be far off. They are also primarily varnish‐based stains rather than oil, although you may run across some that are water‐based. In this article when we refer to gel stains we are talking about varnish‐based stains. They achieve their thickness through the addition of a thixotropic agent which causes them to gel. While some are thicker than others, there’s really not much difference. In addition to staining wood gel stains can also be used to color metal and fiberglass. They are also excellent for use as a glaze.
So, how do they control blotching? It’s really fairly simple. Gel stains, because of their thickness, sit on top of the wood rather than penetrating into areas of less density so the coloring is fairly uniform, even on woods that are difficult to stain like pine or cherry.
These stains work so well at minimizing blotching that you probably won’t need a pre‐stain conditioner. While gel stains are more expensive than traditional stains, you’ll probably come out ahead if you normally buy a commercial pre‐stain conditioner. And your results will be much more predictable.
Unfortunately they won’t solve the problem of end grain staining darker than the rest of the wood, but that’s more due to lack of sanding than the fault of the stain. Most woodworkers tend to neglect the end grain when sanding because it’s harder to do. Sanding end grain to the same level as everything else will drastically improve the evenness of the color.
A gel stain will also stay where you put it, so it’s excellent for staining vertical surfaces without a lot of mess. You’ll still likely make some mess, but the stain won’t be running down your arm.
Application
Gel stains are best applied with a rag, and I think it works better to apply it like you would a car wax using a circular motion. This lets you hit the wood from all directions, ensuring that no areas are skipped. It’s possible to apply with a brush, but this takes longer and eats into the time you have to wipe off the excess.
If you’ve been reading closely you might remember that varnish stains have a shorter working time than traditional oil‐based stains. Since gel stains are primarily varnish‐based then they too have a shorter working time. Water‐based gel stains perform similarly. This means that once applied you have to work quickly to get the excess off before the varnish begins to set. Think about how quickly a wipe‐on varnish begins to get tacky and you’ll understand why speed is important.
If you don’t work fast you can end up with streaks on your workpiece. So it’s advisable to have someone help if you’re working on something large like a big table top. Aside from that you can easily manage it yourself by working on one section at a time. For example, work on a single table leg and make sure it’s to your liking before moving on to the next leg.
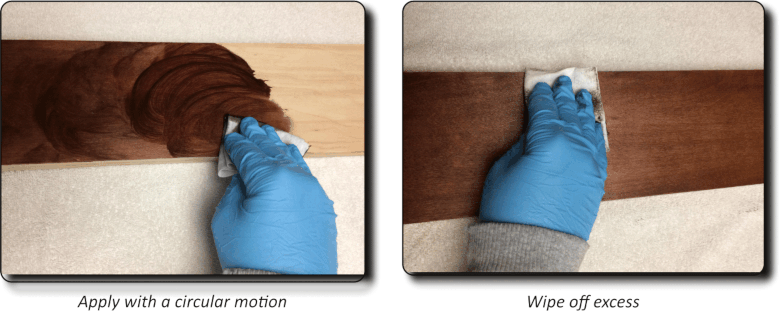
In contrast to an oil‐based stain where excess removal is mandatory, with a gel stain it’s not necessary because the varnish binder will dry fairly hard. It won’t be as hard as its liquid varnish counterpart, but certainly much harder than oil. So you have the option of wiping off the excess or leaving it. Just be aware that if left on too thick the grain will be muddied or even totally obscured.
Building Color
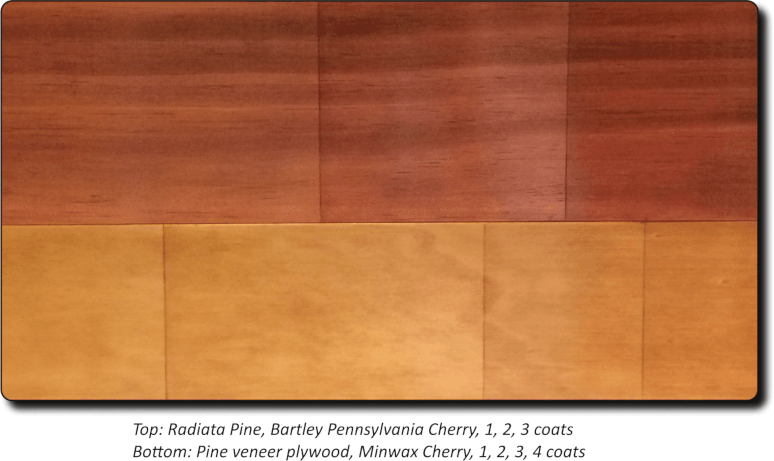
Most of the color will be achieved with the first coat. However, if you need a darker color you can apply a second coat (or more) after the previous coat has sufficiently cured. Gel stains build color slowly, so you have a certain amount of control over how dark it gets. Like any varnish you should let it cure overnight before applying the next coat.
You can apply as many coats as you want, but applying too many coats can obscure the grain of the wood, particularly with darker stain colors. So again, test your finishing strategy (including sanding) using scrap wood all the way through.
Top Coats
Gel stains, even though they are essentially a thin varnish coat, must be topcoated with a film finish for protection. Because the stain sits on top of the wood any scratches will go right through the stain, exposing bare wood underneath. The stain can also wear off under high use, resulting in the same thing. Gel stains may cure to a dull sheen, so in most cases a film topcoat will be desirable anyway.
If you’re using a gel stain as a glaze (more on that later) you should apply it after only one or two coats of finish. The reason for that is to allow enough finish coats to adequately protect the glazing from damage or wear.
The recommended finishes are gel varnish and polyurethane for varnish‐based gel stains, although you may also use shellac and lacquer.
If you plan to use lacquer there are a couple of things to keep in mind. The stain must be fully cured and very thin, so you need to wipe off all the excess as you apply it. Thick coats of gel stain can cause lacquer to wrinkle. If this happens during your testing you can try applying a coat of dewaxed shellac first, before applying lacquer. This will give you a barrier between the varnish and the lacquer.
You can also try misting on a few very light coats of lacquer until you begin to get a film build, then go ahead with a normal coat.
I have successfully applied brushing lacquer over gel stain ( wiped off excess) after allowing several days to cure.
Examples
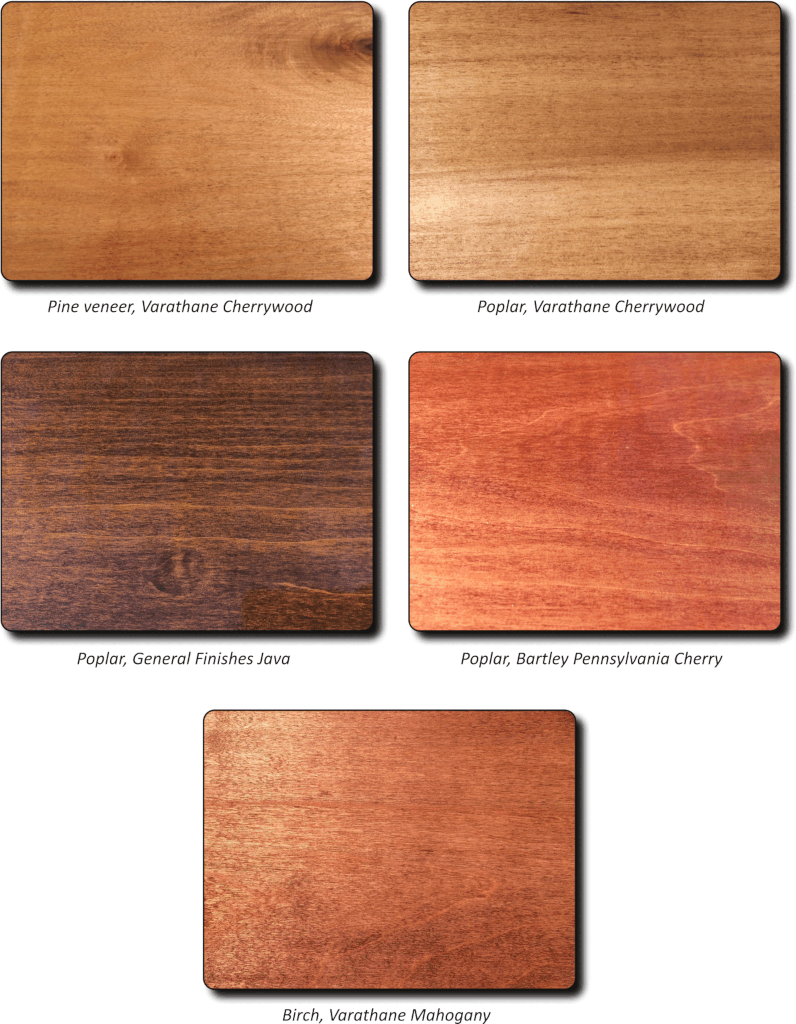
All of these samples were stained with gel stain and topcoated with wiped on polyurethane, the exception being the birch sample. It was finished with lacquer. No pre‐stain conditioner was used. The samples were all sanded to 150 grit, and gel stain was applied directly to the raw wood.
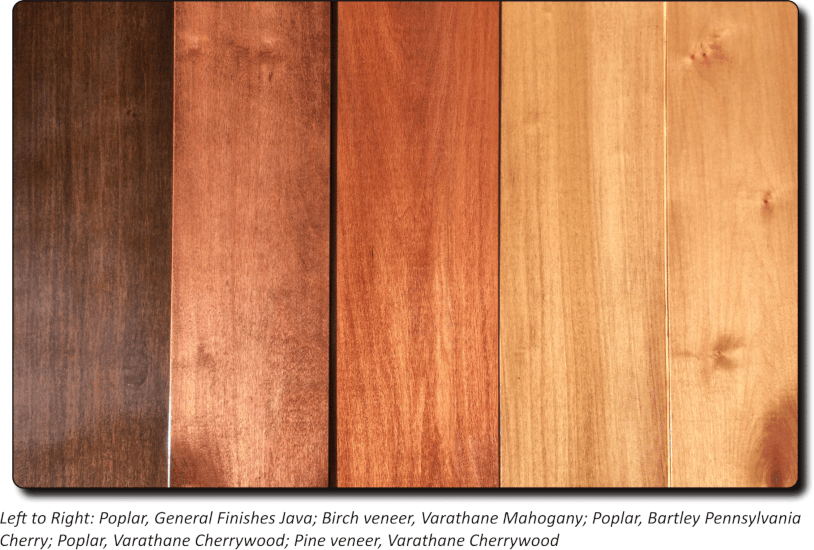
As you can see there is very little, if any, blotching on any of these samples.
Using Gel Stain As A Glaze
Glazing is a coloring technique whereby color is added between two layers of topcoat. This is not the same as toning, where the color is actually in the topcoat itself. You can use this technique in a variety of circumstances, from adding decorative contrast between areas to correcting a color after you have already begun the finishing process.
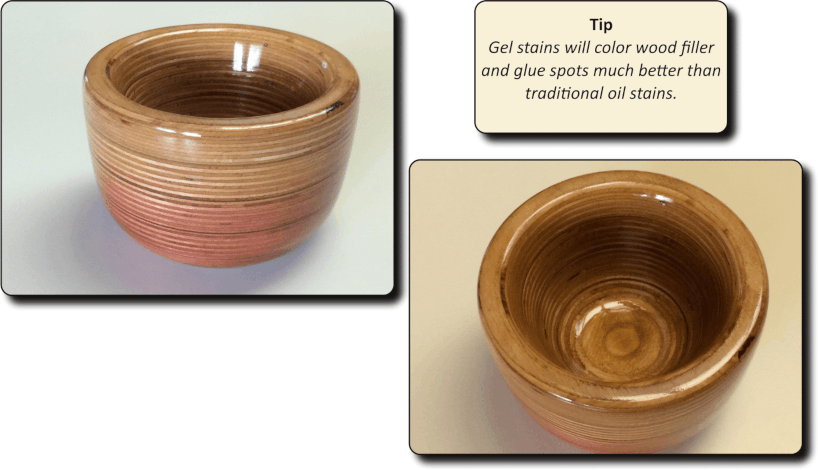
Recently I decided to turn a bowl from laminated blocks of plywood, thinking that it would be a good test for using gel stain as a glaze in a difficult coloring situation. If you’ve ever used plywood for anything you know that the cut edge is chock full of voids, chips, and differing types of wood, with grain running in every direction. Getting any kind of consistent coloring with a penetrating stain applied directly to the wood would be nearly impossible.
Turning the bowl was challenging because the wood had a tendency to chip rather than cut smoothly. As expected, the surface was very rough and pitted. This required lots of wood putty to fill. Once dry it was sanded and three coats of transparent grain filler were applied, again sanding between coats. At that point the bowl was fairly smooth, but I doubted that it would take an even coat of gel stain. So I wiped on five coats of polyurethane, let it cure, and sanded it smooth.
Now, with a perfectly sealed bowl, I was ready to stain. Actually, because the bowl had been topcoated already, what I was really doing was applying a glaze.
Starting with a light stain, I applied it to the ensure bowl while it was turning slowly on the lathe. That looked reasonably good, but what I really wanted was a reddish color on the bottom that blended with the color on top. So after the first lighter coats cured I started at the bottom and layered on the reddish stain. The bowl was then finished with high gloss polyurethane, wiped on. The stain never actually touched the wood, which is a characteristic of glazing.
Adding Age and Depth
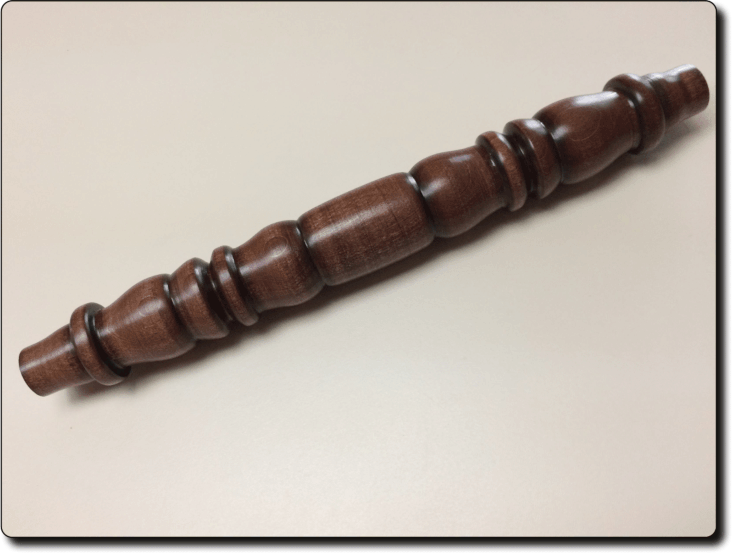
Things like rosettes, beading, turnings, and carvings can benefit from the application of darker color to the recesses to add some drama to the piece and to imitate the effects of aging. In this example I turned a short spindle from a poplar blank and stained it using a mahogany gel stain.
After it had cured, and while it was still on the lathe, I applied a darker gel stain to the recesses with a Q‐Tip and wiped off the stain from the higher areas, leaving it in the deeper crevices.
The spindle was finished with gel varnish, which is simply gel stain without the pigment. Gel varnish works great and is easy to apply, but it only comes in a satin sheen. You should also note that it’s not quite as durable as a liquid varnish so it’s not well suited for something that will get a lot of wear, like a table top.
- Sanding on a lathe is almost always cross‐grain, so sanding to 220 grit or higher will minimize visible scratch marks. Be sure to test your sanding/finishing strategy!
- If you’re lucky enough to have a lathe with reversible direction then sand in both directions,and apply stain the same way. This ensures that the workpiece doesn’t look lighter or darker depending upon the direction from which it’s viewed.
That’s it. Happy Finishing!
]]>At the BRWC meeting yesterday, January 5, the club voted on two important issues: 1) To pursue either a limited or a growth oriented club membership and 2) whether or not to implement club membership requirements. These are both related to the unexpected annual growth of the club and the issues that it has created.
On the first issue, limited vs. growth membership, the members present voted by a large majority to maintain a smaller membership and thus limit growth. This will allow us to continue to meet in owner shops and to have skill topics that involve large equipment usage. It also affords our members more opportunity to see other shops and to get ideas for their own shop organization. Both of these seemed to very important to most members.
On the second issue, implementing membership requirements, the members present again voted by a large majority to do this. They voted to accept the recommendations of the exploratory committee that studied both of these issues in November. Those recommendations, which will be requirements for 2019 in order to rejoin in 2020, are as follows:
- Attend a minimum of 6 Club Meetings per year
Do a minimum of 2 (or 2 of the same) from the following list:
- Participate in a Community Service Project
- Participate in an Education Outreach Event
- Serve on the Executive Committee
- Serve on the Community Service Committee
- Serve as a Club Steward
- Serve as the Club Historian
- Serve on a special committee (such as Nominating Committee, Tool Swap Planning Committee, Meeting/Topic Planning Committee, Membership Committee, etc.)
- Write an article for the Tips Page
- Host a meeting
- Present a skill topic
- Host or attend a workshop, make a presentation at a Club Meeting regarding the results of the Workshop.
- Present 2 Show-and-Tell projects or items
- Other Club activities as they may arise, such as Museum Presentations, etc.
Certainly there will be other options added to this list as we identify them such as teaching a seminar or workshop for club members on a relevant skill or topic, building a number of bird house kits, etc. I think this list is a very workable starting point, and there are plenty of items that will appeal to those who have difficulty spending time away from home. Also, I see no reason why we can’t exercise a little discretion and flexibility when someone is faced with difficult circumstances and may have trouble meeting the requirements as stated.
These requirements are being added to the membership application so that each prospective new member will be fully aware of them at the time they decide to join the club.
At this time we are not implementing a hard limit on membership. Our preferred path is to see if the membership requirements become a self-limiting factor. If that doesn’t happen then it’s possible that a hard limit with a waiting list to join may be the next step.
Finally, if you have already joined for 2019 and feel that this doesn’t work for you then we will refund your dues until the end of February. Just contact Brian Fitzgerald and he can arrange to get you your money back.
Thank you for your patience as we have worked through these difficult issues.
Bob Chambers
President, Baton Rouge Woodworkers Club
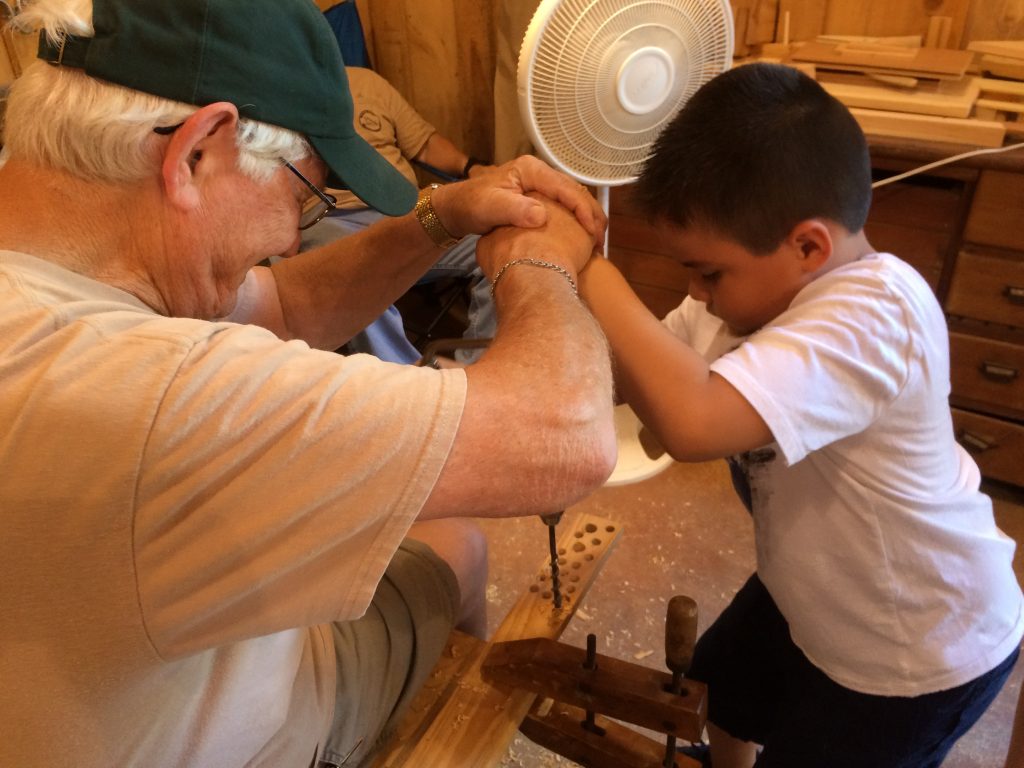
On Sunday, October 7, club members participated in the Sugar Fest at the West Baton Rouge Museum. Members helped kids to cut and drill wood and watch wood being planed.
[See image gallery at www.brwoodworkers.com] ]]>Download PDF Version HERE
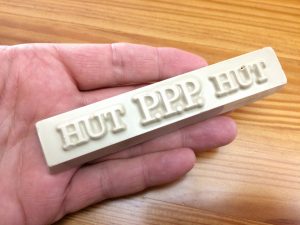
Hut Wax PPP, which stands for “Perfect Pen Polish”, is a food safe wax finishing system for decorative bowls, pens, and small turnings. It’s easy to apply and requires no drying time, and you can completely finish a bowl in around 30 minutes. Also, it can be applied over an oil finish like linseed oil or over stain. It’s not a particularly durable finish so it would be unsuitable for something that will have frequent handling. Any wax will wear away if handled repeatedly, so you can expect that if you use it on pens. But it’s a very nice close-to-the-wood finish that looks great, and this particular formulation will provide a little better water resistance than some wax finishes.
What is Hut Wax PPP?
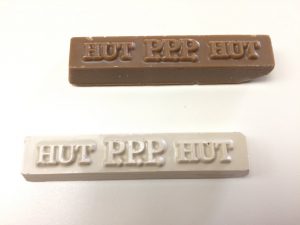
Hut Wax PPP is a two part system, the first part being a brown bar of carnauba wax containing Tripoli polish and the second is a white bar of carnauba wax containing White Diamond polish. It is a “friction polish” and as such requires the workpiece to be spinning when it is applied. In this case the goal is to actually melt the wax onto the workpiece using friction generated heat.
The brown bar, if used alone, will give a nice satin finish to your project. The second part, the white bar, is used after the brown bar to give the bowl a higher gloss.
From my experience the higher gloss from the white bar is only marginally shinier. Maybe your experience will be different, but regardless I’ve been very satisfied with the results using both.
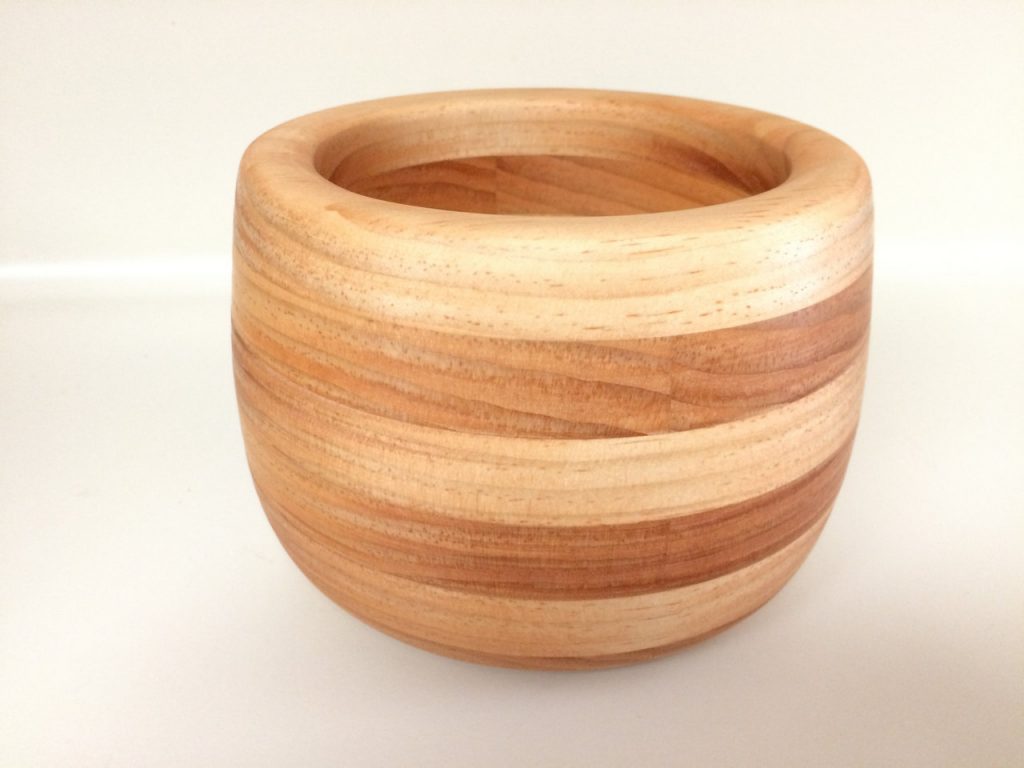
Bowl with 3 coats of prepolymerized linseed oil, prior to finishing with Hut Wax PPP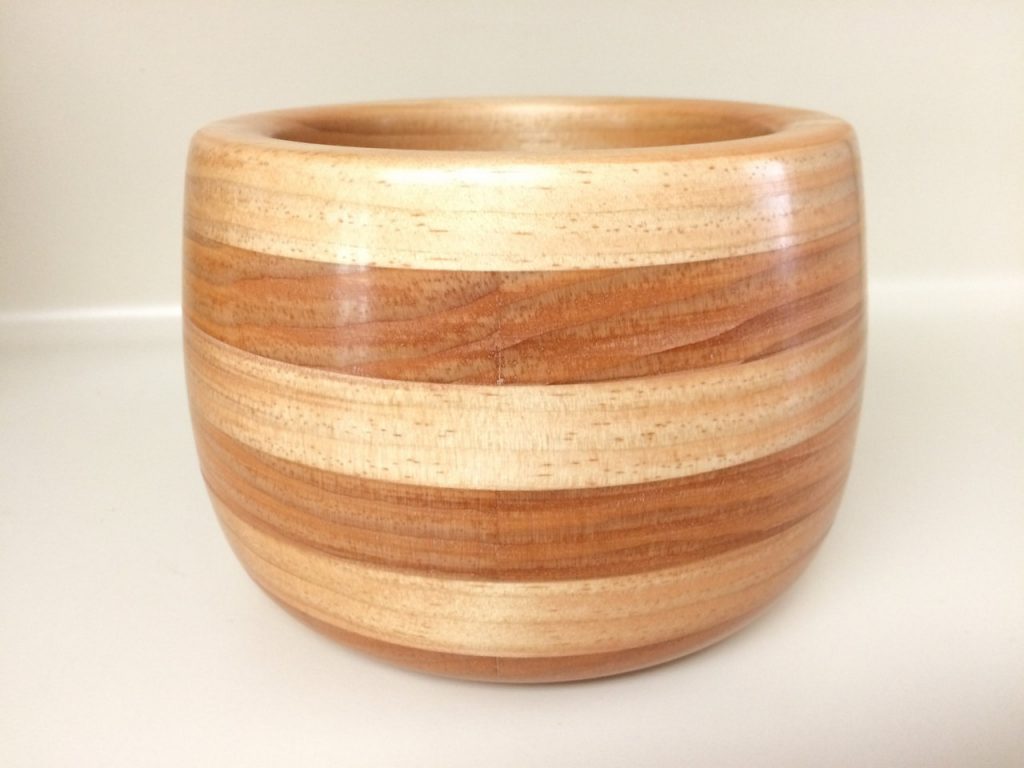
Bowl after finishing with Hut Wax PP
How is Hut Wax PPP applied?
As previously mentioned Hut Wax PPP must be applied while the workpiece is spinning. Supposedly it can also be applied with a buffer, but I don’t see how this would be nearly as effective or as easy as applying it to a bowl spinning on a lathe.
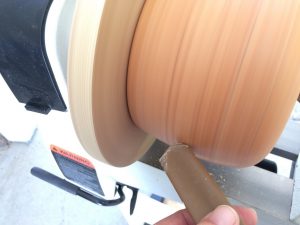
So let’s begin with our bowl mounted and spinning. The lathe speed must be fast. I set mine to spin around 1750 rpm, but you can experiment to see what works best for you.
The first step is to apply wax using the brown Tripoli/carnauba bar. At this point all you’re trying to do is get wax on the bowl so that it can be melted in later. That’s what I’m doing in the photo to the right.
Move the bar back and forth across the bowl, stopping occasionally to look for wax deposited on the surface. You don’t need complete coverage, and you probably won’t get that, but you need enough distributed across the bowl that it will blend together and give complete coverage when you begin the melting process.
Once you’re satisfied that you have enough on the bowl you can melt it in. To do this fold a paper towel several times and hold it against the spinning bowl.
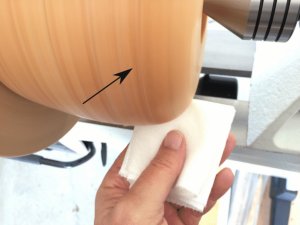
If it does not get hot enough to be uncomfortable on your finger you’re probably not applying quite enough pressure, and you’re likely not melting the wax.
A word of caution here. Never use a cloth to perform this step. If the paper towel snags on your chuck or something else it will simply tear away. A cloth might take your finger with it.
When the wax begins to melt you will see a “melt line” begin to form. Chase that line slowly across the entire surface of the bowl. In the picture above you can see the melt line at the arrow, where the color begins to change.
Repeat using a clean paper towel until no more wax appears on the towel. At this point you can move to the white bar and repeat the process—apply the wax and melt it in.
Cost for both bars is around $10 – $12, and they last quite a while.
Happy finishing!
]]>